
- Joined
- May 13, 2023
- Messages
- 13
Who is this for?
This guide will target more lab oriented users. Some basic skills are assumed like installing an operating system will be assumed. Unlike other guides on the forum this specifically may interest those in or wanting a job in IT. Regardless of if you use these technologies in a corporate environment playing with them on your own can help you get familiar with technologies and concepts people use everyday to get paid. With the added bonus of doing something fun on a Saturday. Overall this guide is not about if you should. It is about if you can do something and try to have a little fun in the process. It may look complex at first because I am really verbose sometimes, but this is all free and wont cost you a dime to learn something new.
We will cover the following to some extent.
- Basic Networking
- Virtualization
- Deploying Operating Systems.
Introduction
So let's get started. Today we will be going over how to use Microsoft WDS with MDT. Links for all of this will be provided below. What are these technologies? WDS or Windows Deployment Server is a feature of Windows Server operating systems. MDT or Microsoft Deployment Toolkit is a toolbox used in conjunction with WDS to modify or manipulate operating system installers.So what is this all used for anyway? Have you ever wondered how a hospital or a walmart or a bank ATM machine gets its OS? Way back we used to use disks. Followed several years later by USB. This is the typical path of the consumer, you and I. However when we are dealing with an office building with 500+ machines are we really paying someone to walk around with a stack of DVDs or a handful of USB drives? The answer is we shouldn't and most don't. That is where WDS/MDT come in. For Microsoft OS's specifically we can use these two technologies to install operating systems not only remotely, but also in a more hands off fashion. Not only that we can make modifications to it, have it run scripts, or install apps for us during the install.
We do this through a process called PXE. Or "Pixie" as it is commonly spoken. PXE or Preboot eXecution Environment is a protocol that has been built into ethernet controllers onboard and USB for several decades. Thats right with the correct dongle even your ethernet less laptop can be pxe booted. This environment reaches out and talks to a PXE boot server. This is the core of what WDS is. There are others, like the FOG project or if you are more ambitious Tinkerbell or Foreman but we are focusing specifically on Microsoft's implementation for our user base. After PXE boot gets a connection it loads a Preboot Environment PE for short into RAM. This is then when we can kick off installs.
Does it sound confusing? Lots of jargon? Don't worry that's fine, We can and will still get you setup, you don't need to know any of these things in depth, and I am assuming you have no experience with any of this. Have this 30k foot view just to keep in your head.
- We boot off your Ethernet adapter which starts PXE
- PXE talks to WDS which loads our installer
- WDS lets us tell MDT what to do
- MDT installs our OS
Required items
To get started we will need a few things. Ideally the following:- The script I attached to this post
- A spare computer or VM on an existing computer
- A Windows Server install ISO
- BONUS: Access to your router
Though it is just a bonus item, I will be simplifying this further from a troubleshooting perspective and ASSUME you have access to your router. For this guide we will be assigning the server a STATIC IP I will touch on this lightly only, and I will assume you know where the options are in your router we will be changing. Though IT is NOT necessary.
Further, these operating systems as you can imagine take up SPACE and because deploying them means we are READING the files on one machine and putting them on another it is ADVISED that you have TWO drives. One for your OS and the other to hold all the data. It is NOT required but it HELPS performance.
Configuring your router
Configuring your router is not difficult and we actually only need to modify one thing. Your DHCP config. In all routers a service known as the "DHCP server" hands out IPs to devices on the network. In most cases by default you will get around 250 IPs to work with. Since this is a lot for home network we are going to take them.The DHCP server hands out IPs and works from a "pool" this "pool" of IPs is defined by a range. While there are multiple technologies surrounding reserving or using "static" (non-changing) IPs we are going to use the least common denominator. We are basically going to modify the range and tell your router to offer a few less so we can use one.
To do this find the DHCP configuration of your router. The following is mine.
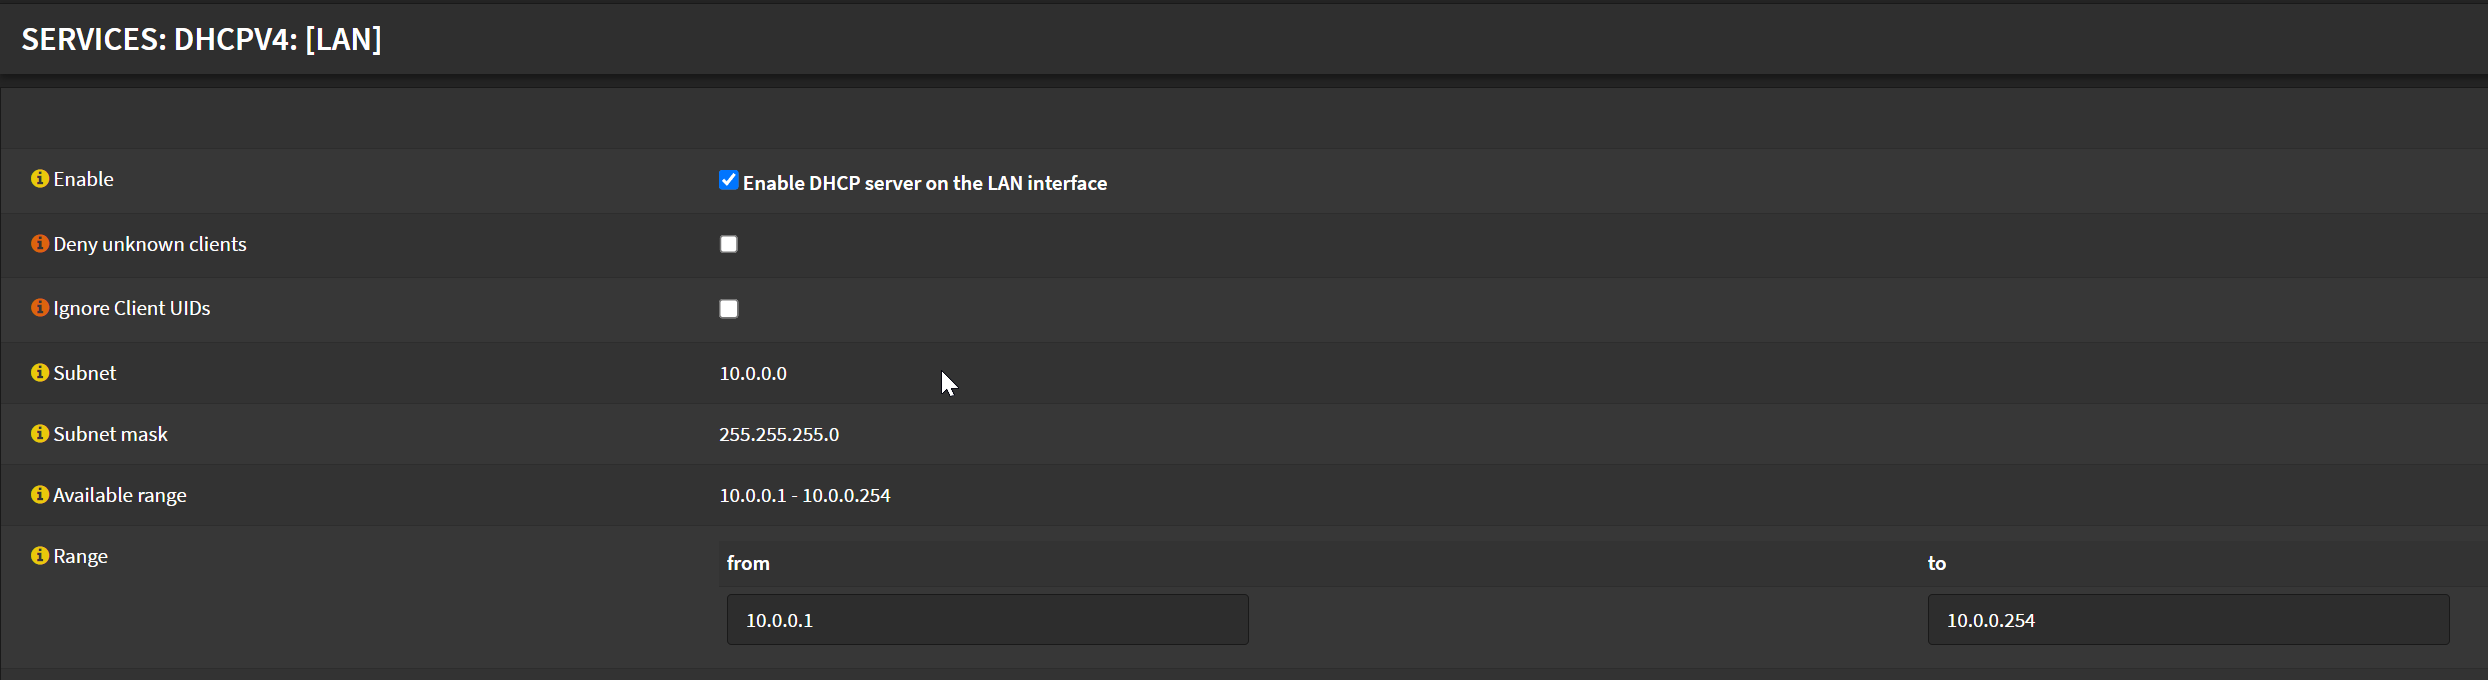
As you can see I am using 10.0.0.1 through to 10.0.0.254. Your IPs may be different. 192.168.x.x or maybe 172.16.x.x it doesnt matter. They are usually the same. It will start at x.x.x.1 and end at x.x.x.254 in most cases.
Now what we need to do is tell DHCP I want to reserve a few IPs and to issue less of them. In my case I will reserve some at the beginning. You can reserve however many you want. I just do tiny blocks to make it easy. In my case I am going to tell it to START issuing IPs at x.x.x.10 through to x.x.x.254. That means that other than x.x.x.1 (my router) I can use x.x.x.2 - x.x.x.9 for whatever I want. DHCP will not touch them.
So just change the number. You will need to save or apply afterwards.

Perfect! Now that we have a handful of IPs we can play with lets move on.
Installing Windows Server Evaluation
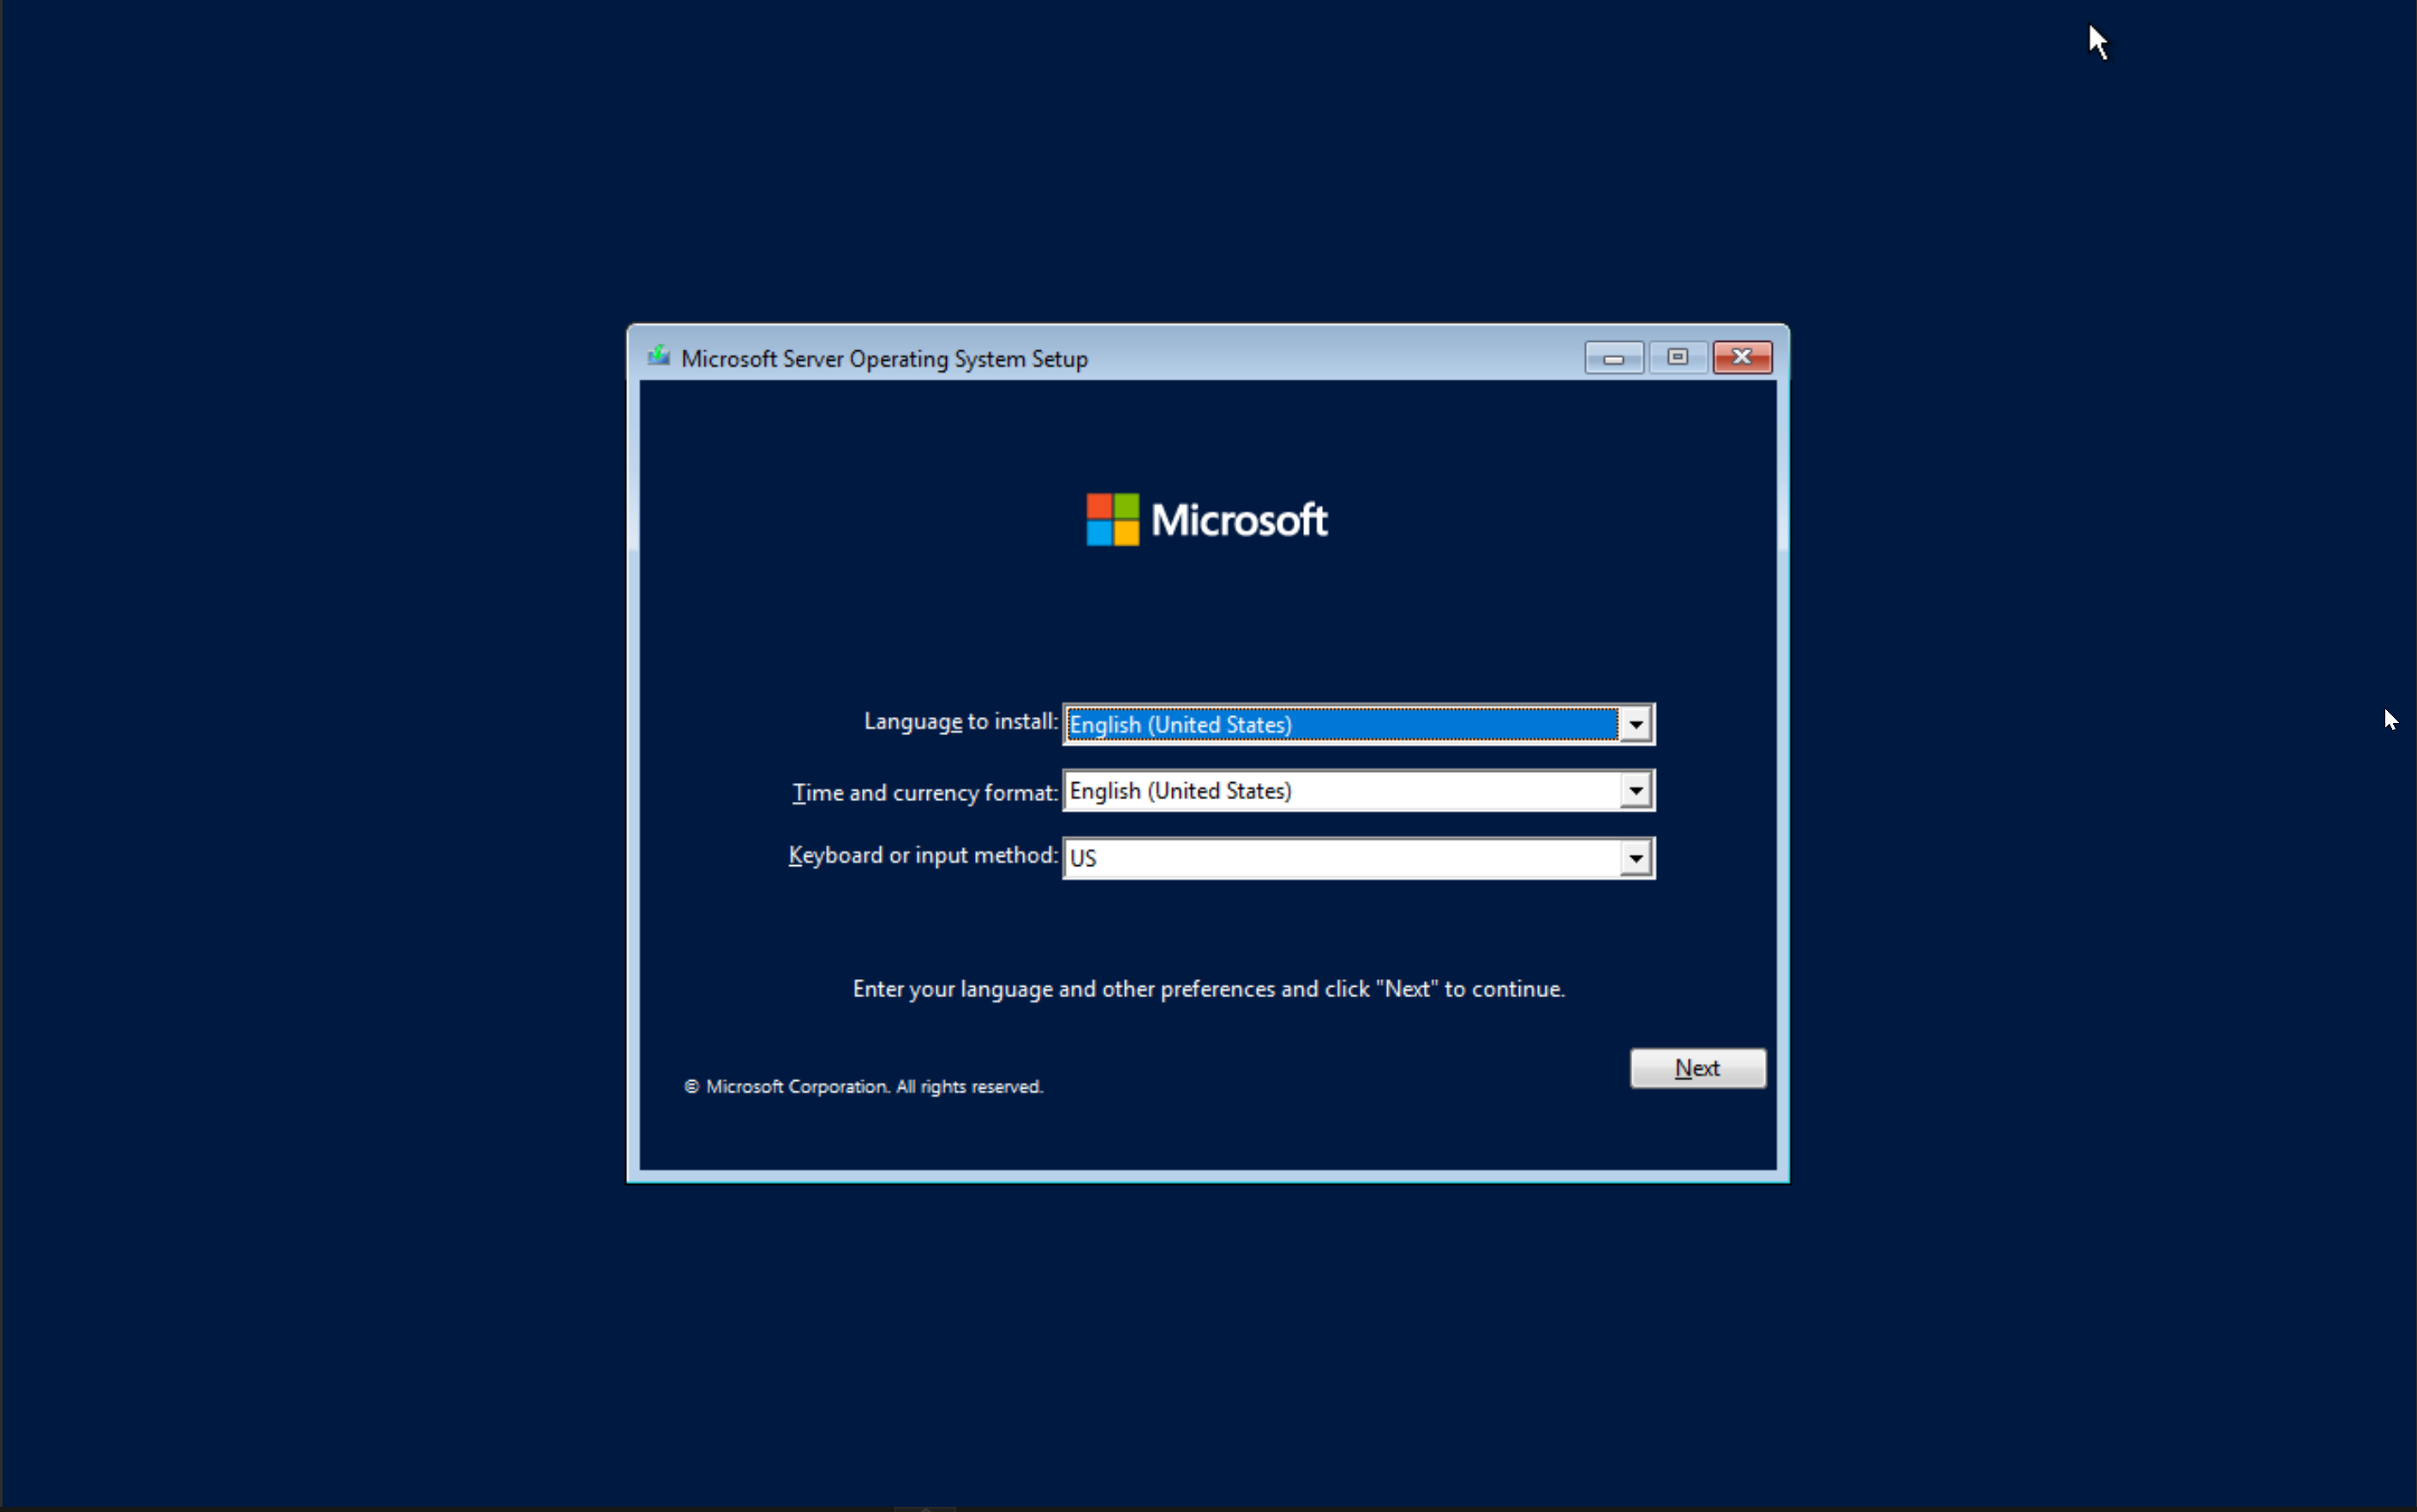
All the links are at the bottom of this post in there own section. Once you grab the server eval we will install it on our machine. It may seem to above your head to be playing with something like a server OS. I PROMISE though this really isn't that big of a deal and this guide will hold you hand the entire time.As usual you will get a normal choose your own adventure menu. If you are feeling froggy you can select a language you cant read or speak.
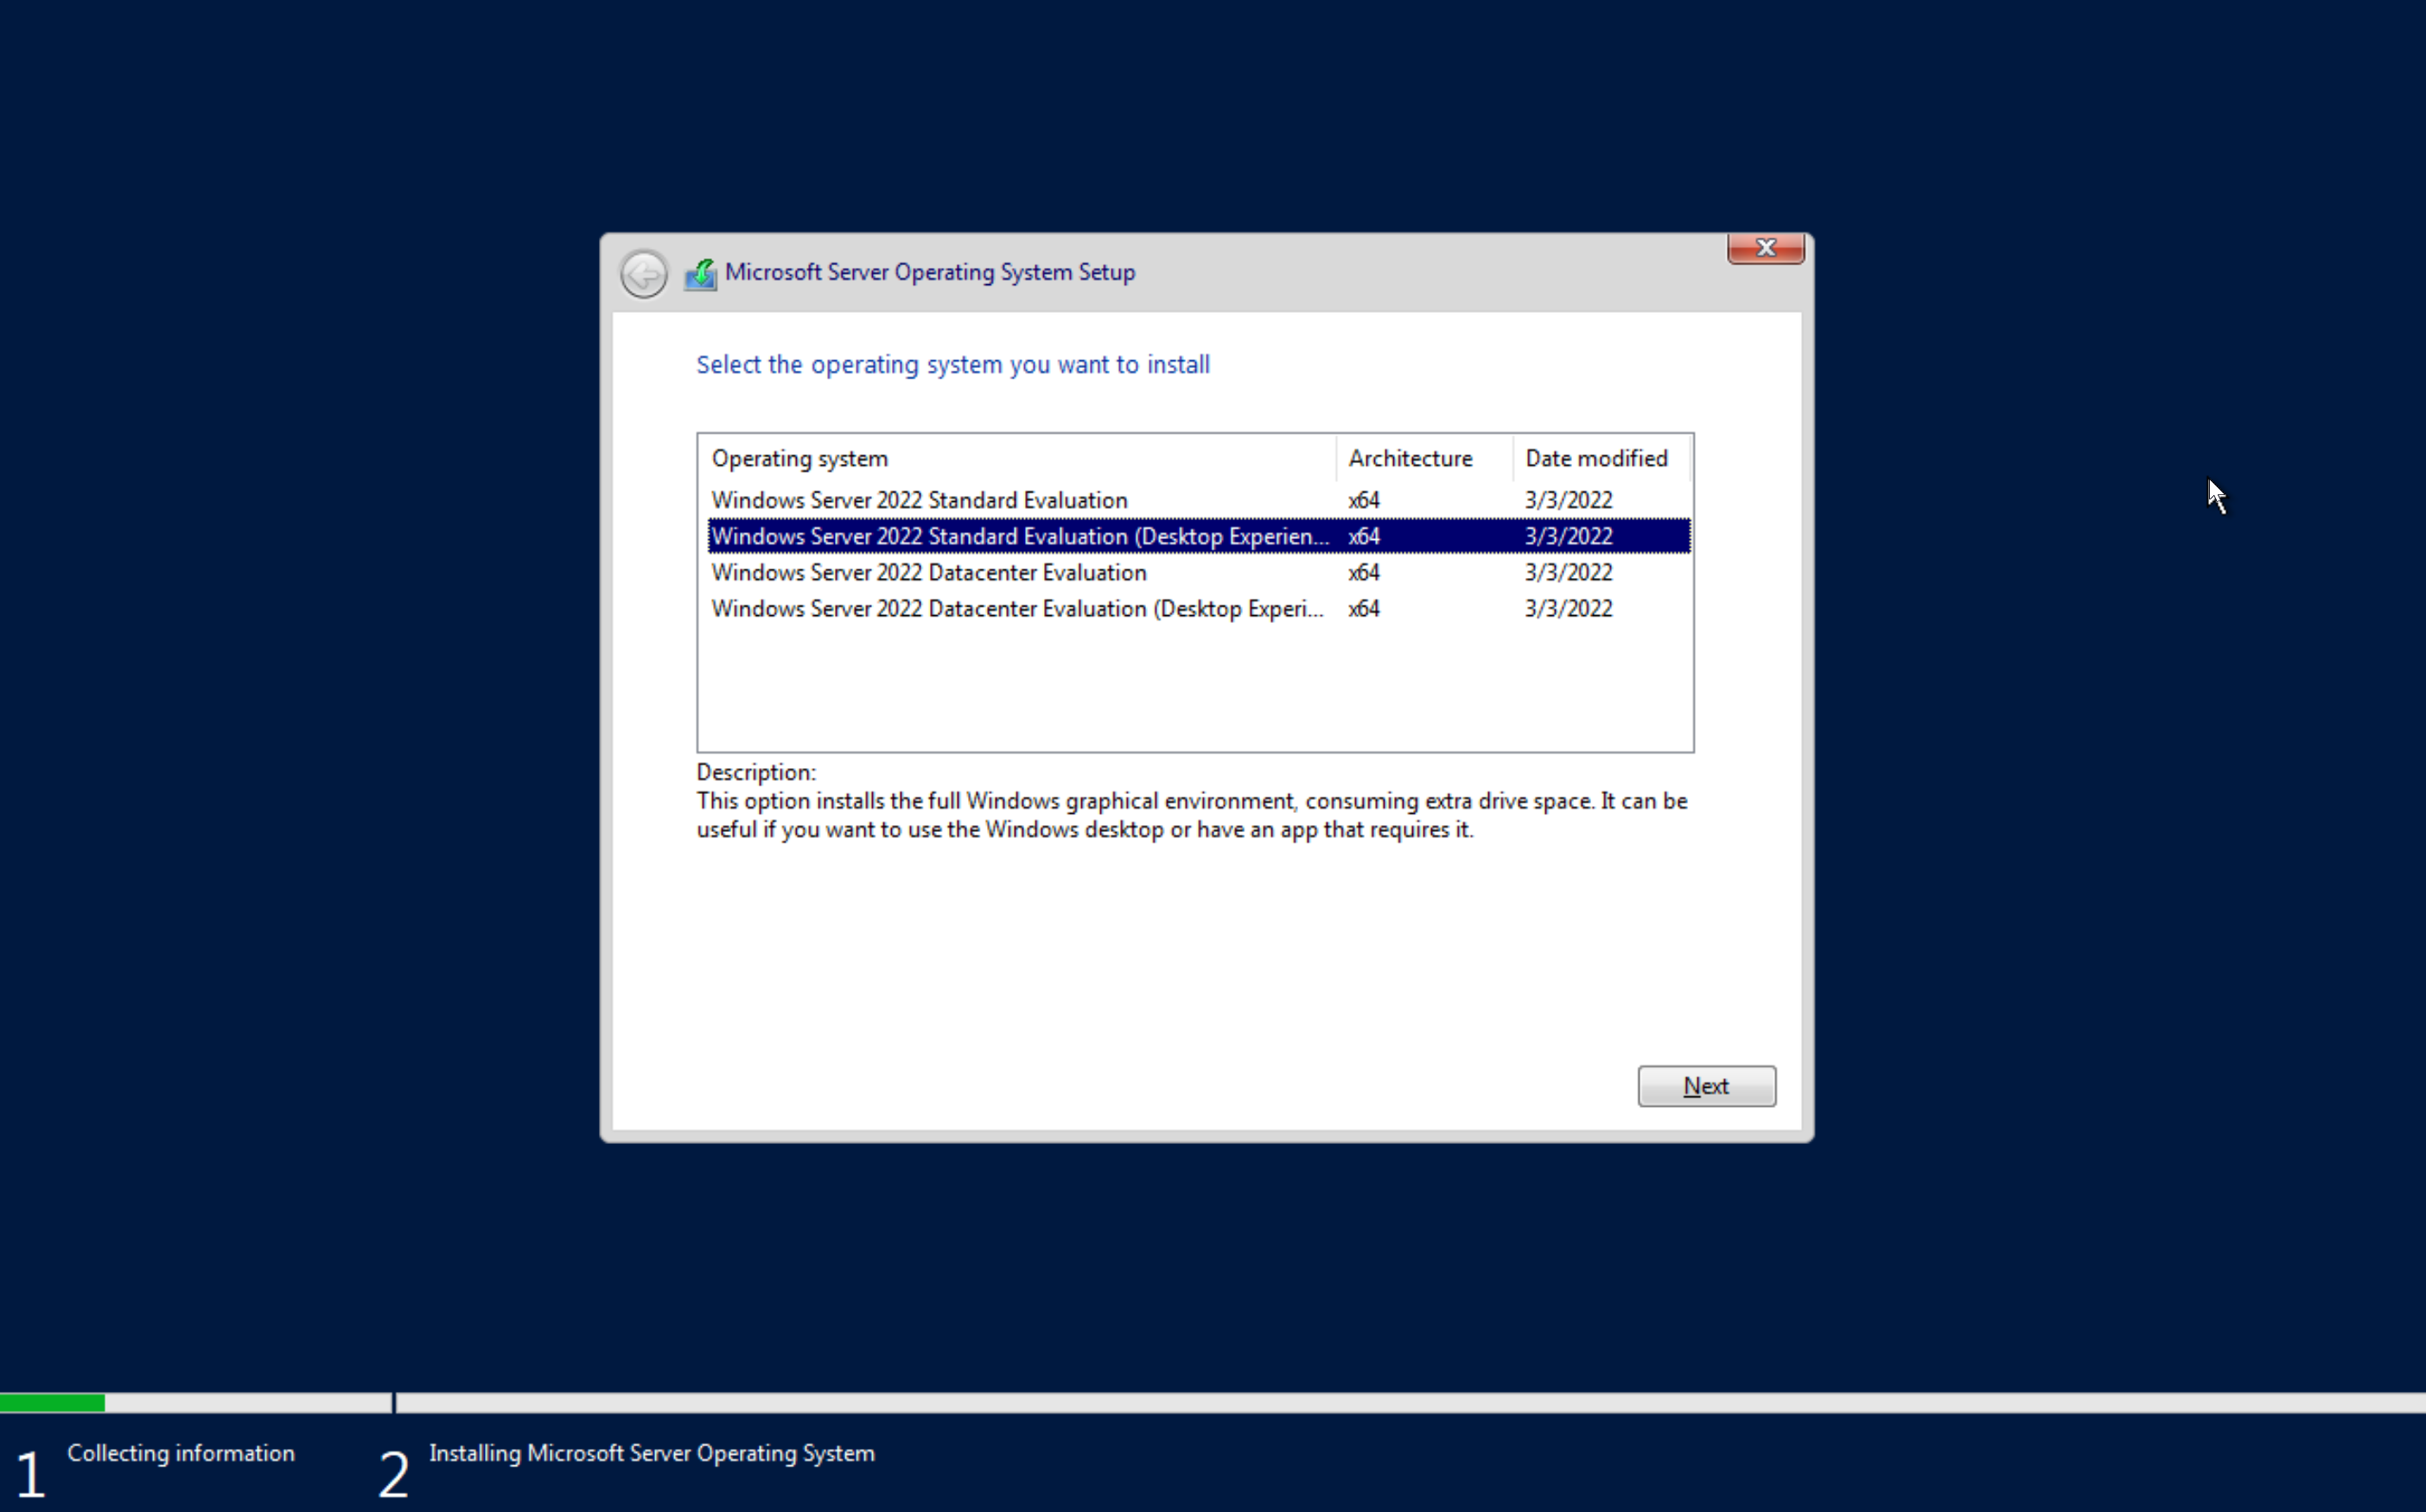
In this case Standard and Datacenter offers you as a user absolutely nothing. It isnt like home vs pro. What DOES matter is that we will want to select "(Desktop Experience)" or else you will enter the scary world of windows server.
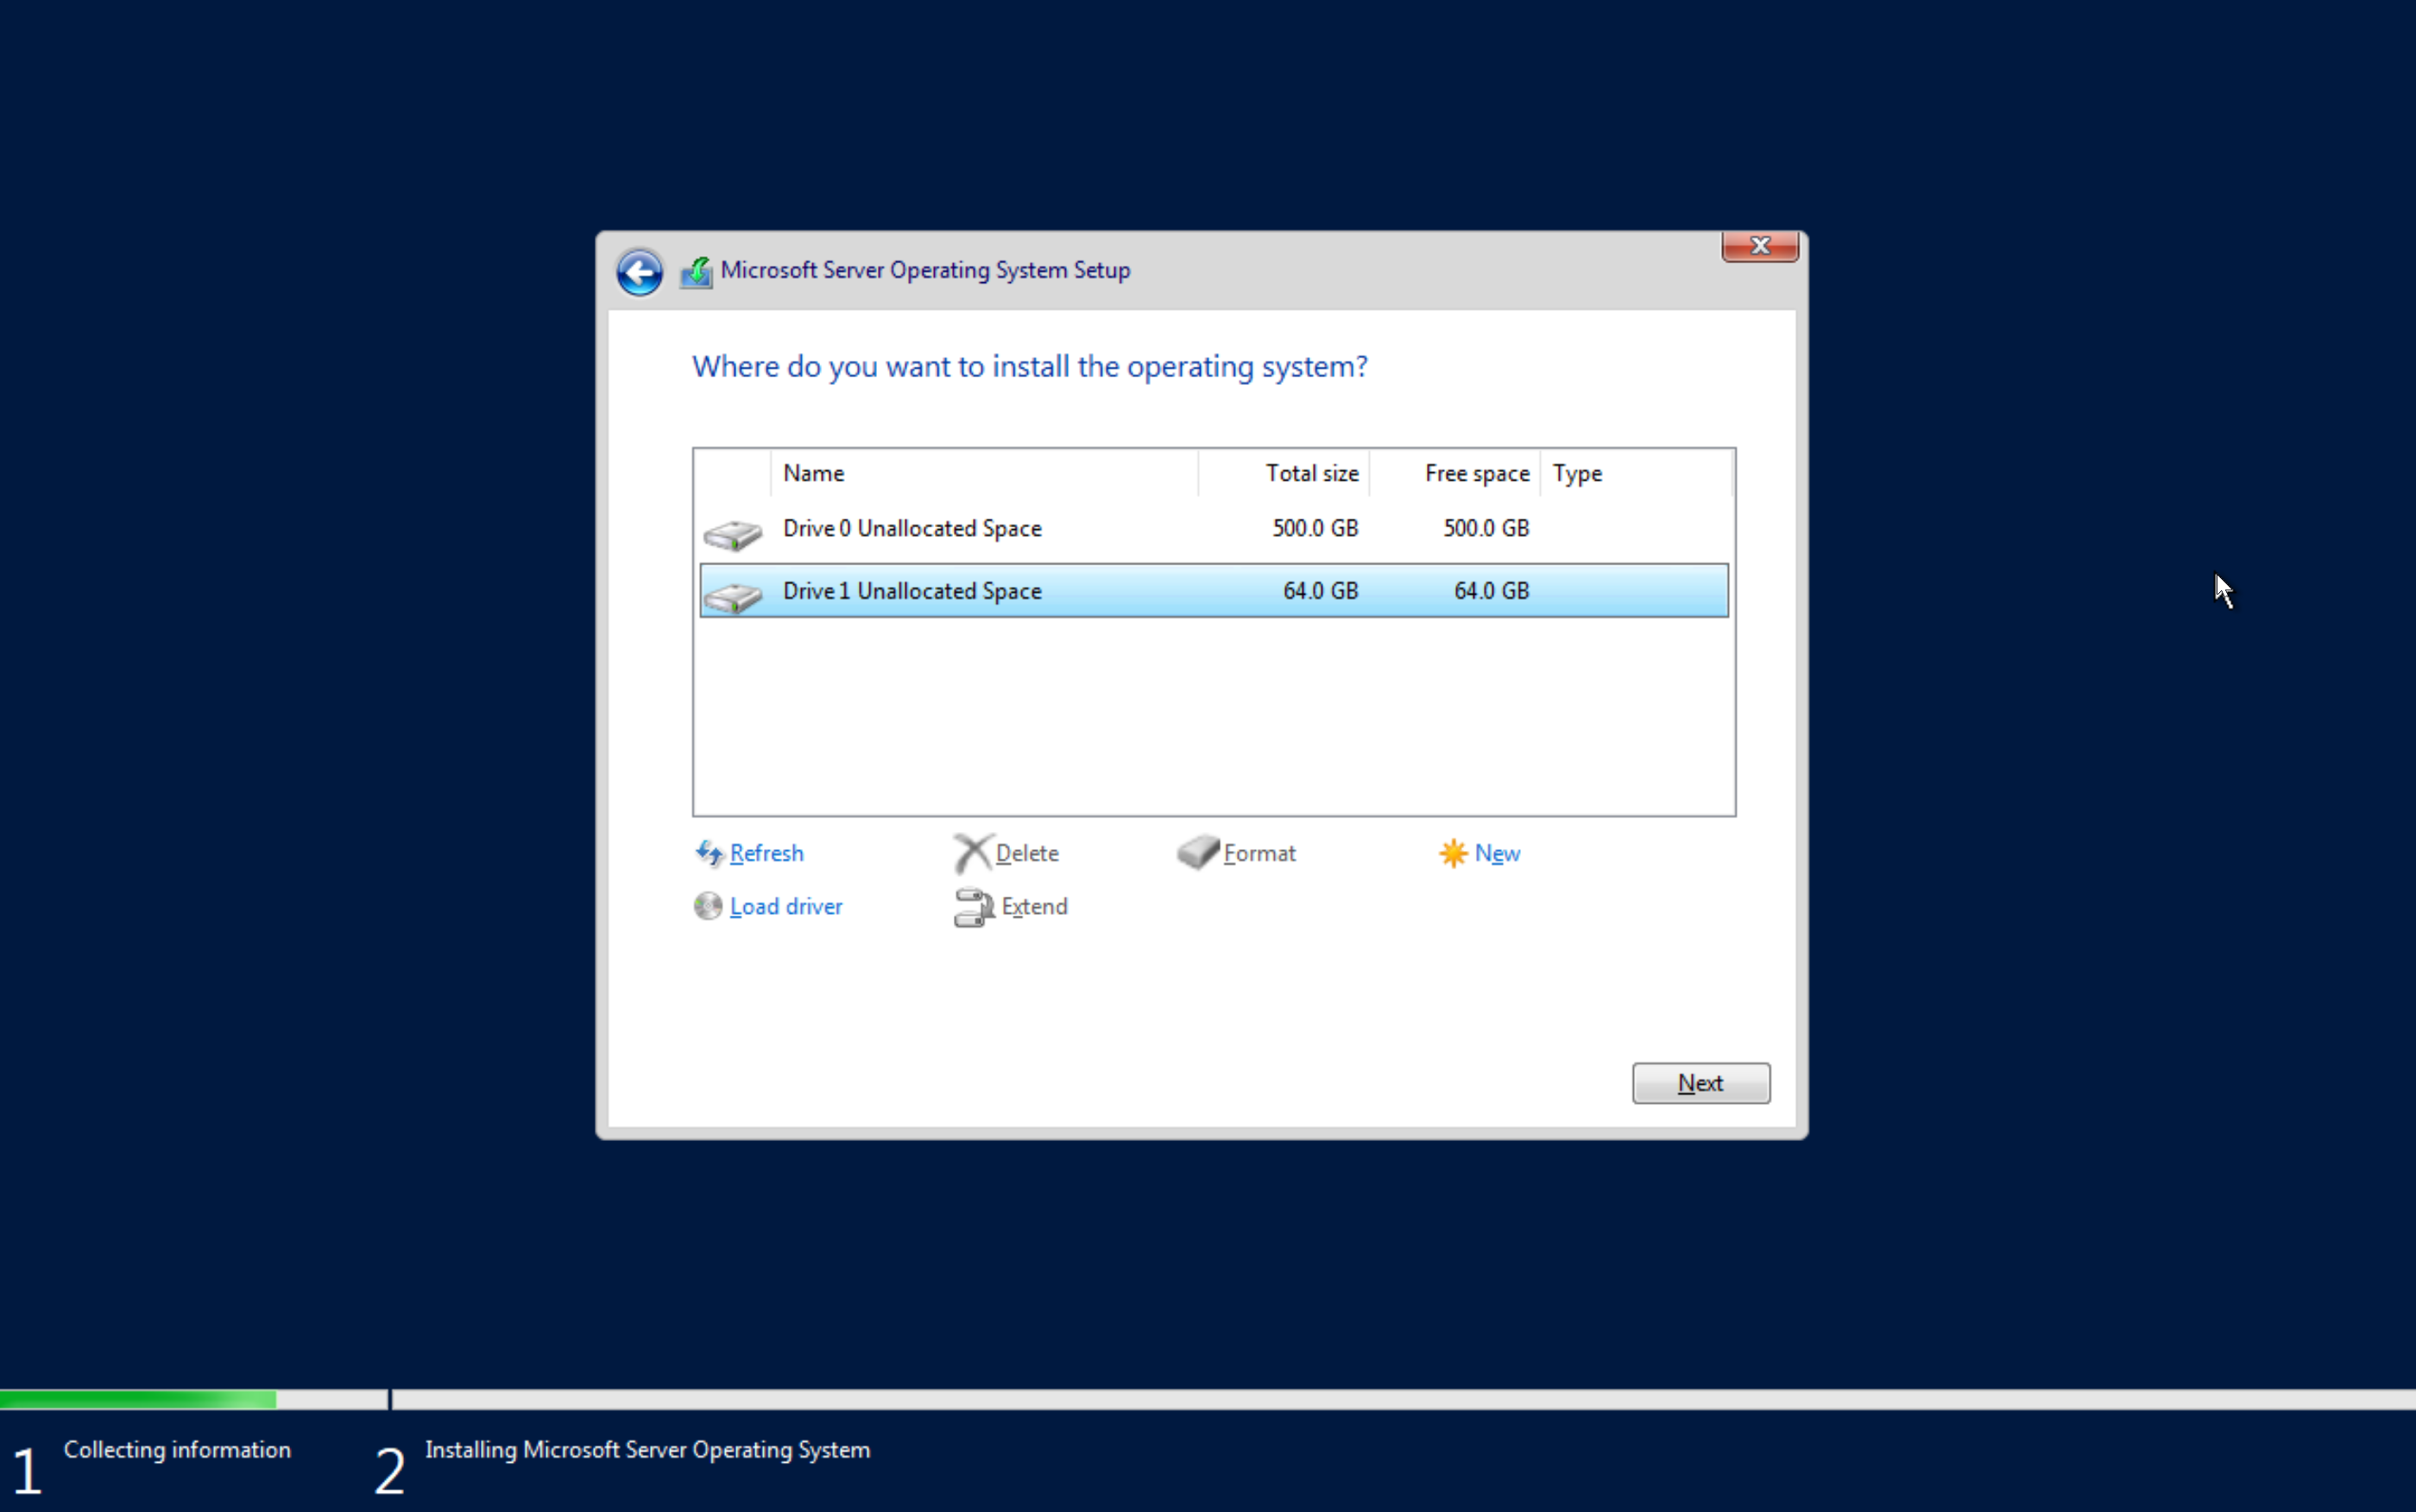
You have been through OS installs before and this isn't much different. I will simply mention this one last time. In this case I have two drives. I am installing the OS on the SMALLER drive so I can use the big one for the data.
Now that the OS is installed. Lets take care of a few things.
We will want to:
- Trust the network
- Set a static IP
- Enable RDP
- Set the server name
- Do some updates
- Get "Server Manager" our of our face
- Set some shortcuts
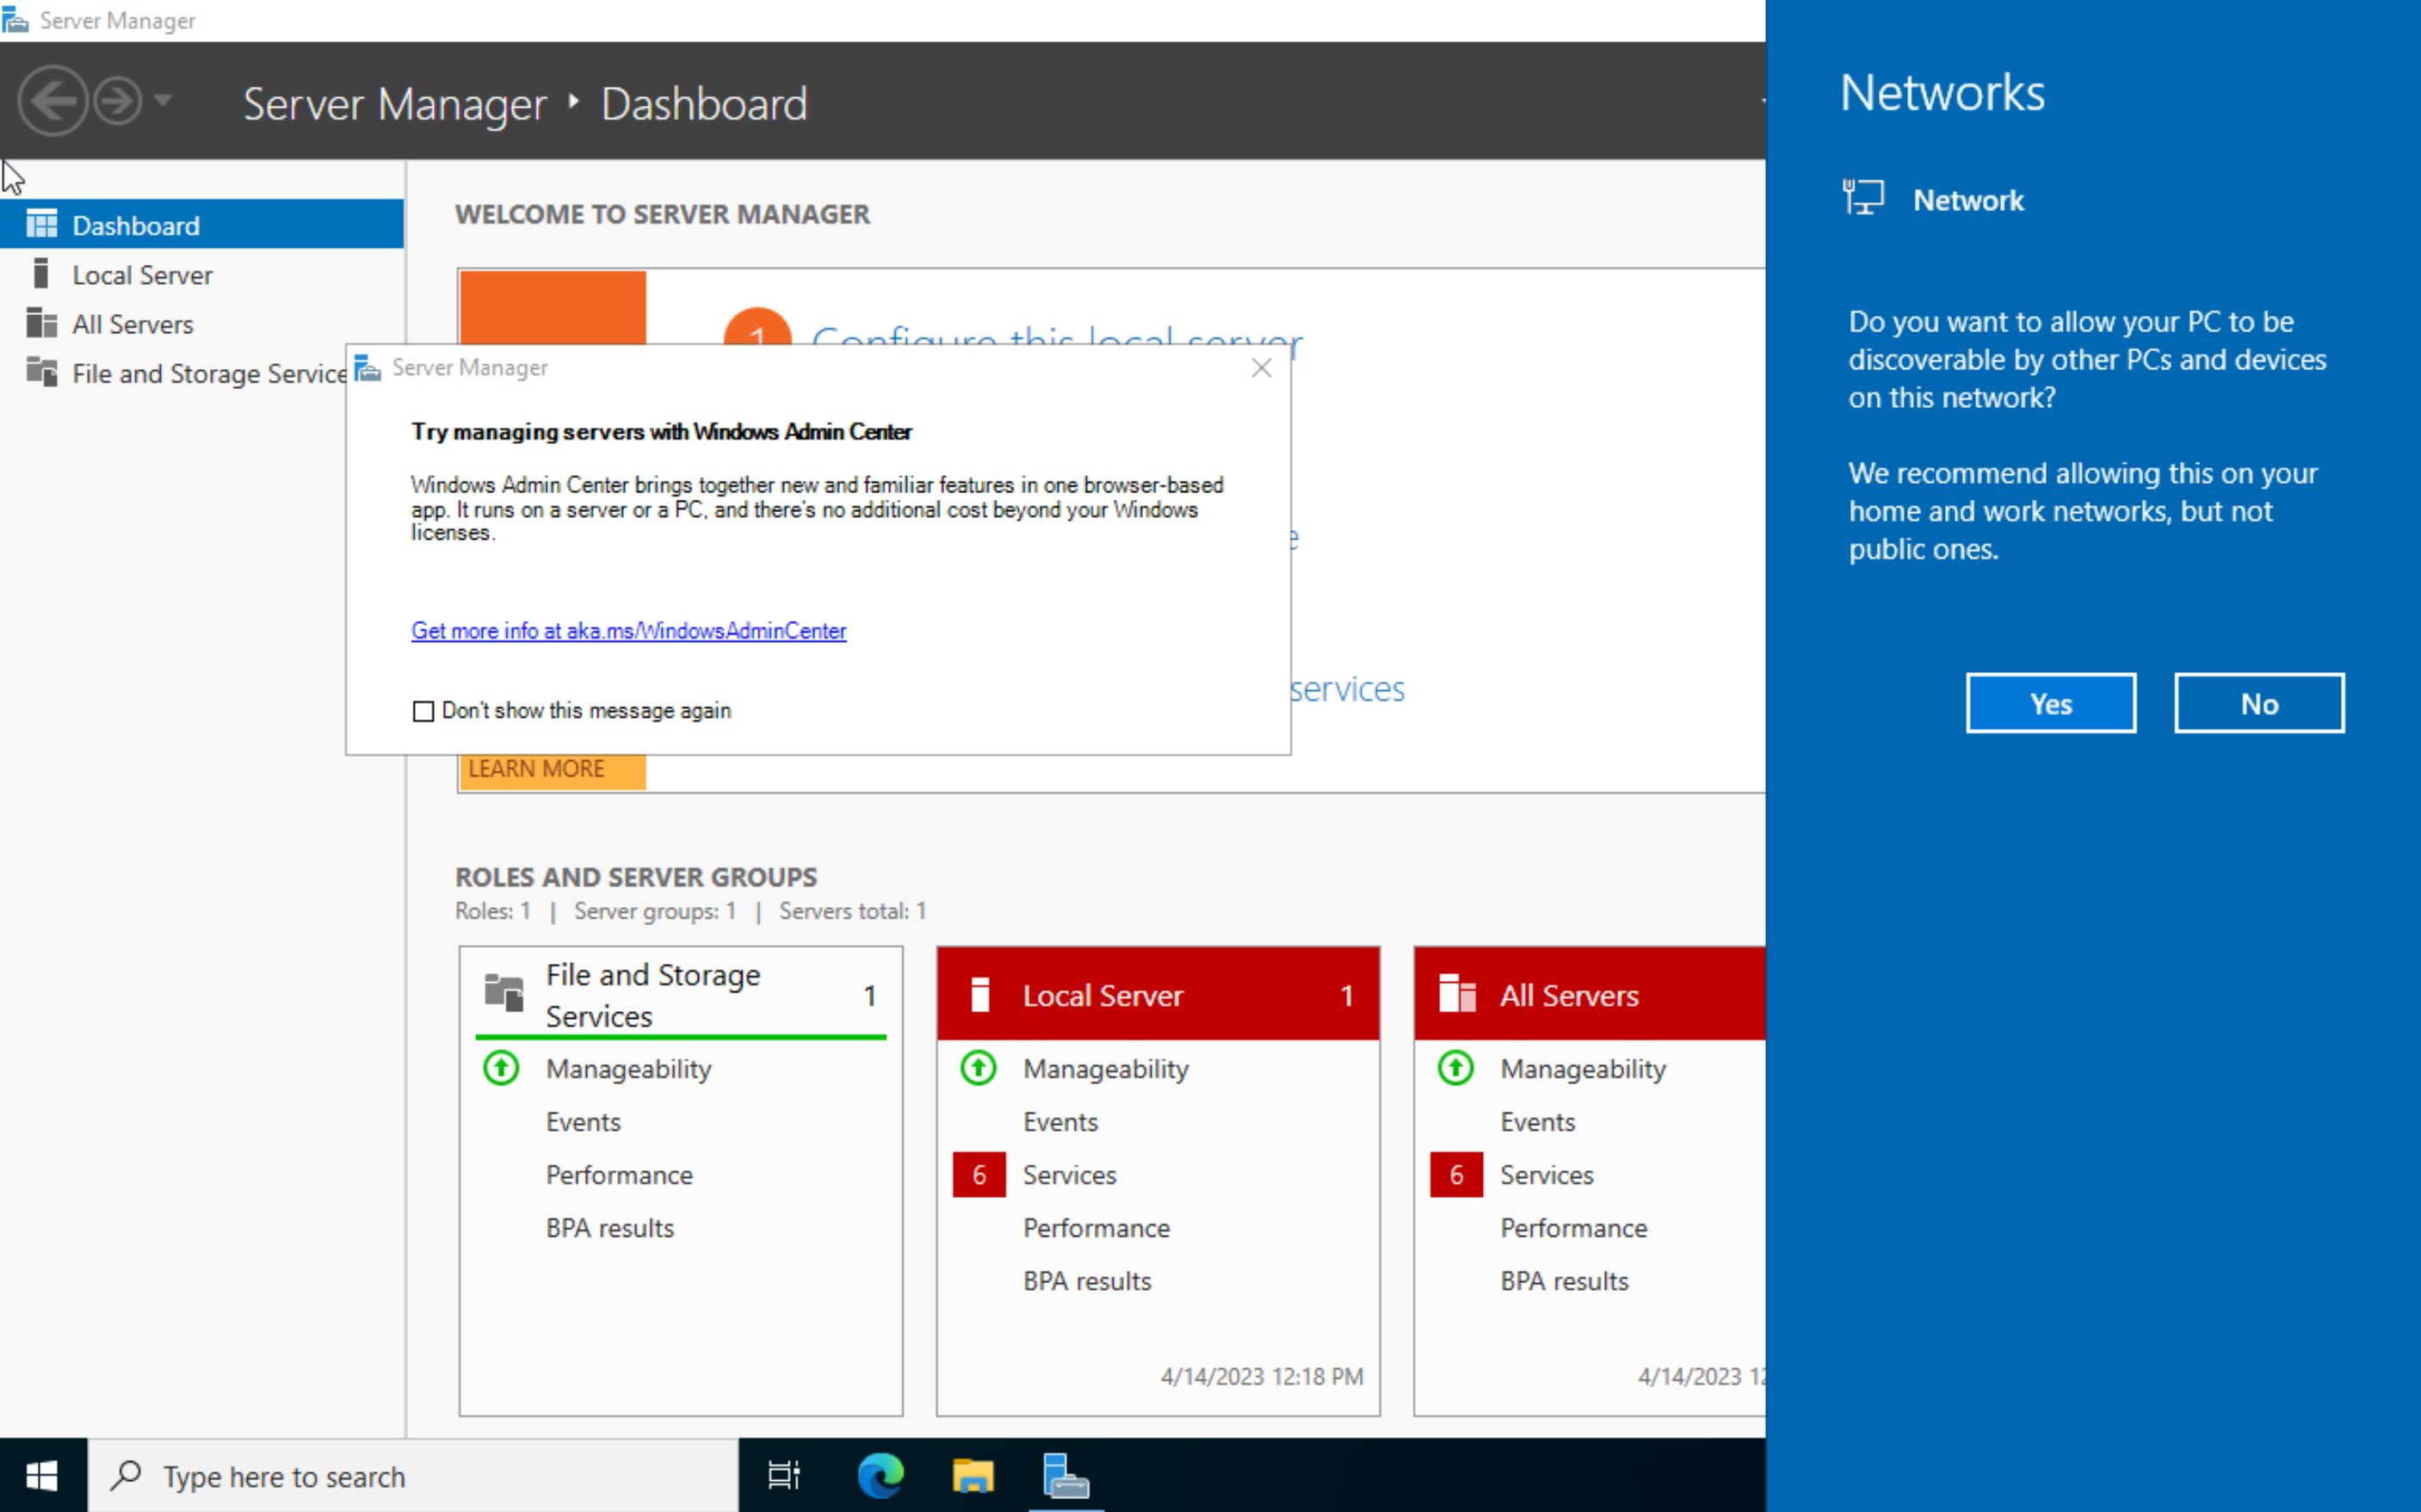
We want to trust the network always. This is internal so it will be ok, but we will want to make sure the firewall is configured for a "private" network, which will happen if you trust the network by hitting "yes" here. This also can pop up when setting a static IP. So make sure to pay attention.
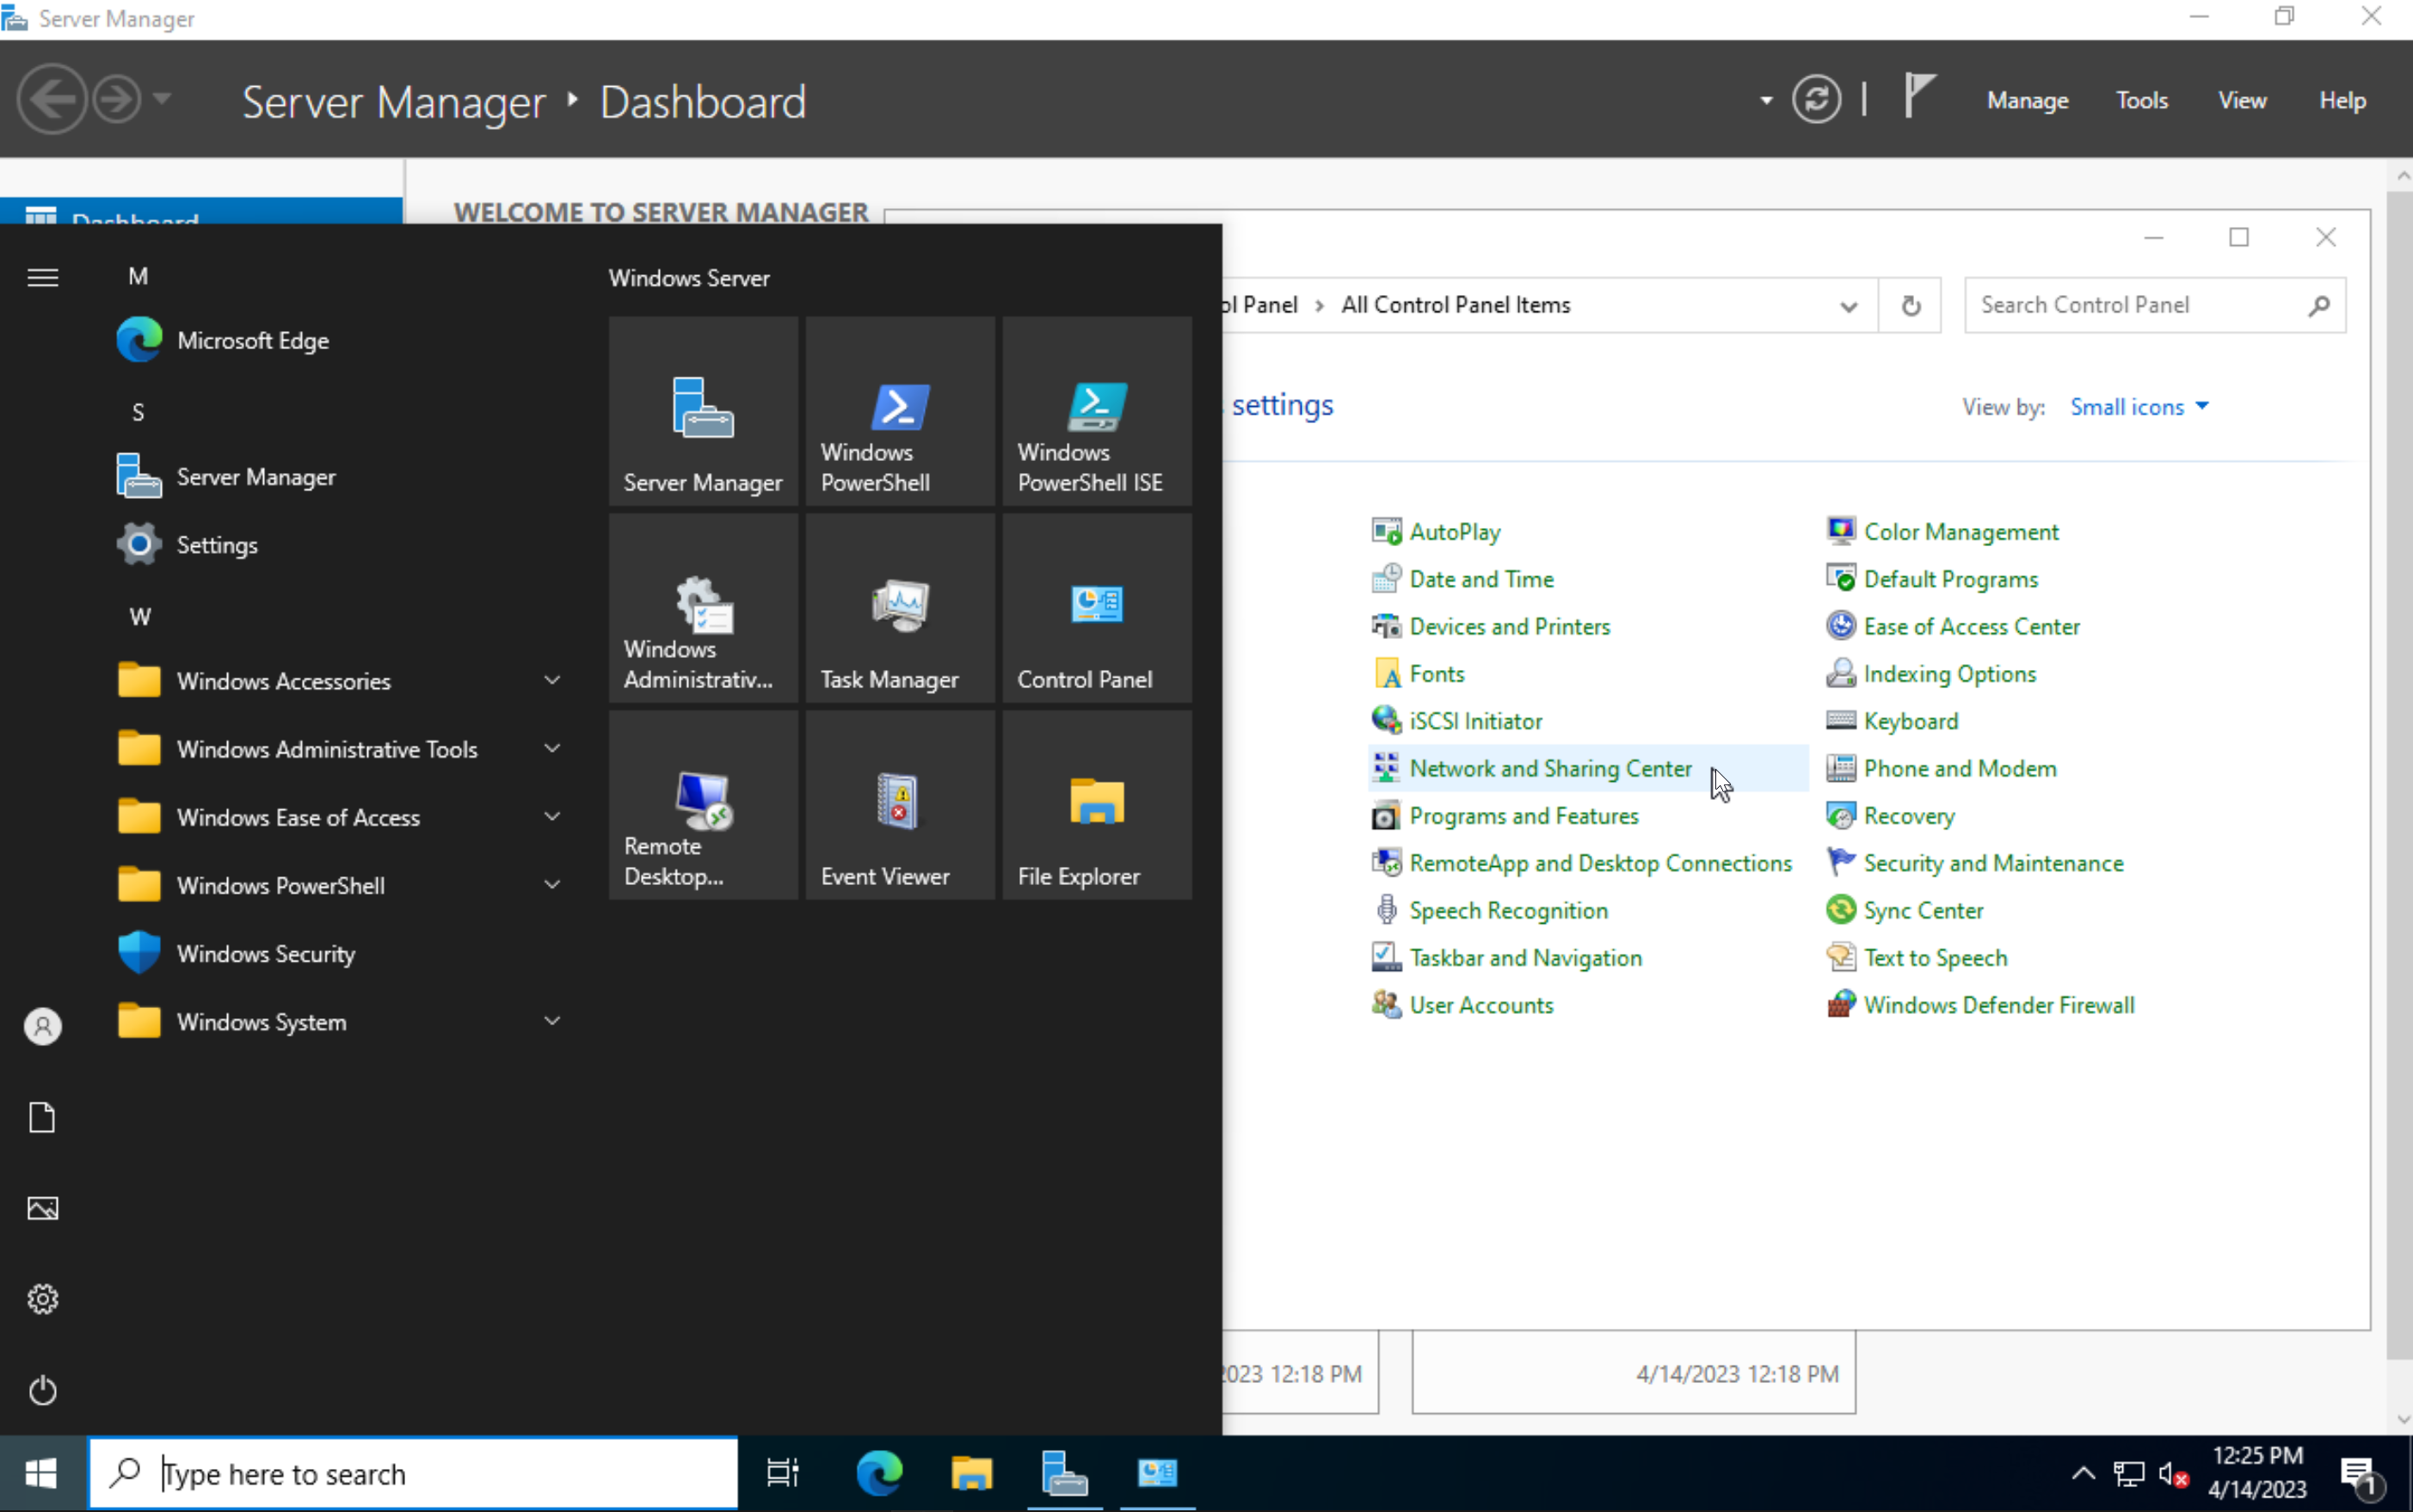
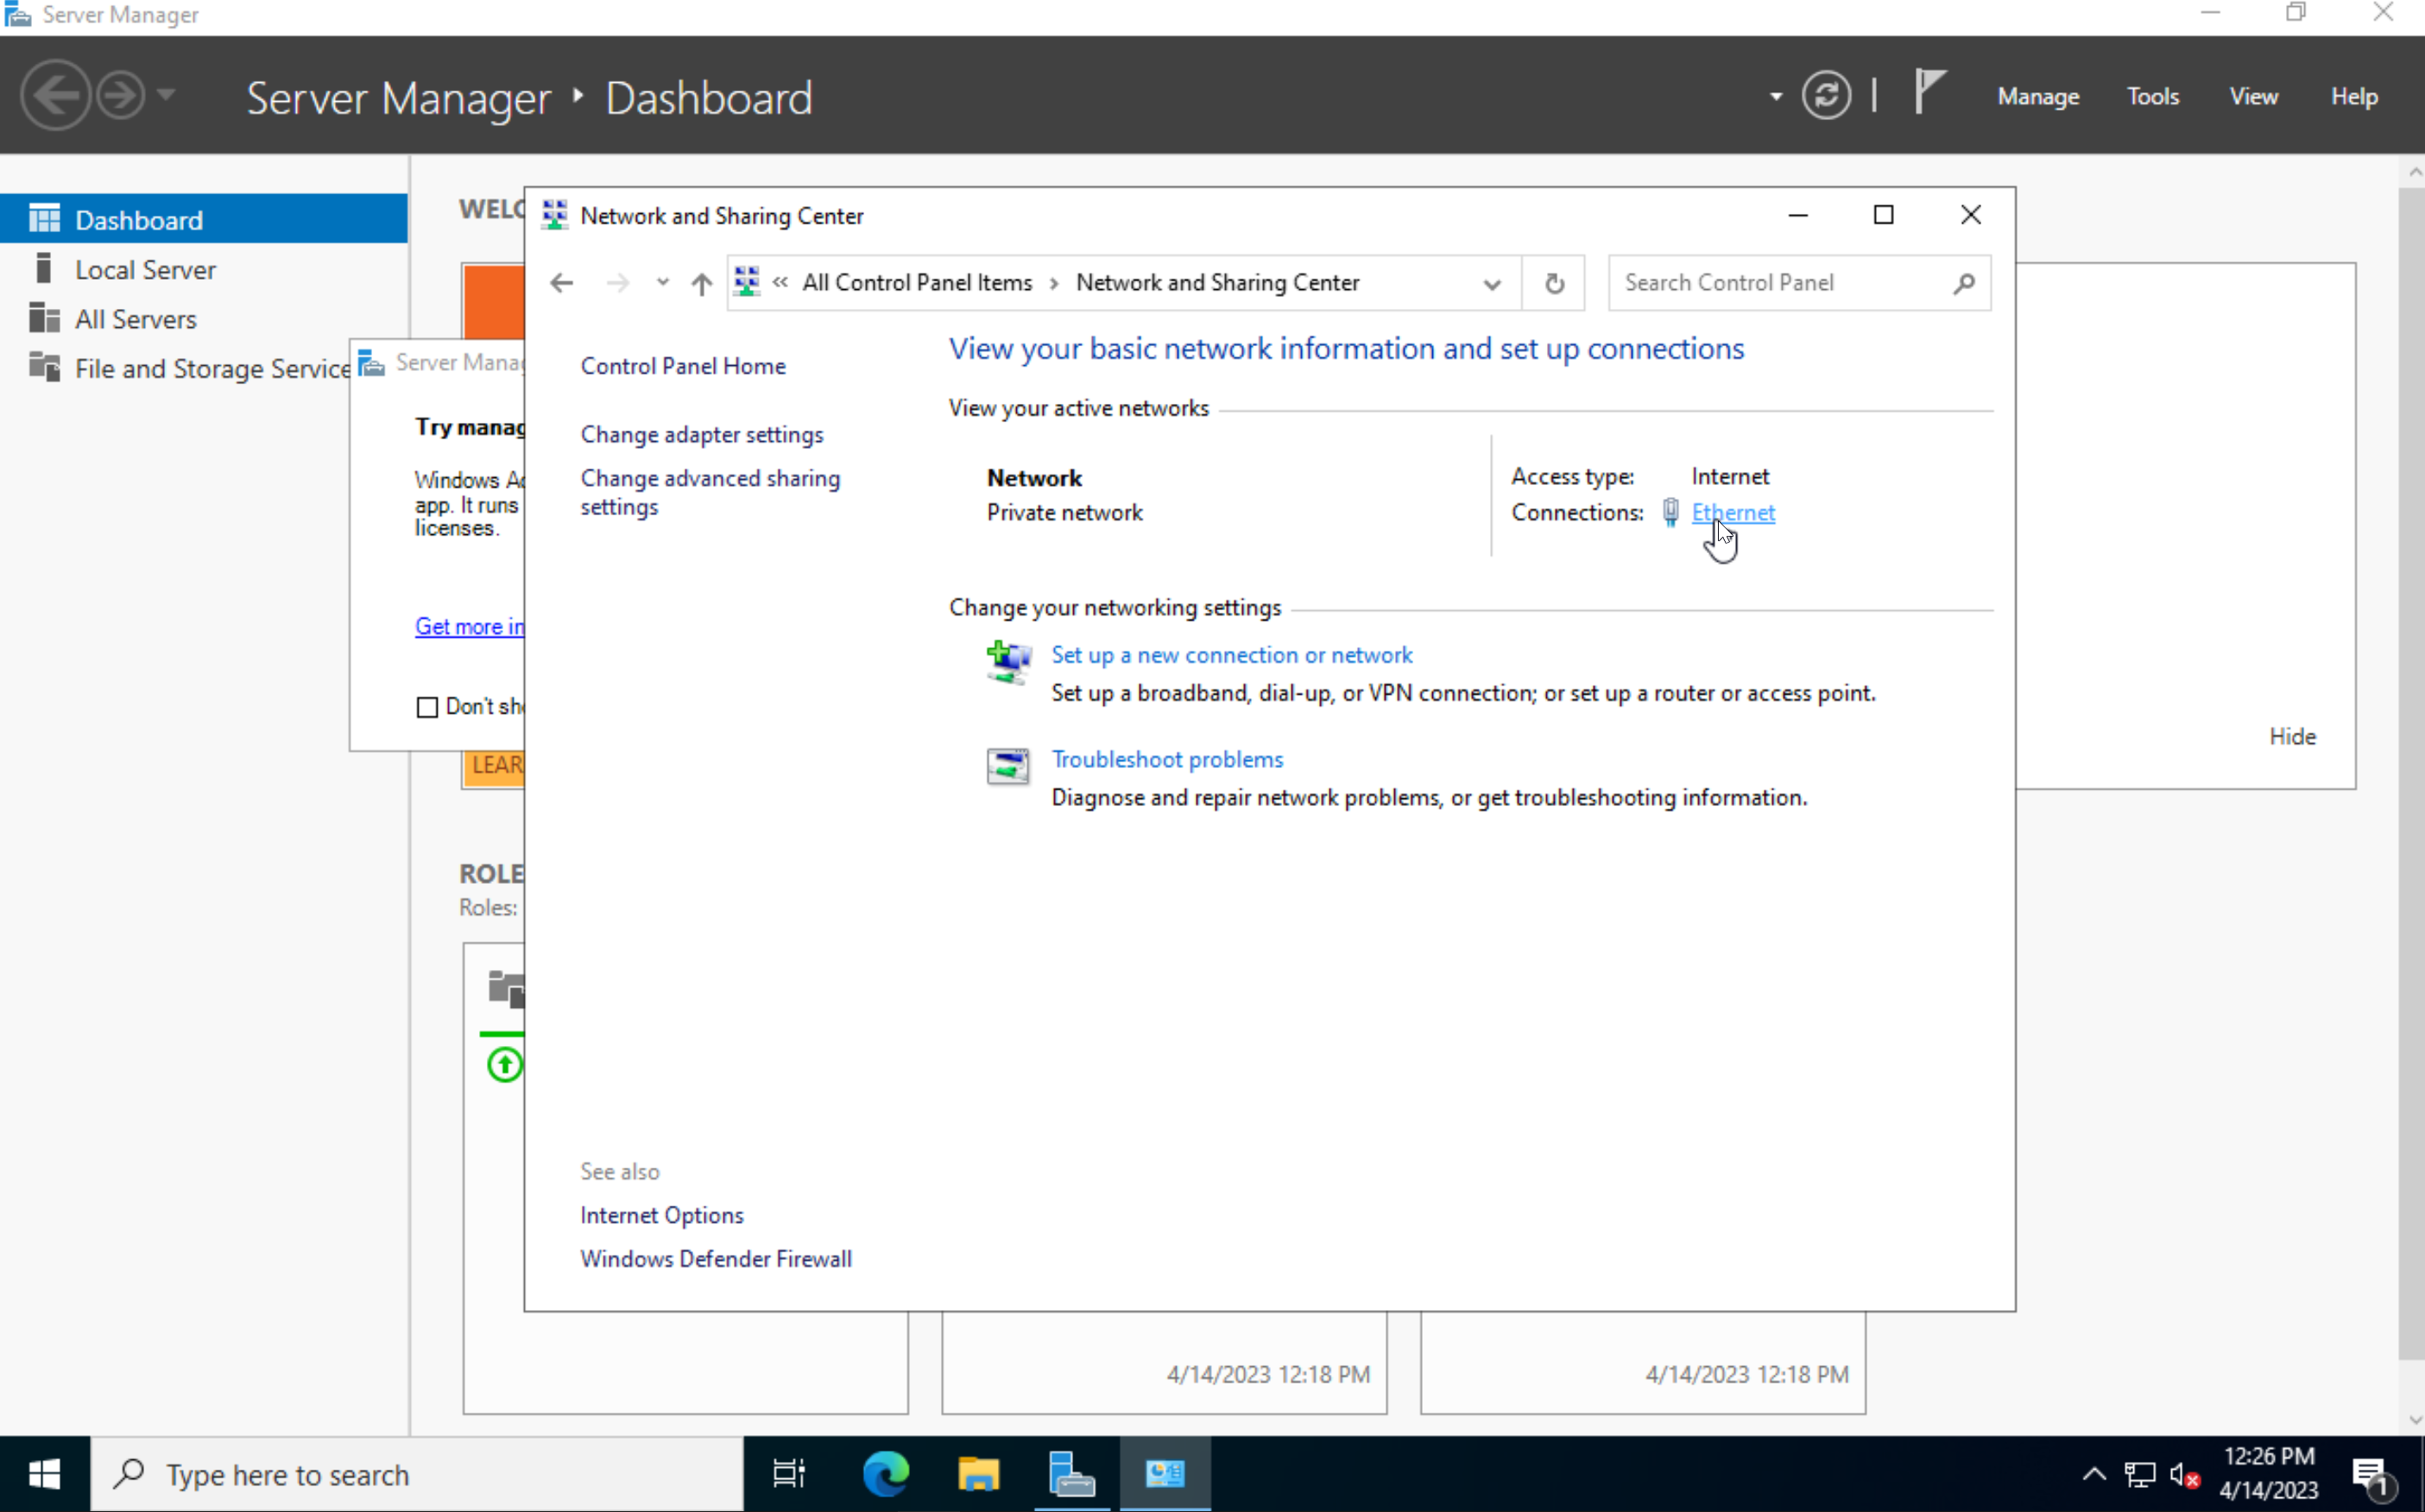
Now that the network is trusted lets set a static IP. We can do this by changing the adapter config. You can get to this by going to control panel and opening the "Network Sharing Center".
Now Click on the adapter to open its properties.
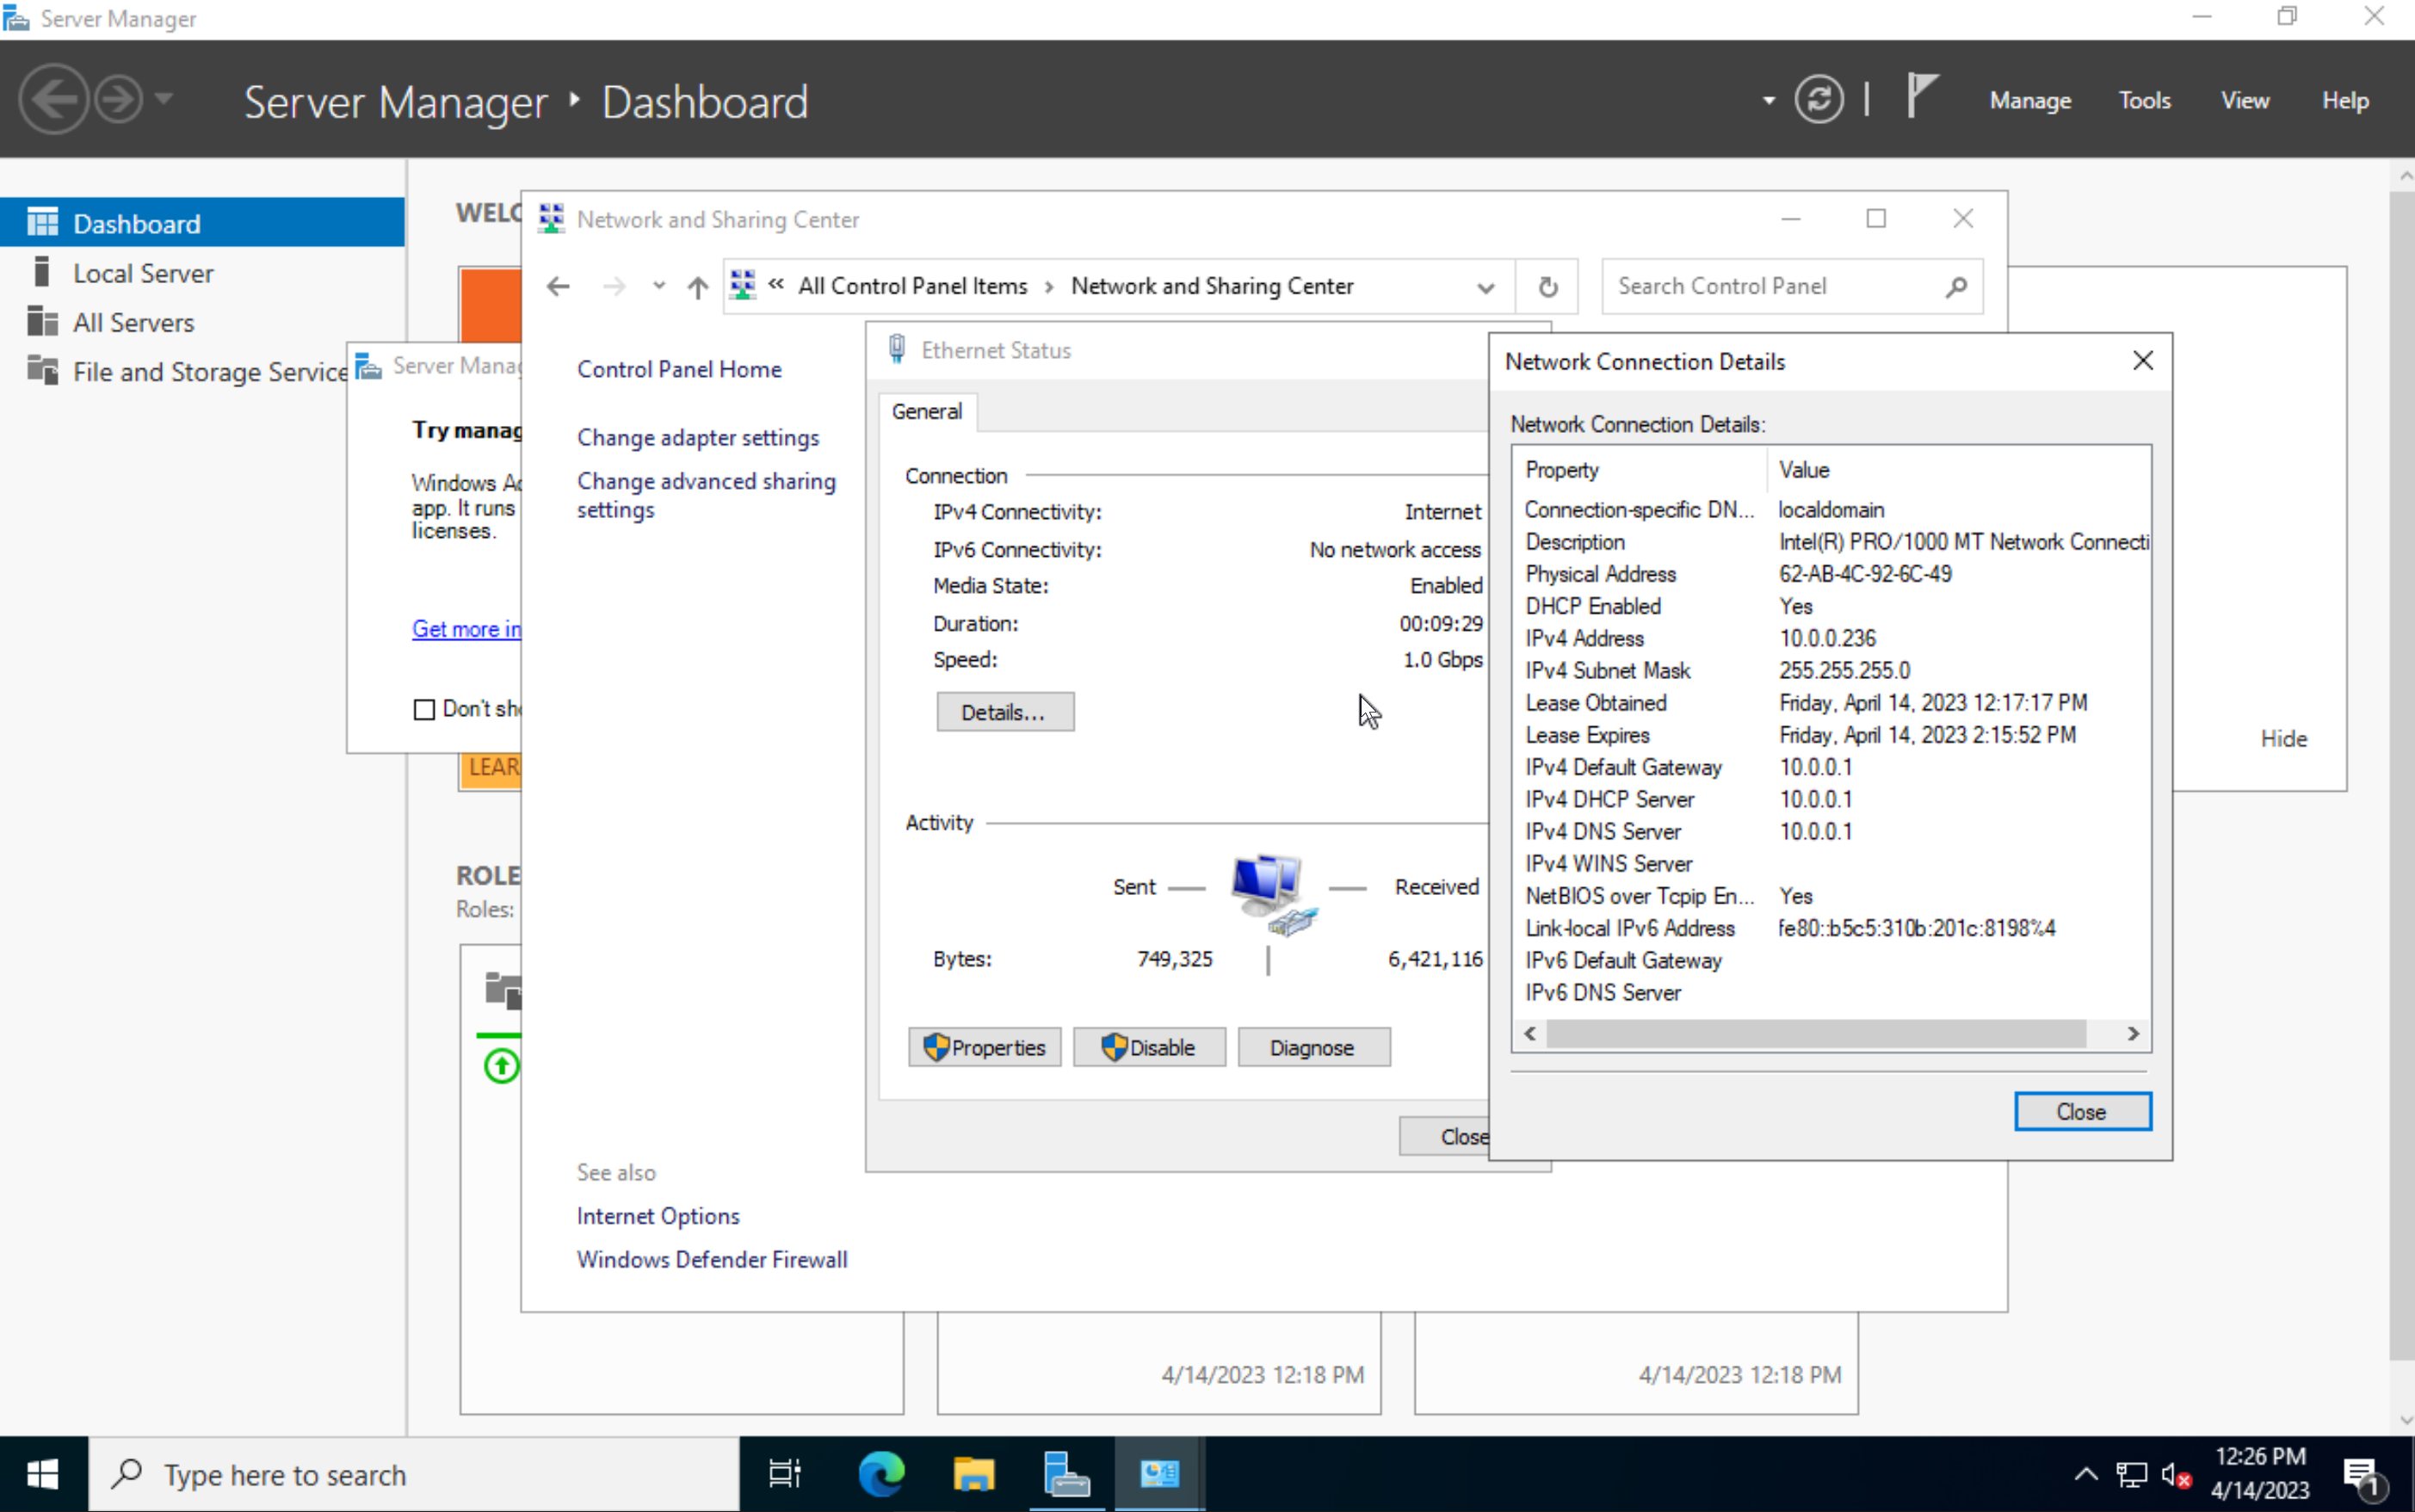
From here you can click "Details" to see your current "Ip", "Subnet Mask" and "Gateway". This will let you use them as reference. We are going to use the SAME "Subnet Mask" and "Gateway" we are only changing our "IP" address.
Now click "Close" and instead click "Properties".
From here select "Internet Protocol Version 4 (IPv4) and click "Properties" again.

Finally! From here you want to change from "Automatically" to specify. In my case I am going to use the IP address of 10.0.0.8. The subnet mask, gateway and DNS servers I will enter as they appeared when we checked before.
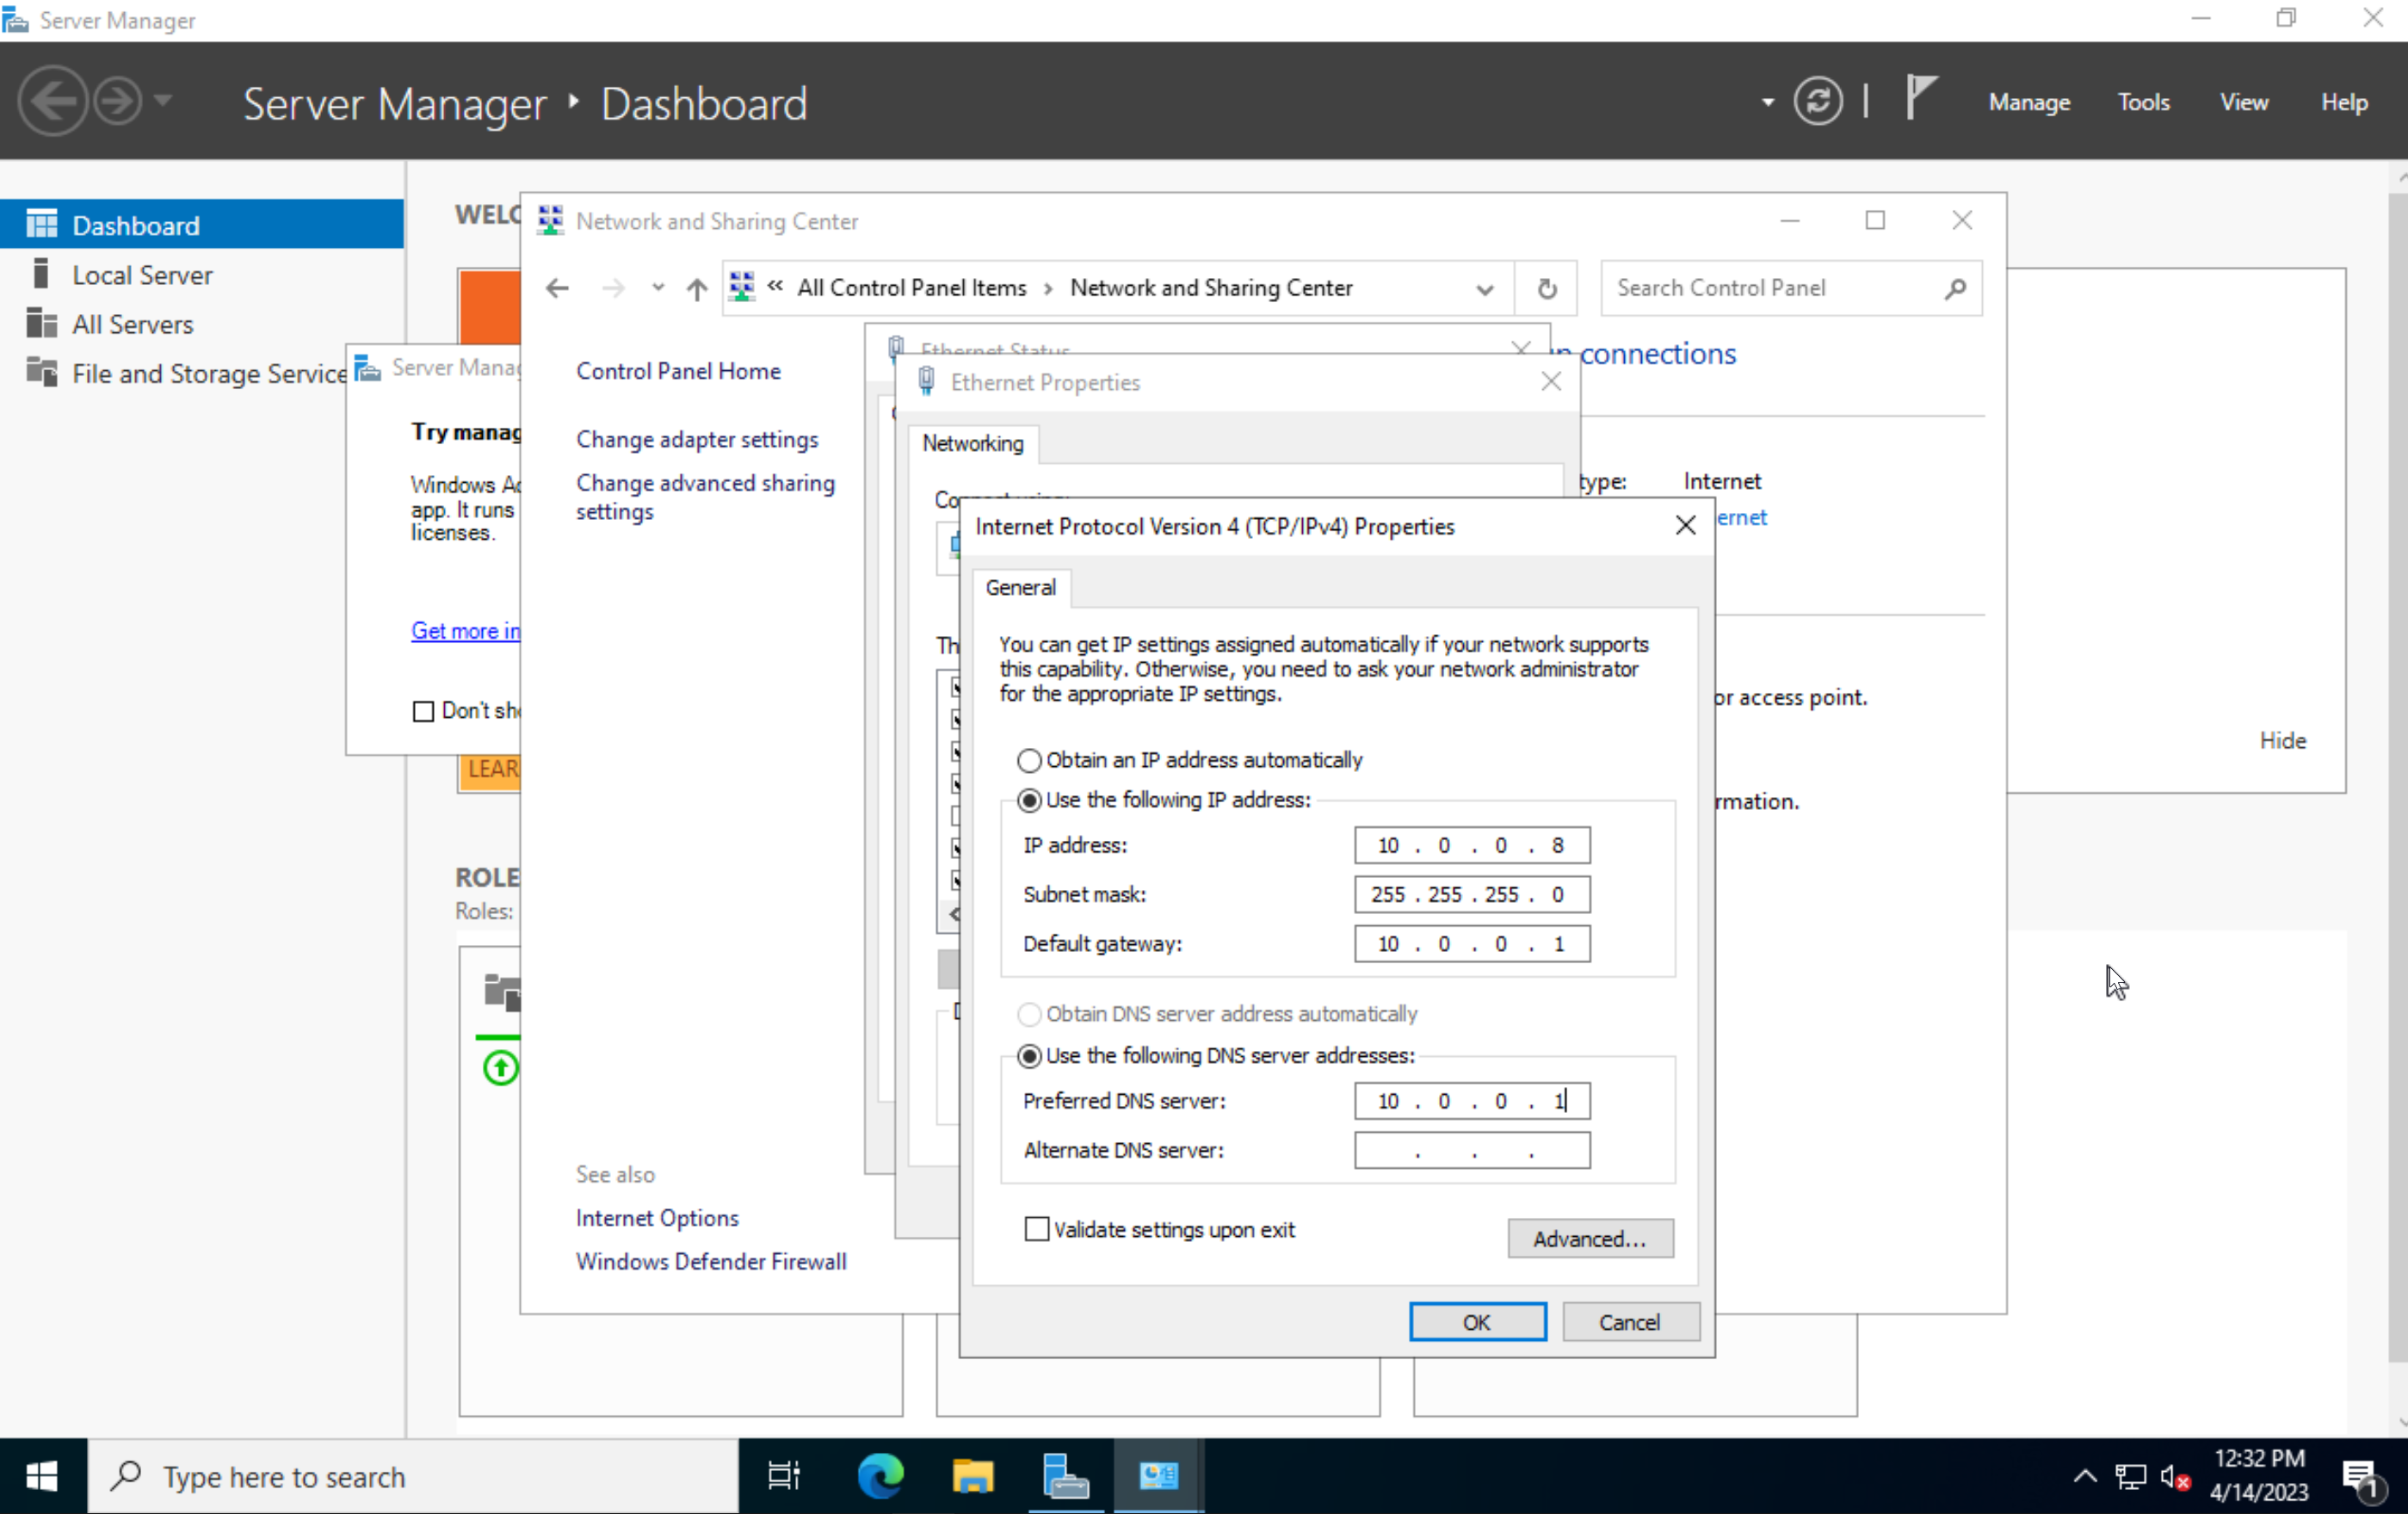
Sweet! Press "Ok" until the ethernet boxes go away. We are done with this step! To make sure it worked you can open the settings again and press "Details" again. It's important to note that if you did this right you should still have the internet. Though it is not uncommon for you to lose connection for several moments.
Now Click on the adapter to open its properties.
From here you can click "Details" to see your current "Ip", "Subnet Mask" and "Gateway". This will let you use them as reference. We are going to use the SAME "Subnet Mask" and "Gateway" we are only changing our "IP" address.
Now click "Close" and instead click "Properties".
From here select "Internet Protocol Version 4 (IPv4) and click "Properties" again.
Finally! From here you want to change from "Automatically" to specify. In my case I am going to use the IP address of 10.0.0.8. The subnet mask, gateway and DNS servers I will enter as they appeared when we checked before.
Sweet! Press "Ok" until the ethernet boxes go away. We are done with this step! To make sure it worked you can open the settings again and press "Details" again. It's important to note that if you did this right you should still have the internet. Though it is not uncommon for you to lose connection for several moments.
Enabling RDP is simple in server OSs and we are going to do it so we can more easily access this machine. Since we now have a static IP this will be even easier.
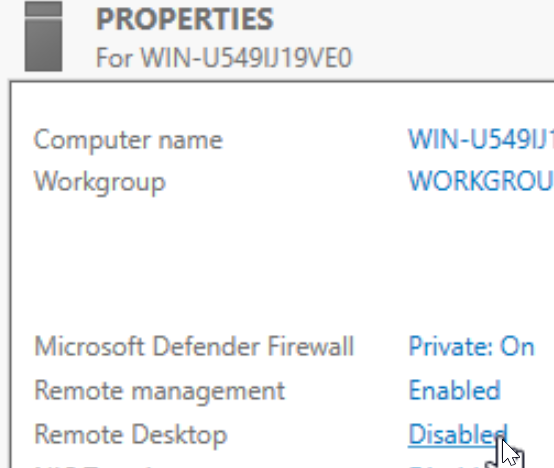
First click on "Local Server" to bring up the machines server control panel.

From here simply click on "Remote Desktop"
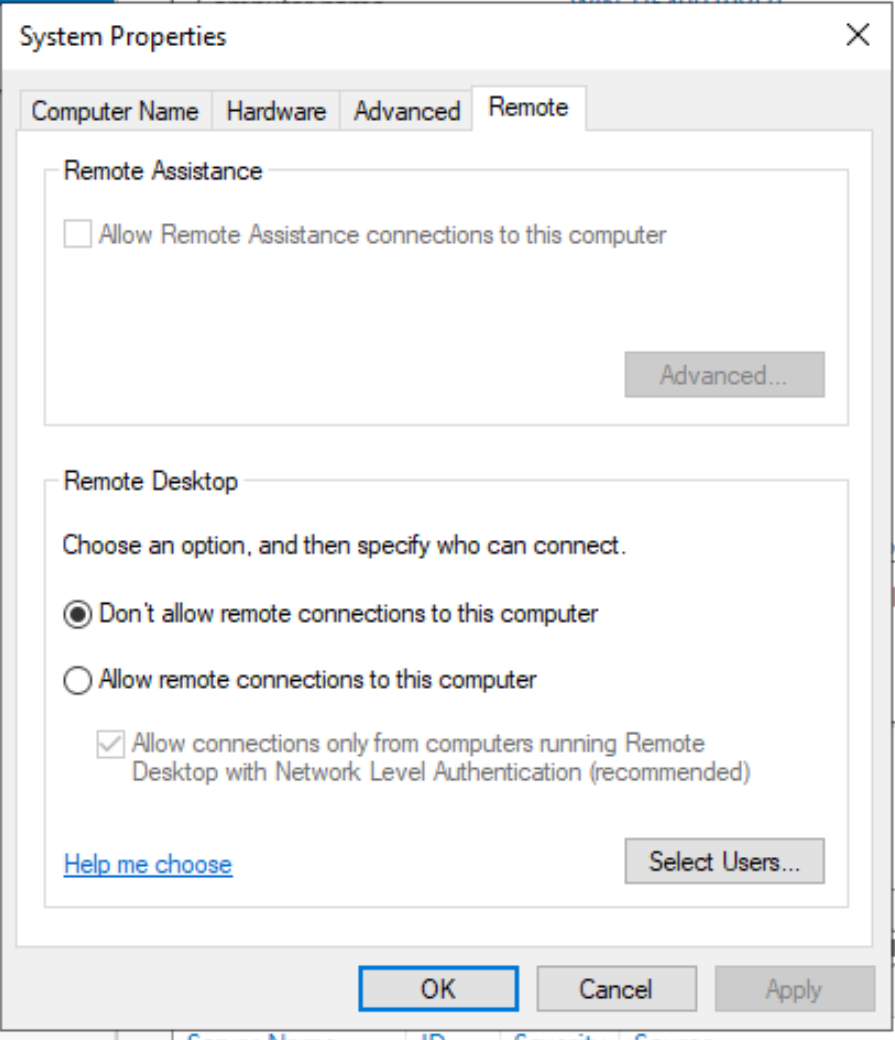
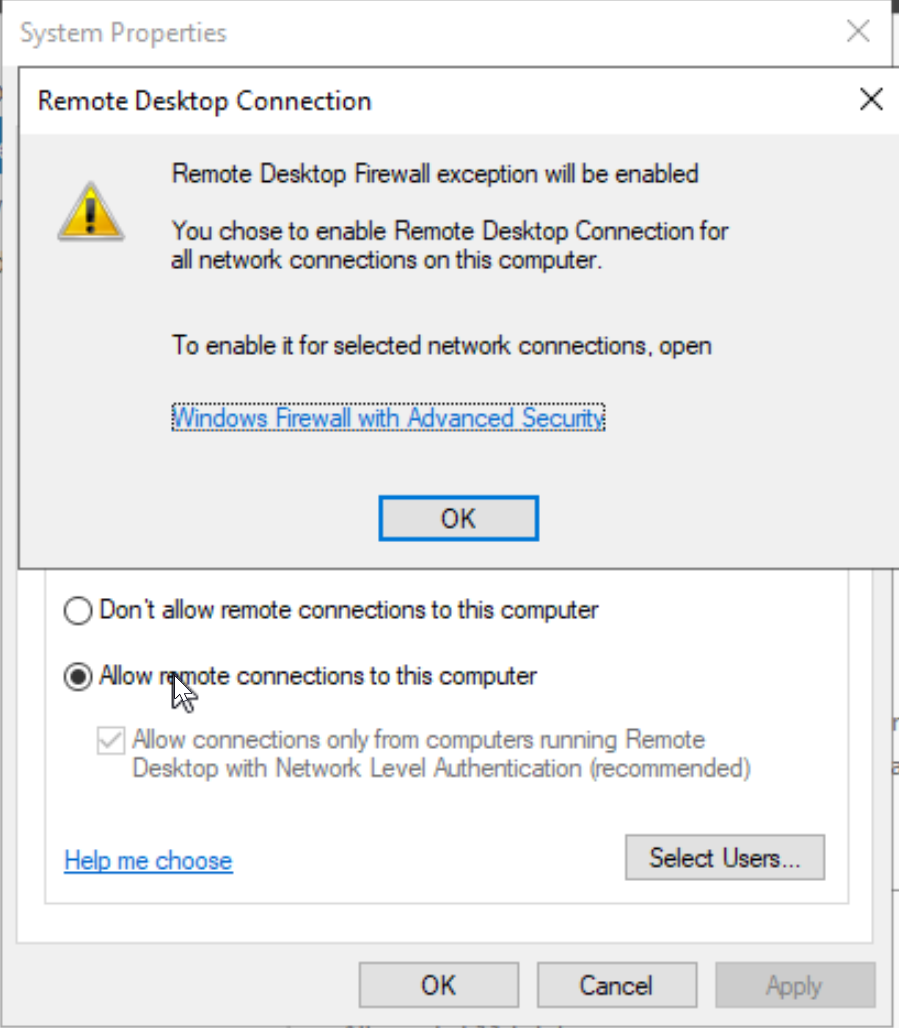
The following box will appear. Lets click the "Allow remote connections to this computer" box.
We will be greeted with a firewall modification warning. We can go ahead and press "Ok" to allow the modification.
Finally hit the "apply" and "OK" buttons to set our changes.

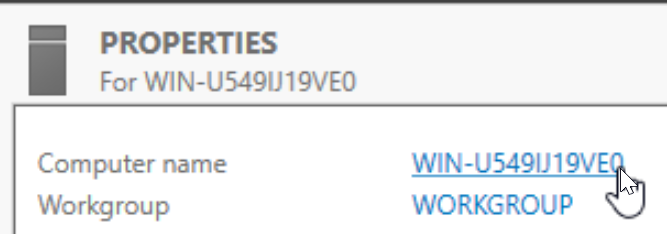
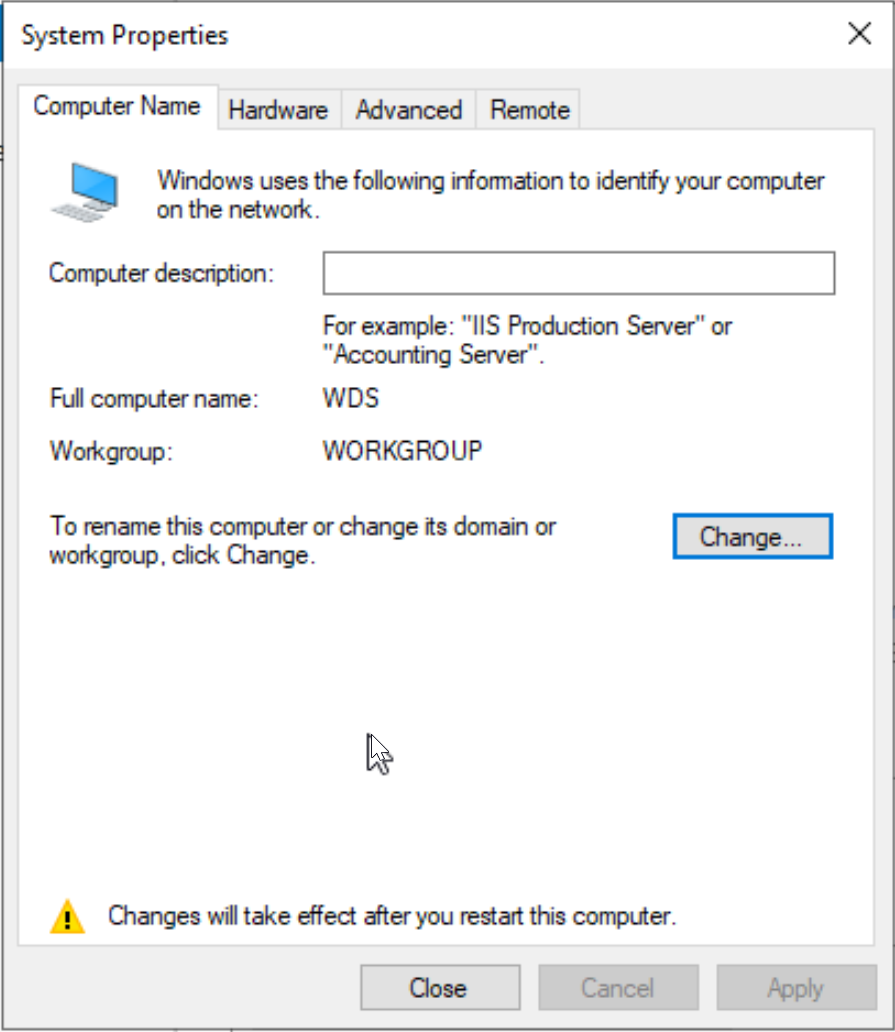
Now that RDP has been enabled lets set the server name. This will make it easier to read when we are PXE booting, and also serves as an easy way to RDP. Since if we know the name or the IP we can get to the machine.
For this, we will simply click on the name of the machine at the top of our server control panel.
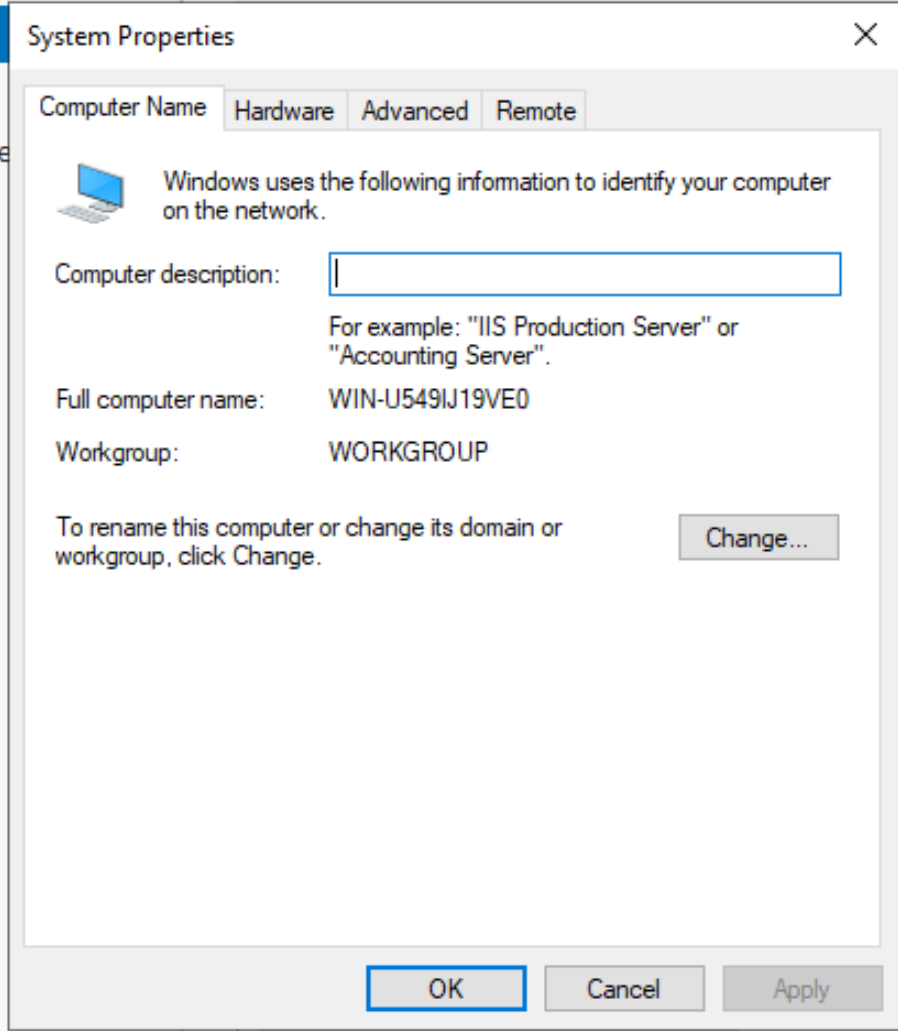
A new box will appear, but we want to dig a little deeper. This "Name" field isn't really the server name. Think of this box more like a "nickname" We need to change the ACTUAL name of the machine. For this we click the "Change" button.
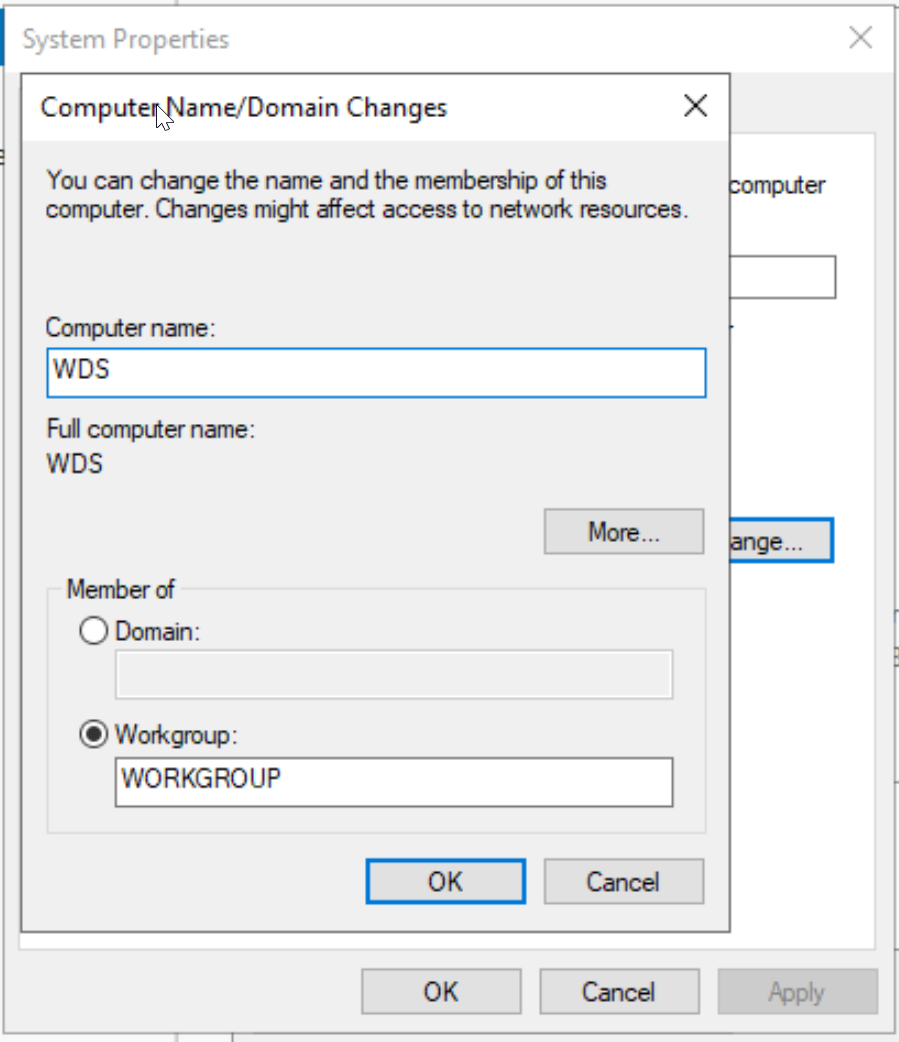
After we have pressed "Change" we will get a new box. We don't want to play with anything else here. We just want to change the name. In my case I used "WDS".
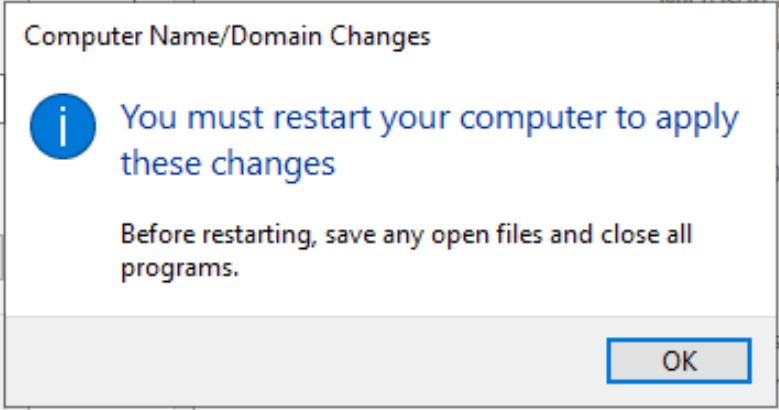
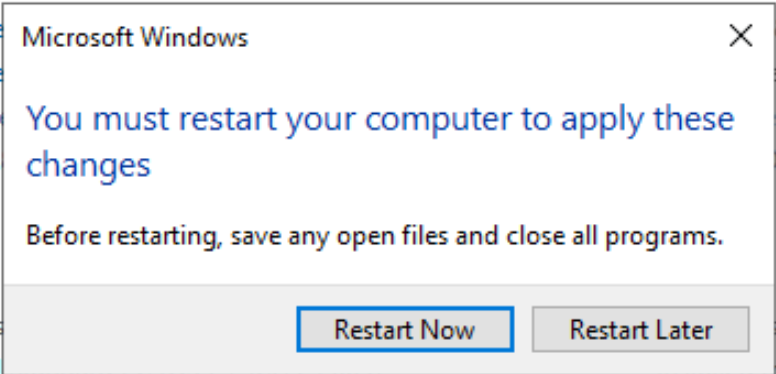
Now just press "OK". We will get a new box saying that we just changed the name of the machine and that we need to restart before all of the settings update.
Press "Close" on the previous properties box.
And finally. Go ahead and let it restart your machine when it gives you the following prompt.
First click on "Local Server" to bring up the machines server control panel.
From here simply click on "Remote Desktop"
The following box will appear. Lets click the "Allow remote connections to this computer" box.
We will be greeted with a firewall modification warning. We can go ahead and press "Ok" to allow the modification.
Finally hit the "apply" and "OK" buttons to set our changes.
Now that RDP has been enabled lets set the server name. This will make it easier to read when we are PXE booting, and also serves as an easy way to RDP. Since if we know the name or the IP we can get to the machine.
For this, we will simply click on the name of the machine at the top of our server control panel.
A new box will appear, but we want to dig a little deeper. This "Name" field isn't really the server name. Think of this box more like a "nickname" We need to change the ACTUAL name of the machine. For this we click the "Change" button.
After we have pressed "Change" we will get a new box. We don't want to play with anything else here. We just want to change the name. In my case I used "WDS".
Now just press "OK". We will get a new box saying that we just changed the name of the machine and that we need to restart before all of the settings update.
Press "Close" on the previous properties box.
And finally. Go ahead and let it restart your machine when it gives you the following prompt.
Yay! For this I am not going to teach you, you know the drill. Run a few checks and a few reboots from the settings menu. Once we are upto date we can do things.
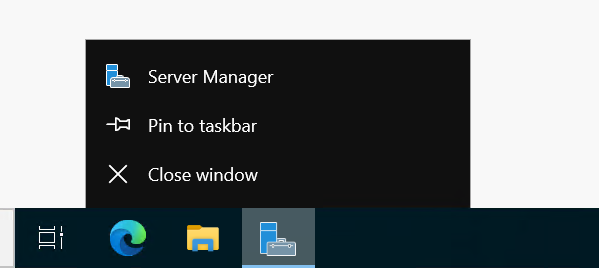
In the meantime lets stop server manager from opening all the time. We may need it, but it is pretty annoying.
While you are starting at the server manager right click on it in your taskbar and pin it.
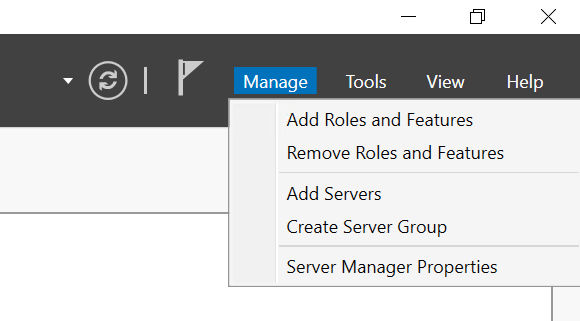
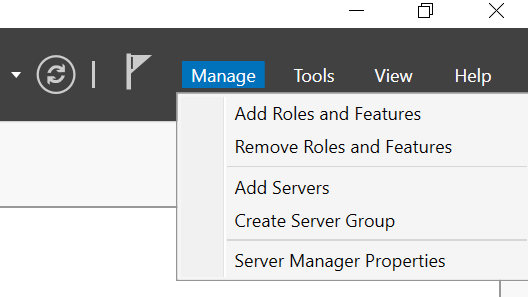
Once that is done at the top right of the Server Manager Dashboard click "Manage" then "Server Manager Properties".
Finally check the box "Do not start" at the bottom.
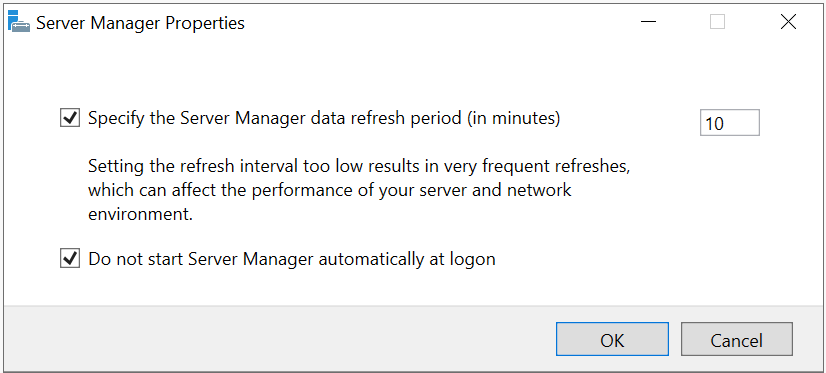
Finally.
In the meantime lets stop server manager from opening all the time. We may need it, but it is pretty annoying.
While you are starting at the server manager right click on it in your taskbar and pin it.
Once that is done at the top right of the Server Manager Dashboard click "Manage" then "Server Manager Properties".
Finally check the box "Do not start" at the bottom.
Finally.
Installing WDS
Alright. So far you have managed to install and OS, do some updates and some quality of life changes. All and All it was a lot to read, but not anything you didn't already know how to do and if you had to do it again I bet you could do it without reading and under like 10min.
Now we will walk you through another sub 10min process. Installing WDS. I will provide some info for the academically curious but this process is also mostly reading the first time. It's pretty simple to do.
First lets open the Server Manager. Remember when we added it to the taskbar? I know /bigthink.
With Server Manager open we want to install WDS, now Windows server operating systems classify things as "Roles" and "Features". I won't get into why, or what they mean. I am just clarifying so you don't get confused. Anyway at the top right click on "Manage" followed by "Add Roles and Features".
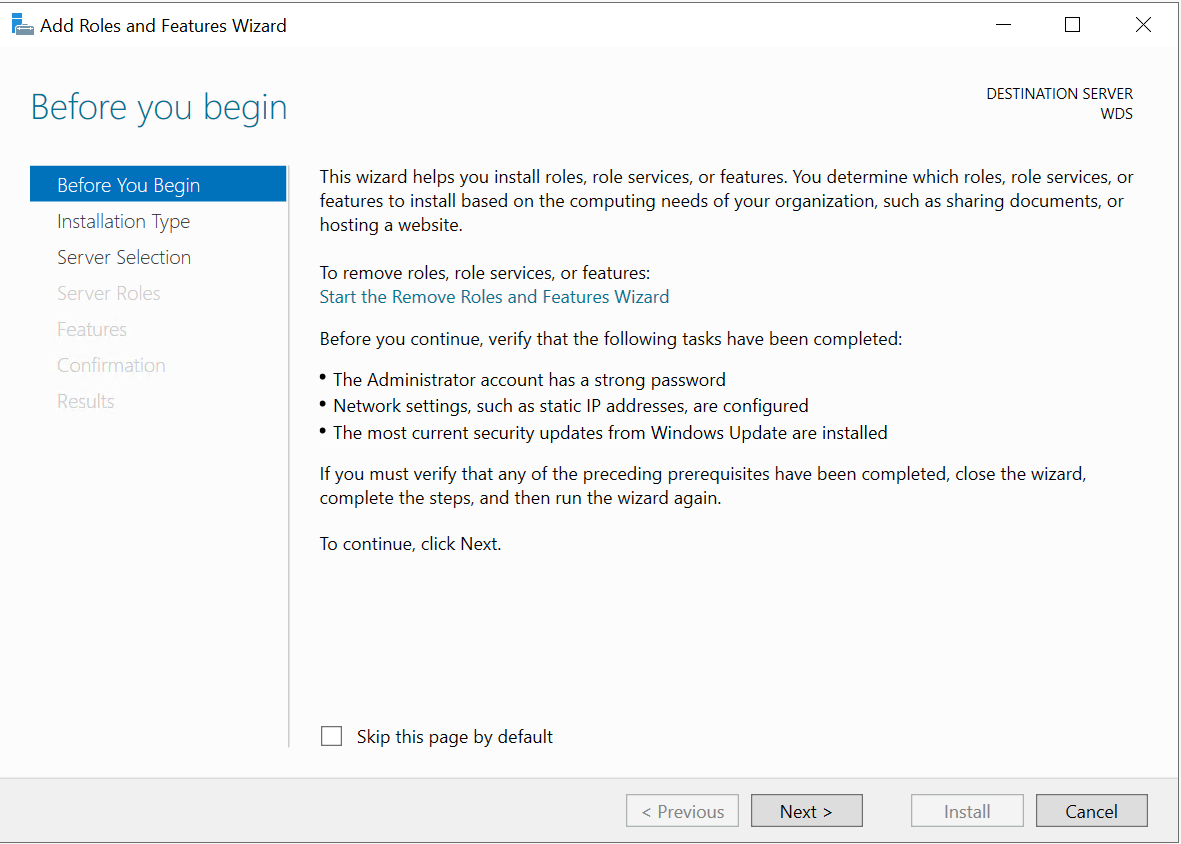
We will start getting some screen preparing us to make software modifications to the server. Click "Next".
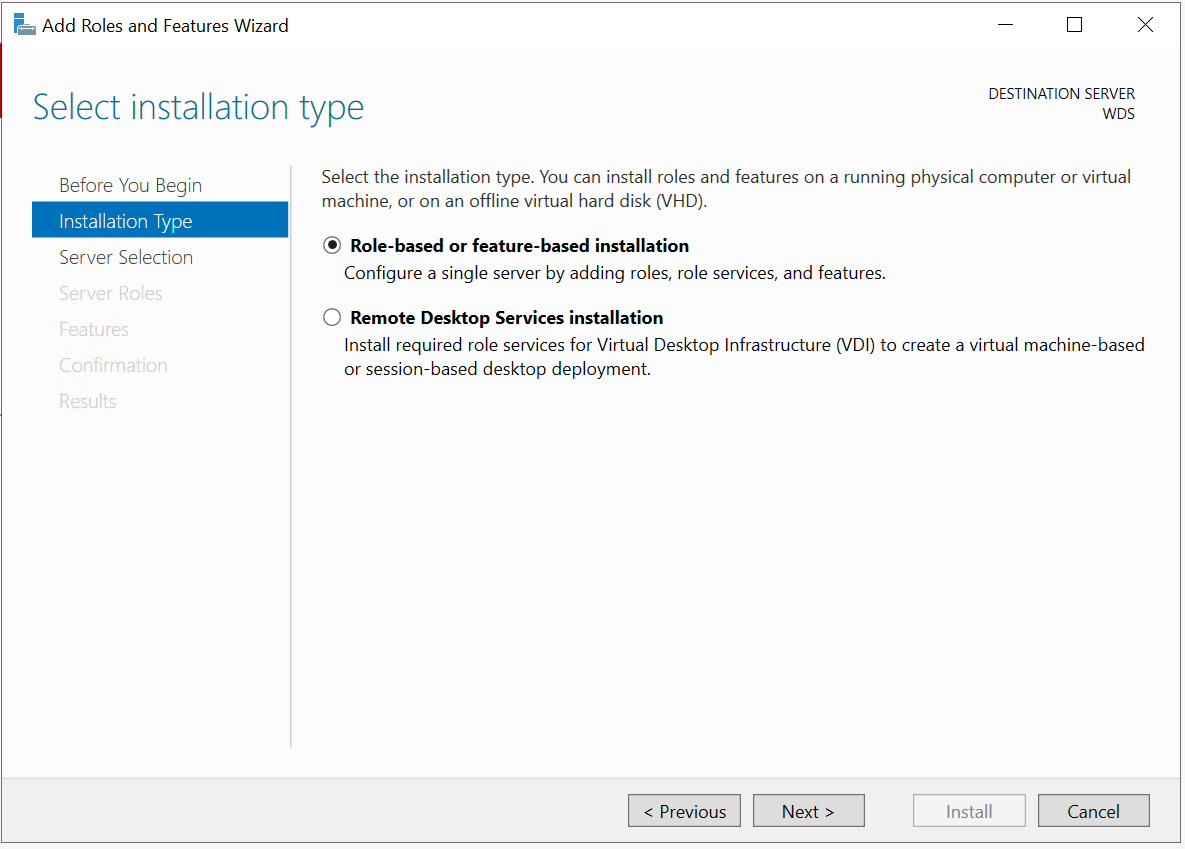
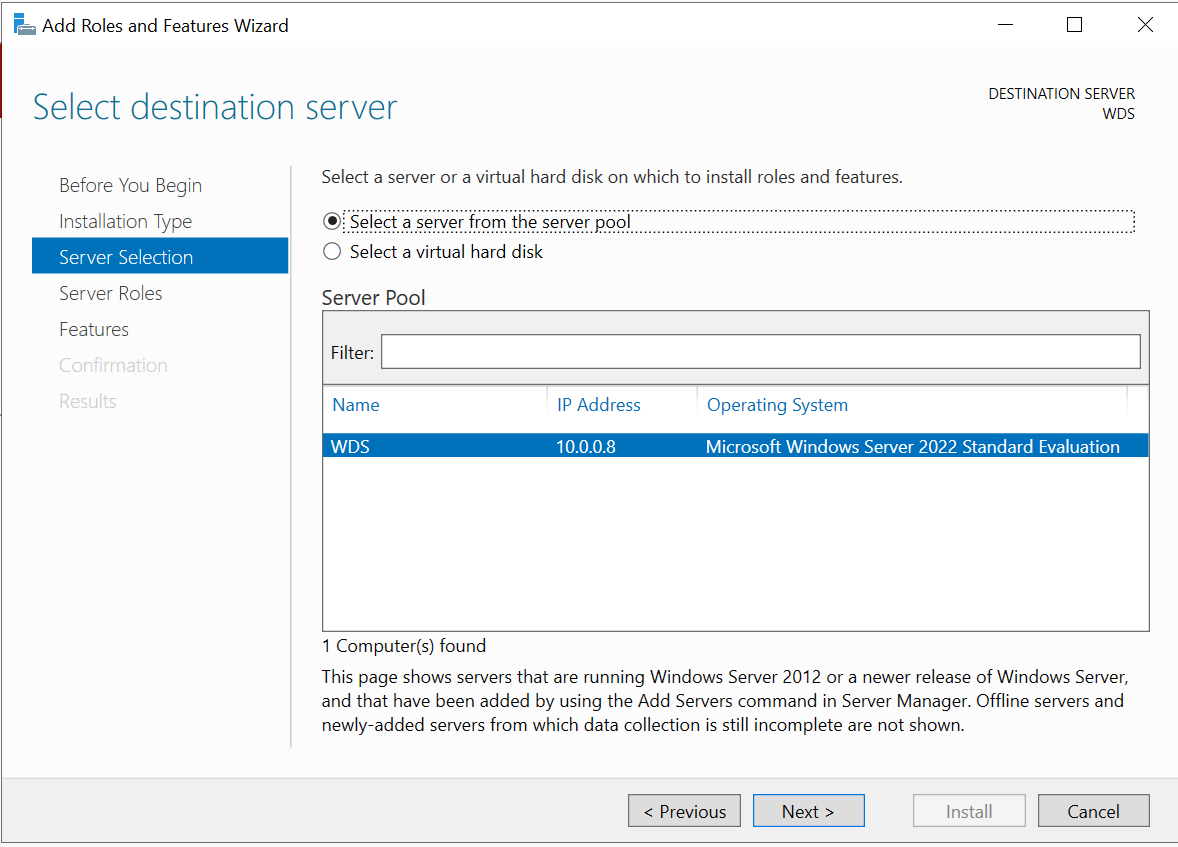
Keep going we are a local server not an RDS cluster.
We are a single server so we will click next again, but if we were part of AD and you had multiple servers you could click on it here.
Now we want to scroll down and check the box "Windows Deployment Services".
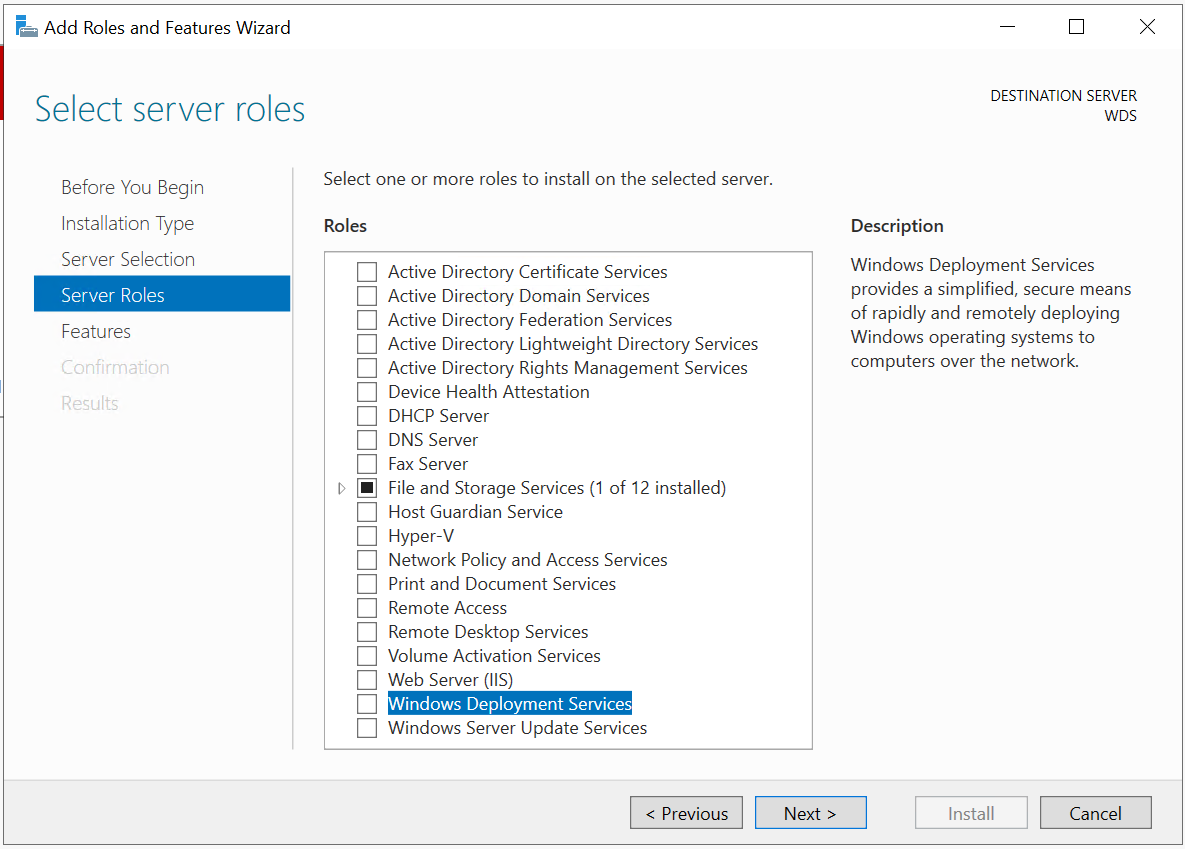
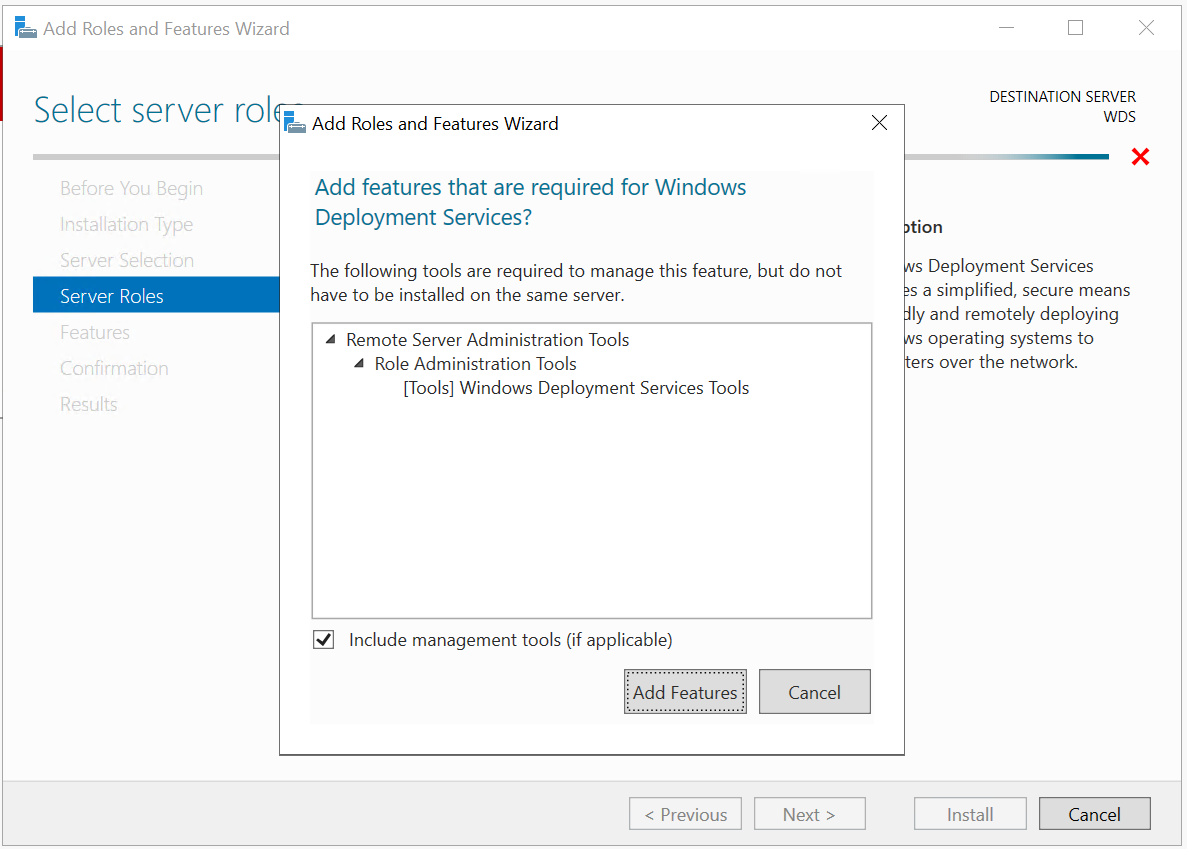
Press "Add Features" followed by "Next".
Press "Next" again we don't need or want anything on the "Features" page.
We are now greeted with the WDS information window. Click "Next" again.
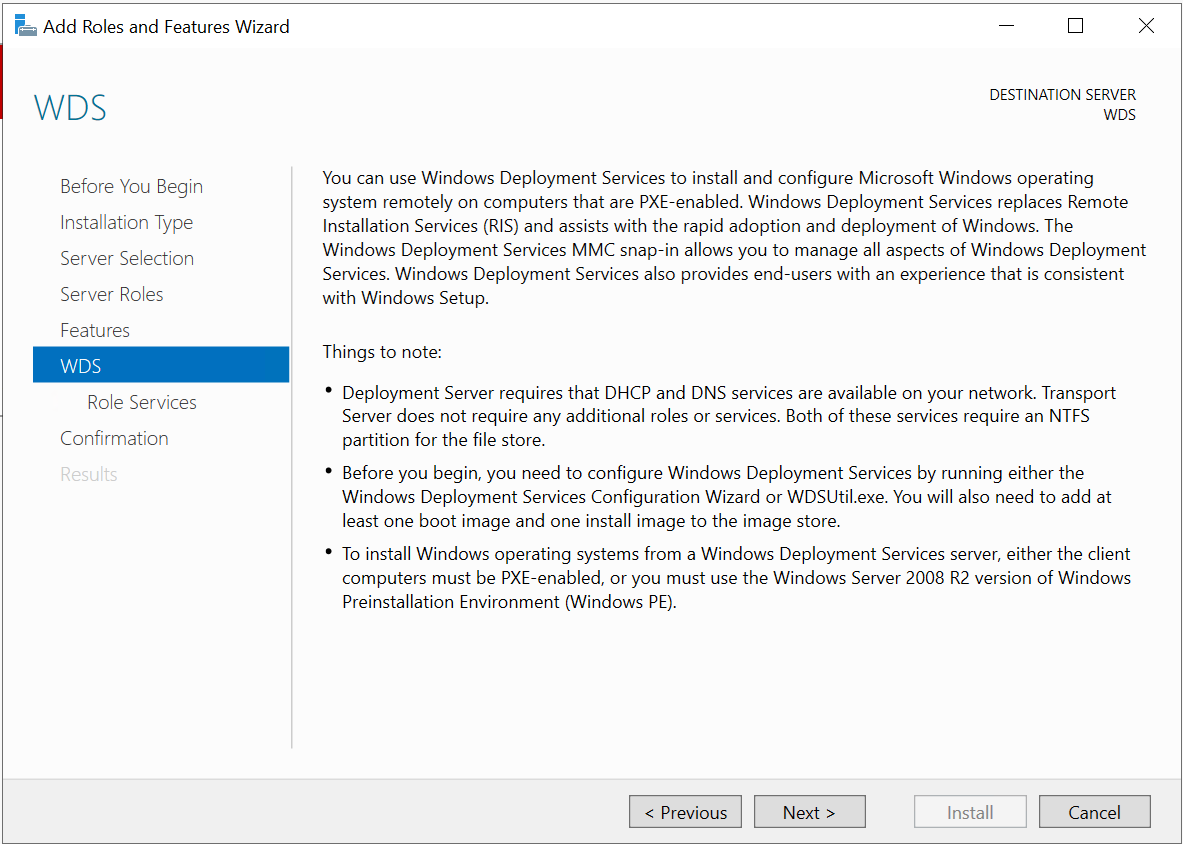
Keep both boxes checked, we want all the configuration.
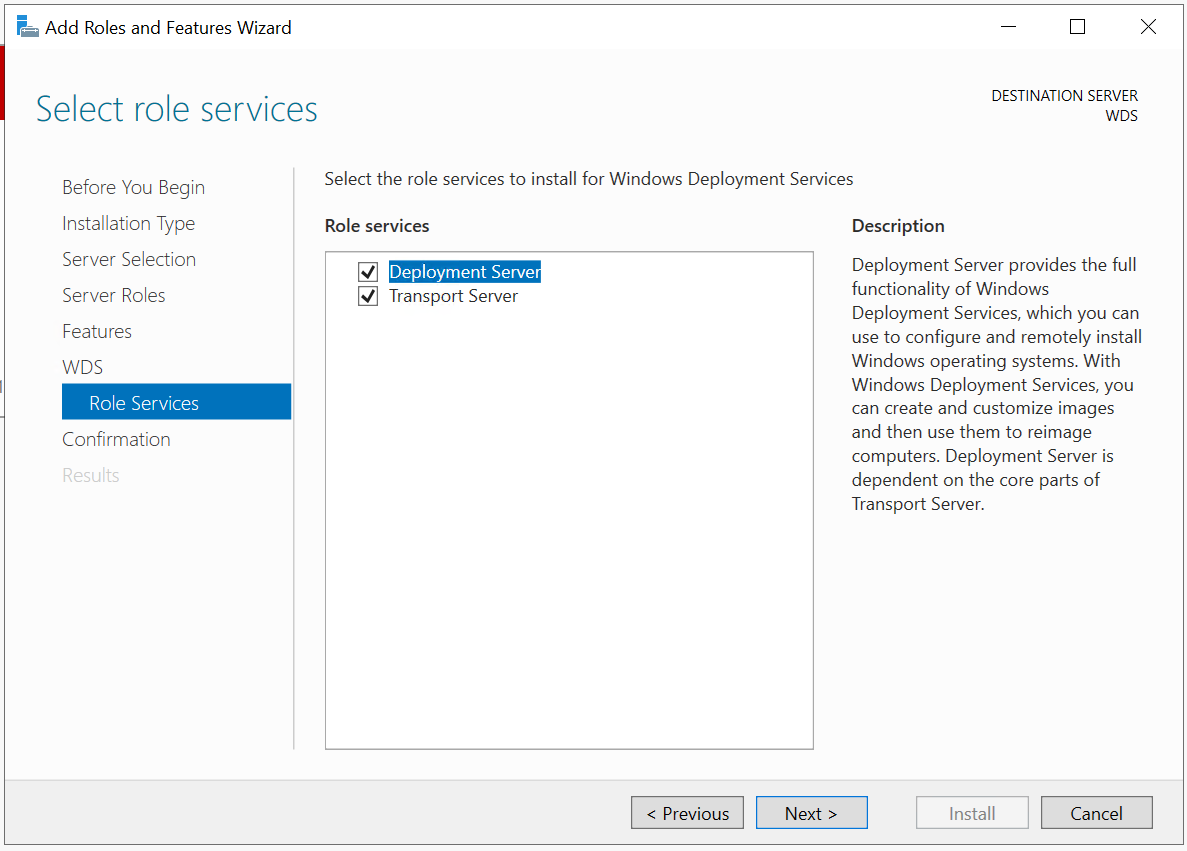
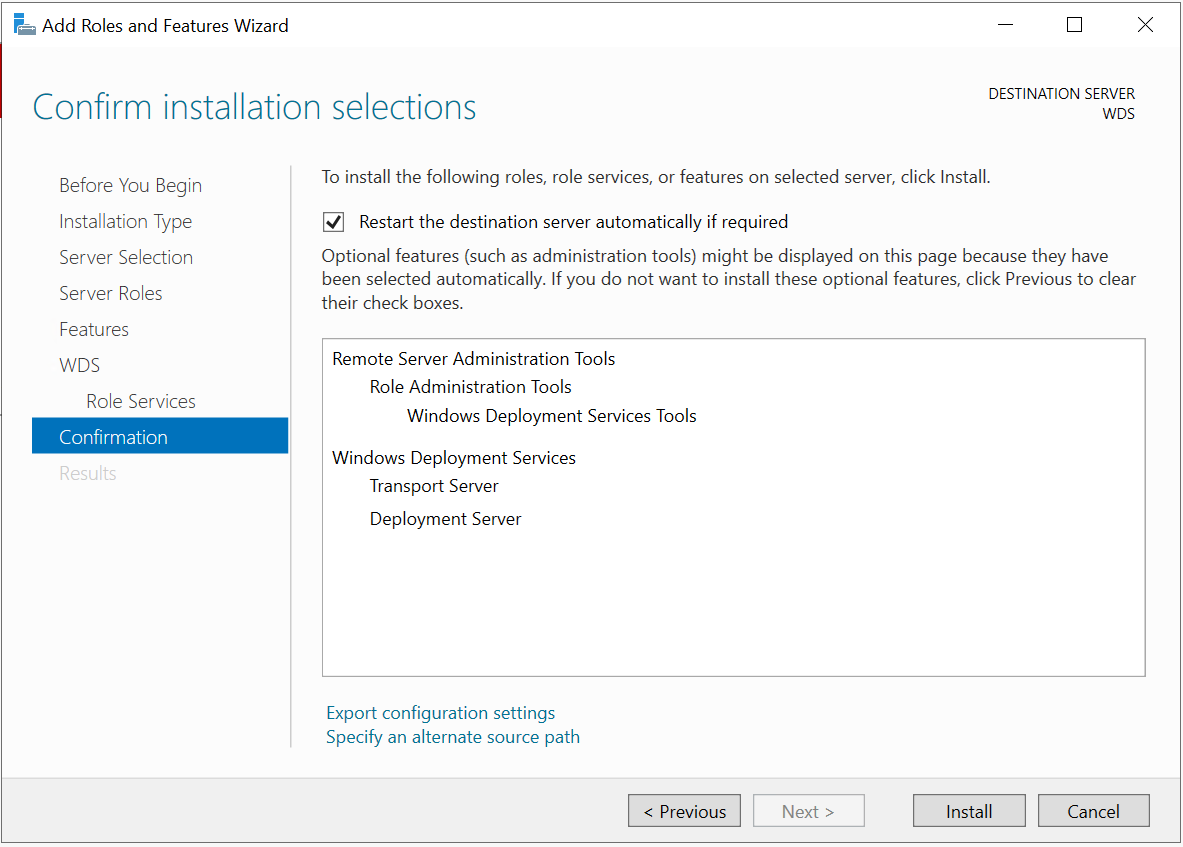
Finally click install. If you are feeling ambitious you can check the box at the top to auto restart if needed.
Now its done!
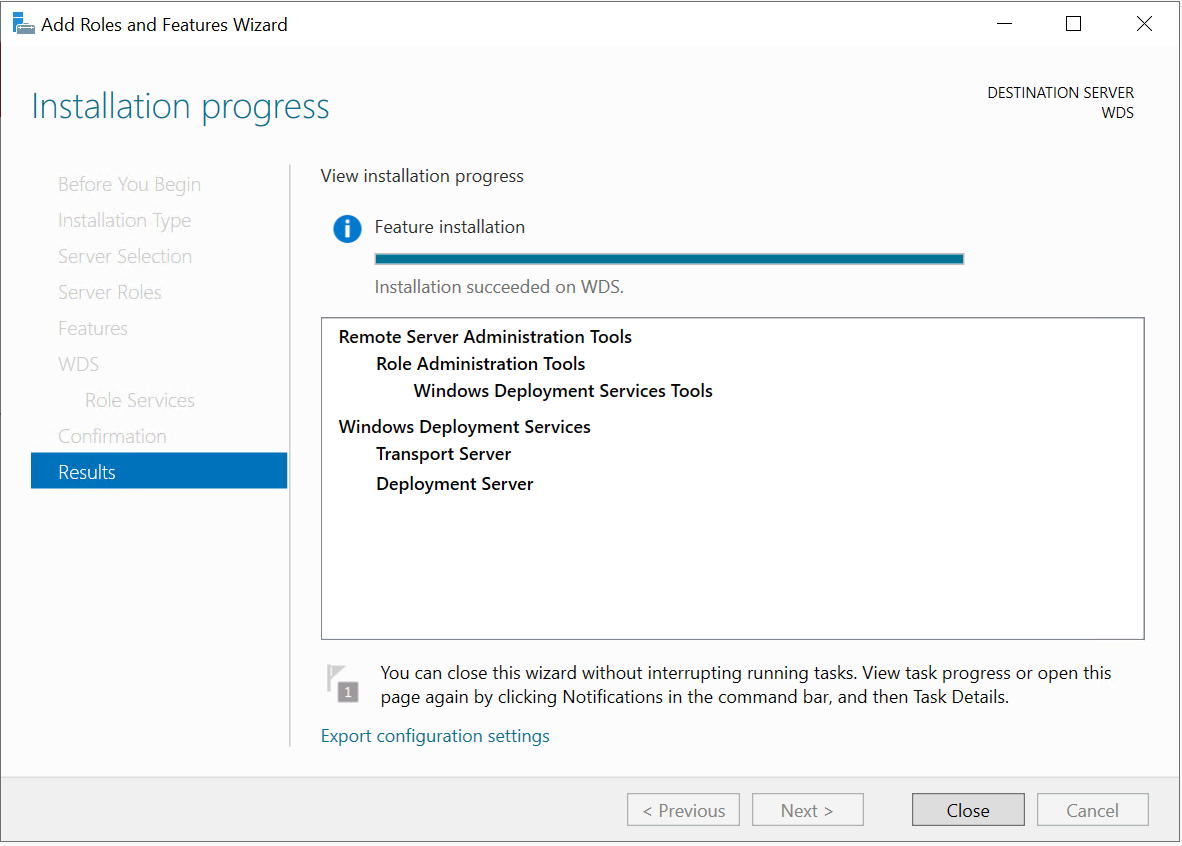
You mad lad. You've done it, and it was barely scary. Is that all? Yes! Lets configure it.
Configuring WDS
Now that we have WDS installed lets go turn it on, and do a quick configuration.At the Server Manager Window click "Tools" and scroll down the list and click "Windows Deployment Services". Once it opens feel free to right click on it in your task bar and pin it to your taskbar.
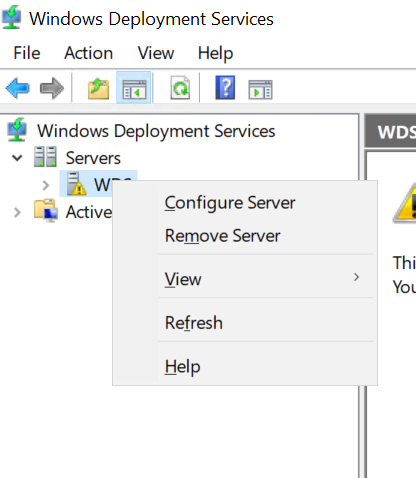
Expand the "Servers" list at the top left. You will see our server with a scary yellow exclimation. Don't worry though just like everything else before this, this step is easy.
Go ahead and right click it and select "Configure Server".
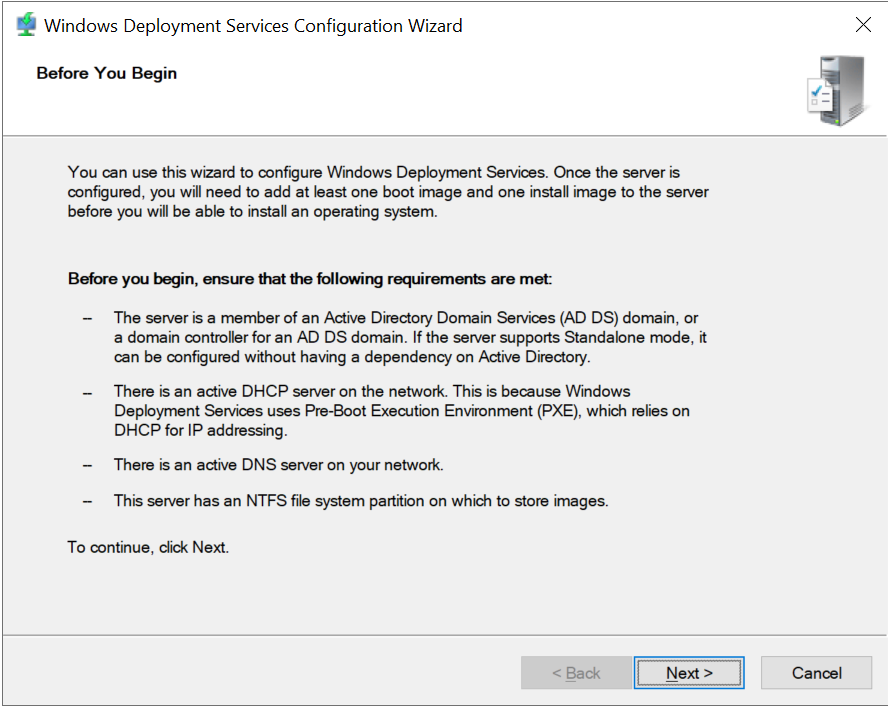
We are going to now walk through the configuration. Click "Next" at the intro dialogue.
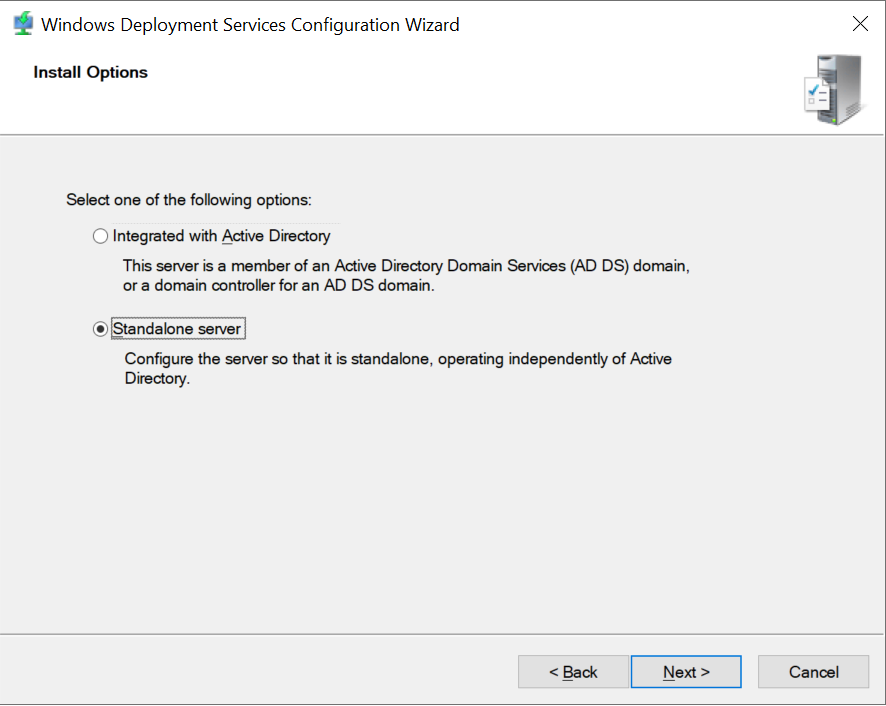
From here we want to select "Standalone Server" since we are not using AD. If we were however, this would still be a fine option. They aren't co-dependent.
Now we want to change the drive letter SPECIFICALLY while leaving the path. We want to set the drive letter to that of our data drive. In my case it is "E:\". It is NOT REQUIRED for this to work right. However, performance is generally MUCH BETTER if you have a separate data drive (not just a partition!).

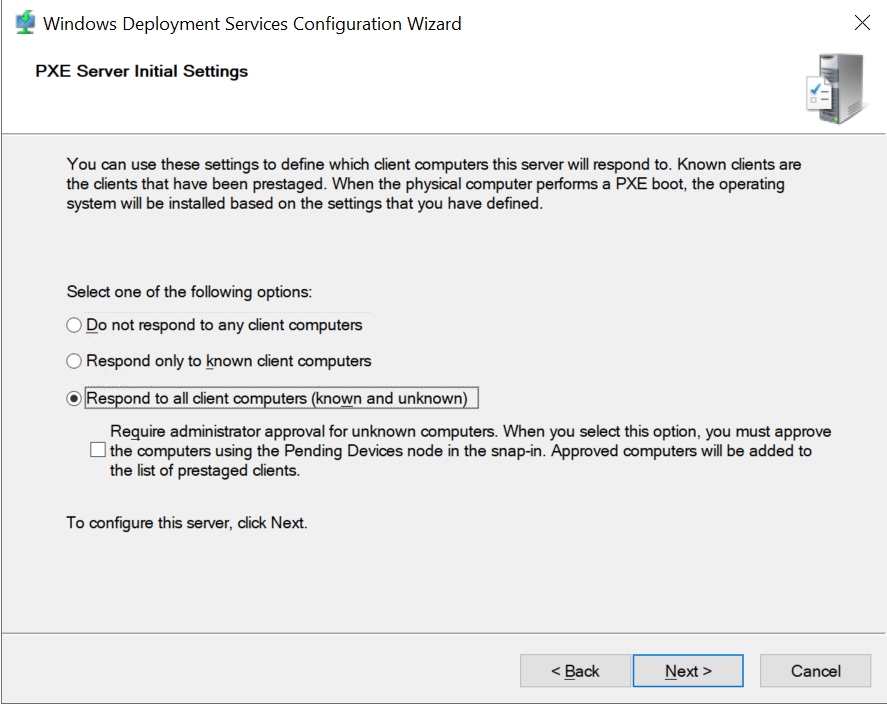
At this screen we want to choose how the server responds to PXE requests. There are A LOT of technical and usage case reasons we can dive into regarding which one is best for what. Since we are home users though and just want to format our machines when we catch a virus from utorrent we will want to select "Respond to all client computers )known and unknown)" we will NOT check the nested box under it.
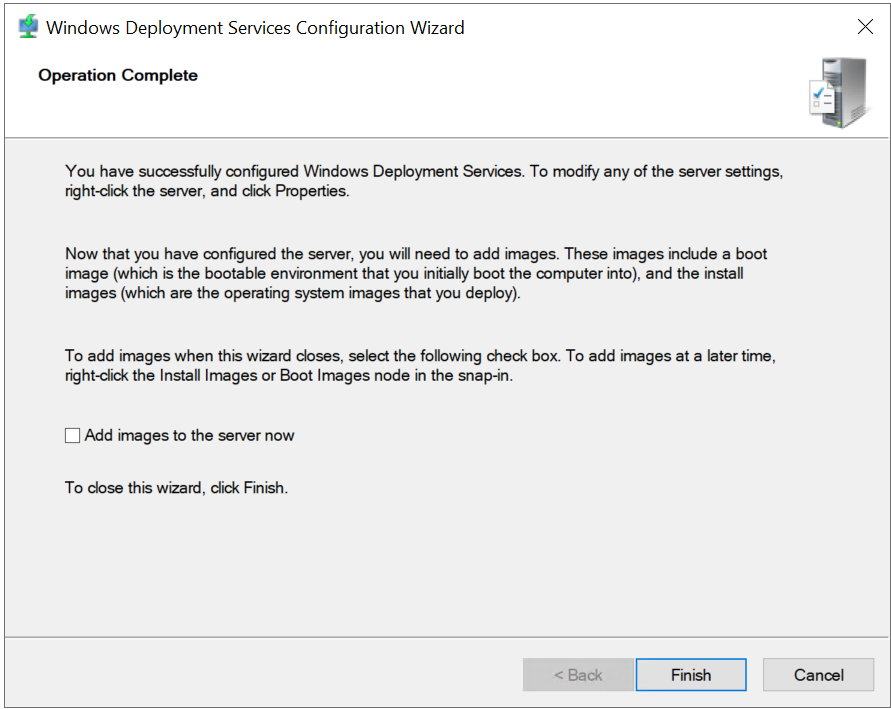
After the fancy installer bar we will have finished the initial configuration. Uncheck the box "Add images to server now" there will be plenty of time to make mistakes with that later. Then click "Finish"
See? All good. Lets take care of a few small configurations then I will let you rest.
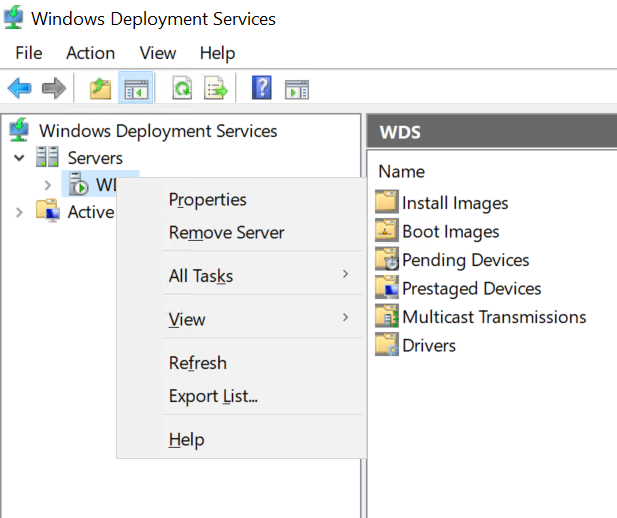
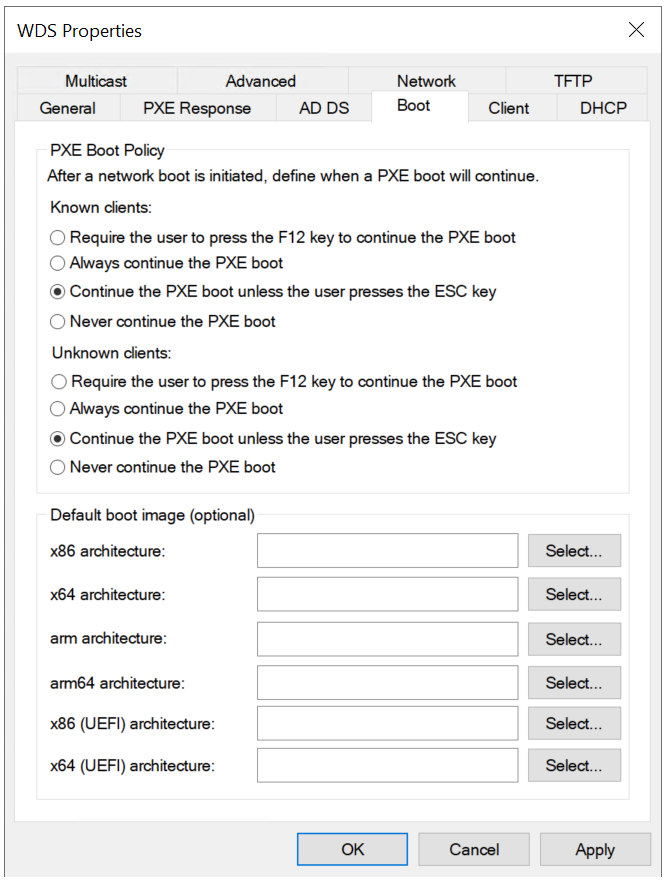
Right click on the server and click "Properties".
Under the "Boot" tab check the following bubble for BOTH Known and Unknown clients. "Continue the PXE boot unless the user presses the ESC key".
Next, under the "Client" tab check the box "Do not join the client to a domain after an installation."

Press "Apply" you may get an error. This is fine. If you do just hit "OK" then press "OK" again on the properties box to close it.
At this point go ahead and right click on the server again, go to the "All Tasks" submenu and click "Restart".

You did it! You can exit out of WDS now. The service will continue to run, but we are done configuring it. See? It wasn't that bad.
Installing MDT
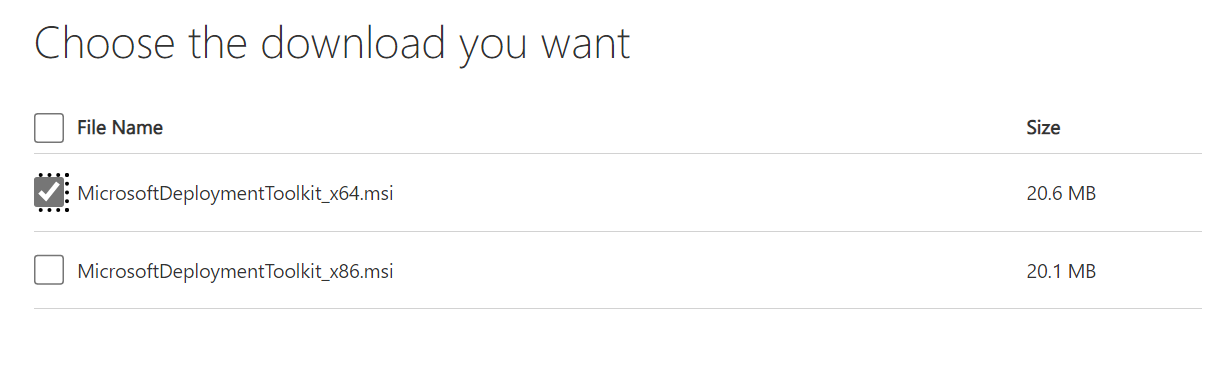
All done with your break? I did encourage you to take one. Now we are going to install MDT. MDT is the toolkit we will use to control and add and modify our images remember? The link is below under the link section. The same place you grabbed the server ISO. For this we will want to make sure we download the 64bit version.
Lets get started.
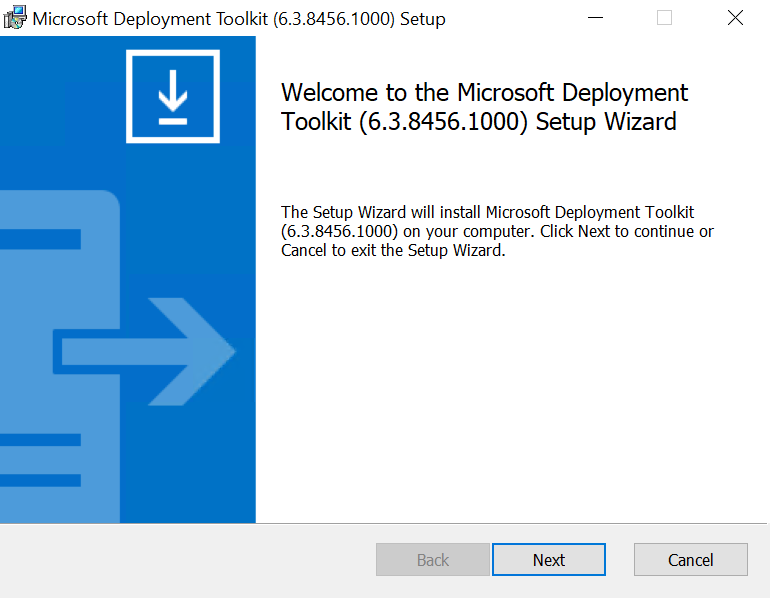
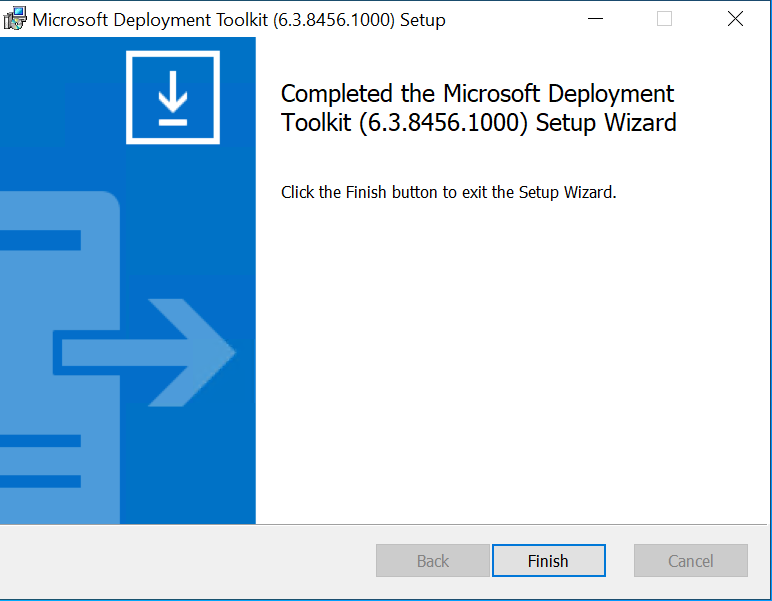
Once you have it downloaded go ahead and open it up to start the installer. It is more or less a "Next" fest but I will let you know if you need to do anything else. So click "Next" to begin.
It's ok for this to go to the "C:\" drive so don't worry about that quite yet. Go ahead and click "Next".
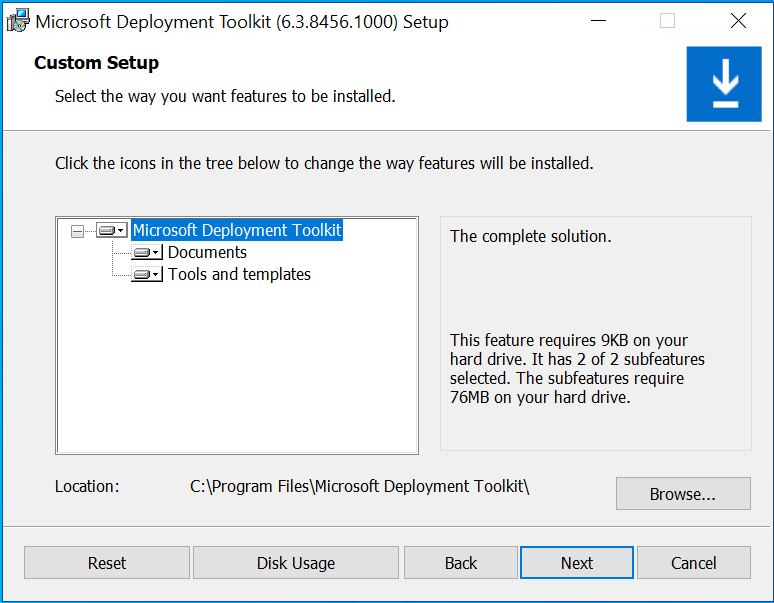
You will get one more notice about the customer experience program. Simply click "Install" and finally when its done, "Finish".
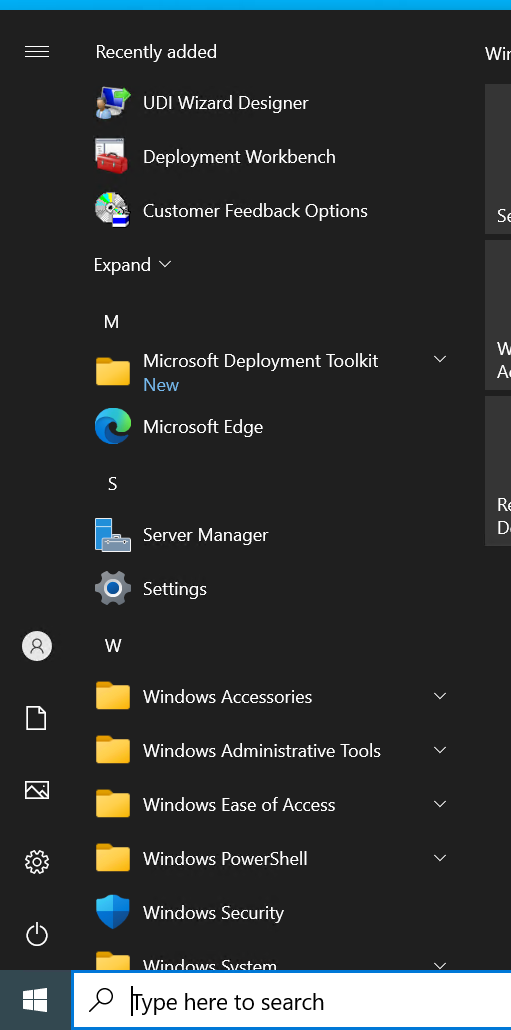
Nice! Now for fun lets go ahead and open it, you guessed it. So we can pin it to our taskbar. It will be called "Deployment Workbench".
Now that its pinned lets move on.
Installing the ADK
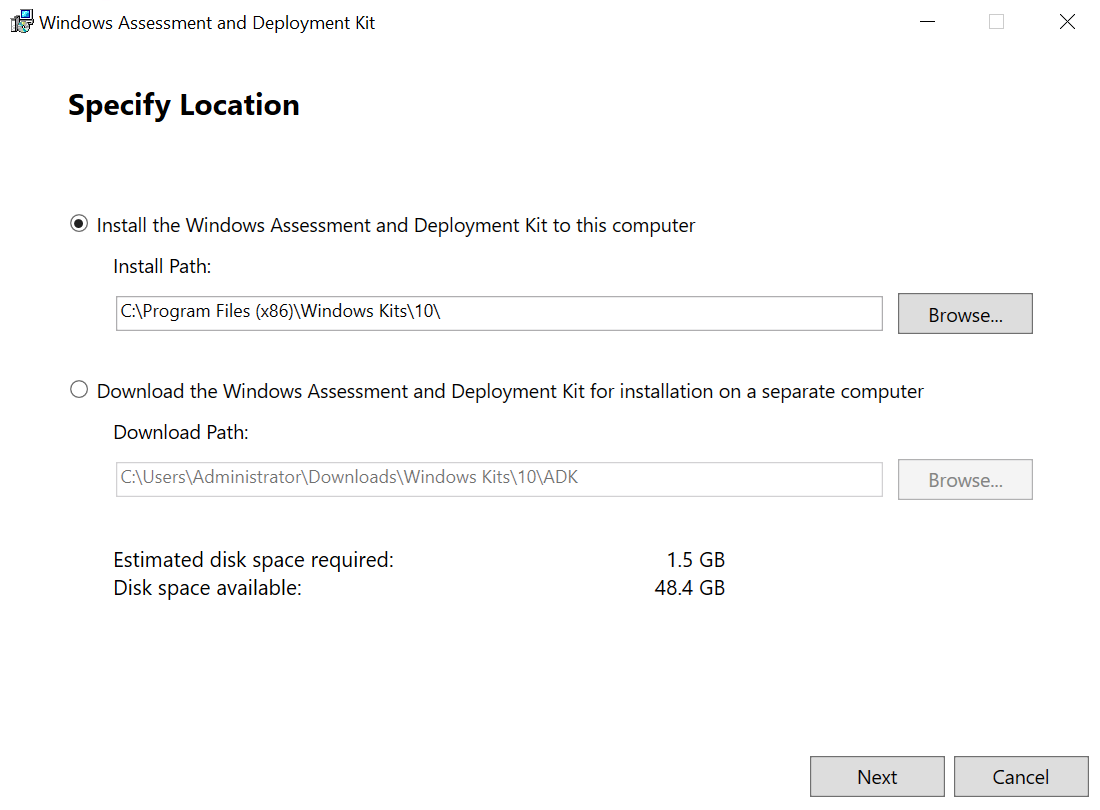
So we finished installing MDT! and WDS! This is great news! Now lets install the ADK. The ADK links are below. They will extend the features of MDT. It's important to know we will install the ADK FIRST then the ADK PE SECOND! Feel free to download them both for now though.Once you have the ADK lets begin the install. Again we will let this install to "C:\".
After a few EULA windows we are given the selection menu. It is ok to leave it default. Simply press "Install".
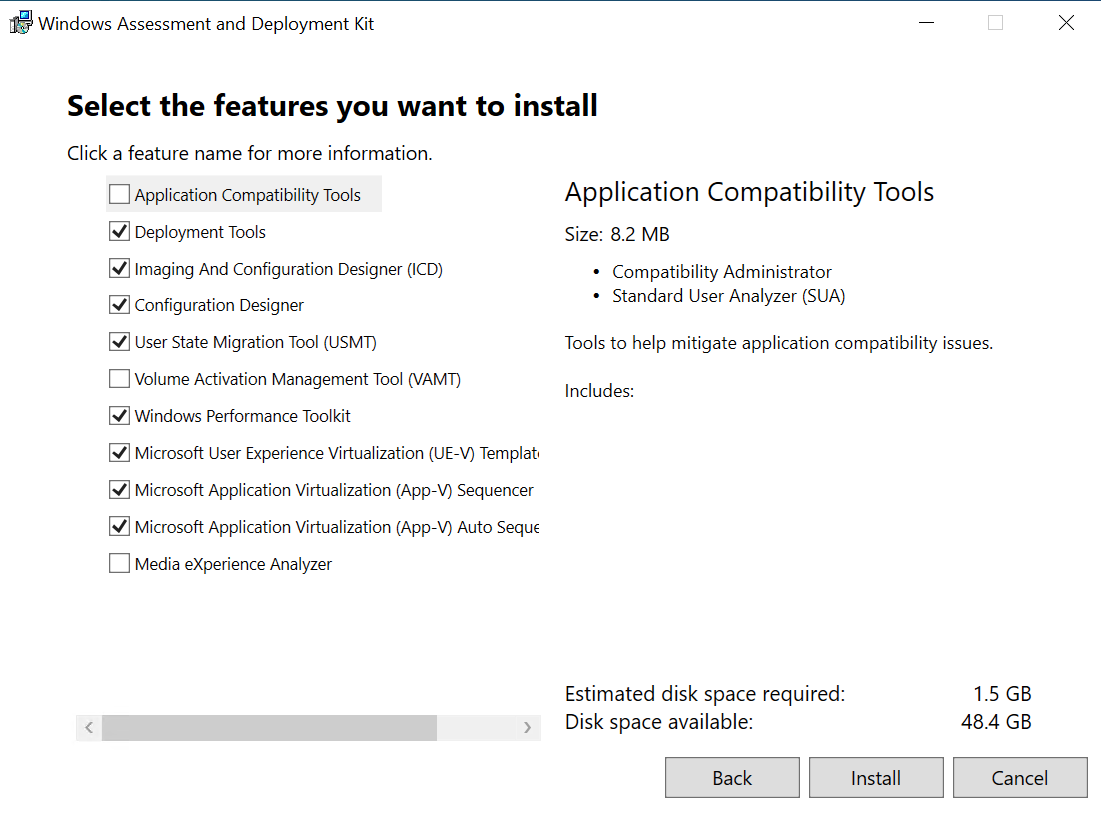
The ADK installed!
Now that the main ADK is installed, lets install the PE add-on. Again like before, it is more or less a next fest. don't worry about the paths.
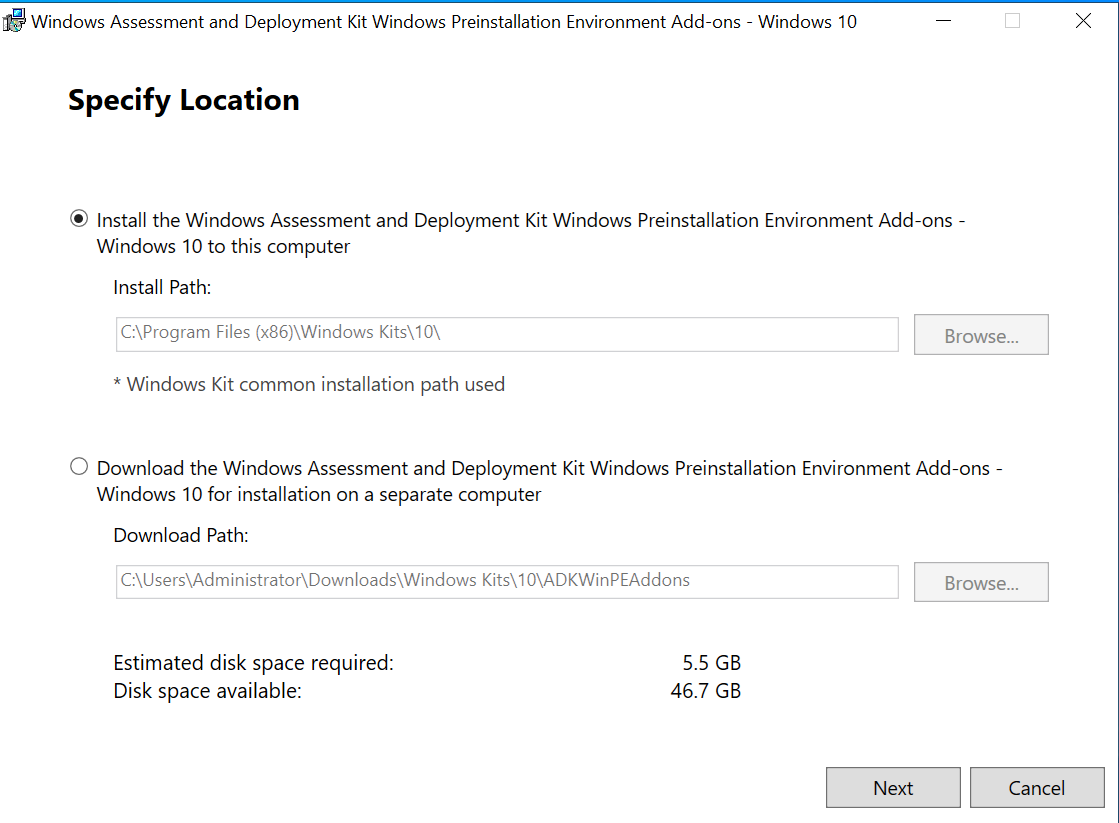
"Wait doesn't this say Windows 10?" Yes! The Windows 11 ADK PE dropped support for x86. This is because Windows is going x64 only. However their is a bug in the control panel that still attempts to read the x86 directory, so we are working around it by installing the 10 ADK PE. Which is fine for our use case. You can read more about it here: https://learn.microsoft.com/en-us/a...oyment-workbench-crashes-when-opening-the-win
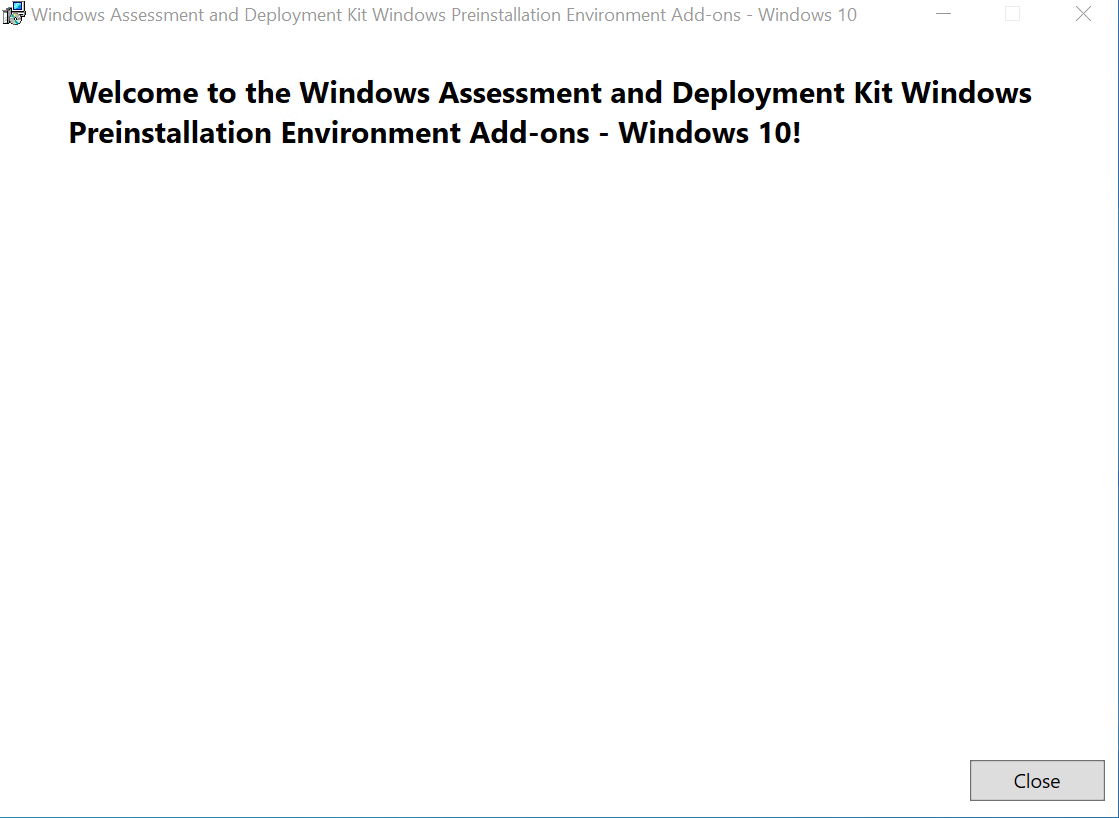
Nice! the PE finished installing!
Finally, with the x86 issue taken care of. We need to fix one last bug with this specific build. The errata is here: https://learn.microsoft.com/en-us/mem/configmgr/mdt/known-issues
Run this command in an admin terminal:
reg.exe add "HKLM\Software\Microsoft\Internet Explorer\Main" /t REG_DWORD /v JscriptReplacement /d 0 /f
Then navigate too and edit.
Code:
C:\Program Files\Microsoft Deployment Toolkit\Templates\Unattend_PE_x64.xml
Code:
<unattend xmlns="urn:schemas-microsoft-com:unattend">
    <settings pass="windowsPE">
        <component name="Microsoft-Windows-Setup" processorArchitecture="amd64" publicKeyToken="31bf3856ad364e35" language="neutral" versionScope="nonSxS" xmlns:wcm="http://schemas.microsoft.com/WMIConfig/2002/State">
            <Display>
                <ColorDepth>32</ColorDepth>
                <HorizontalResolution>1024</HorizontalResolution>
                <RefreshRate>60</RefreshRate>
                <VerticalResolution>768</VerticalResolution>
            </Display>
            <RunSynchronous>
                <RunSynchronousCommand wcm:action="add">
                    <Description>Lite Touch PE</Description>
                    <Order>1</Order>
                    <Path>reg.exe add "HKLM\Software\Microsoft\Internet Explorer\Main" /t REG_DWORD /v JscriptReplacement /d 0 /f</Path>
                </RunSynchronousCommand>
                <RunSynchronousCommand wcm:action="add">
                    <Description>Lite Touch PE</Description>
                    <Order>2</Order>
                    <Path>wscript.exe X:\Deploy\Scripts\LiteTouch.wsf</Path>
                </RunSynchronousCommand>
            </RunSynchronous>
        </component>
    </settings>
</unattend>
Configure MDT
Now that we have everything installed grab the script from my repo or the attachment on this post. We need to configure MDT and then create our first image!
To get started lets open MDT.
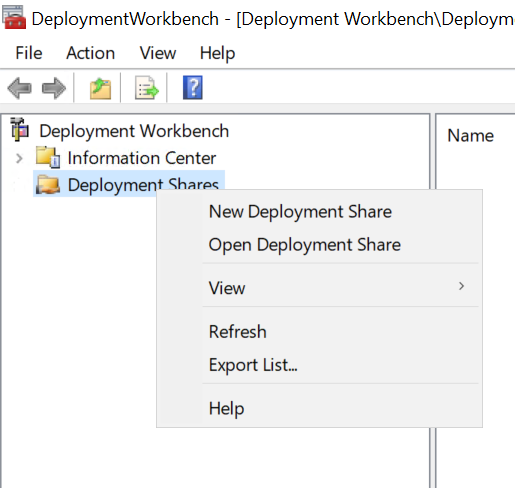
Once open right click on "Deployment Shares" and select "New Deployment Share".
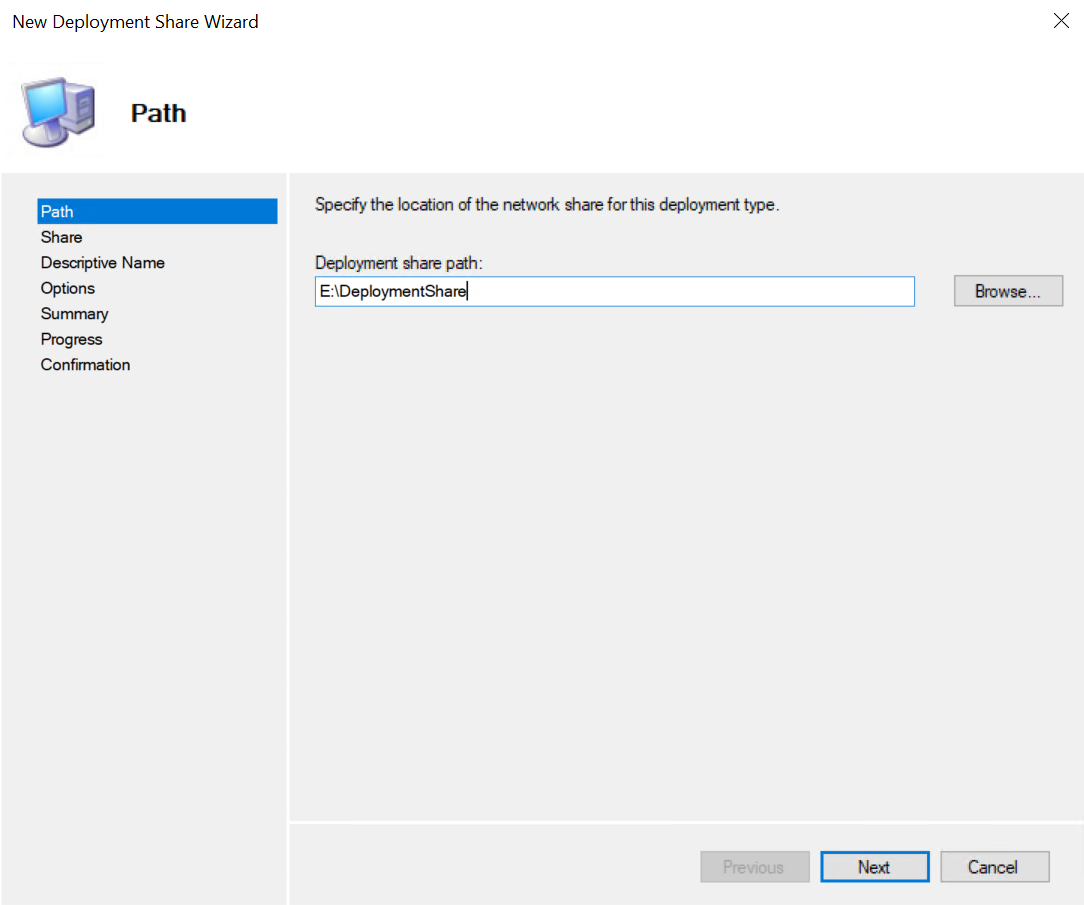
The first thing we are asked is important! Just like WDS we will change the drive letter. We want to keep the path but we want to send anything we put here to our data drive. In my case, it is "E:\"
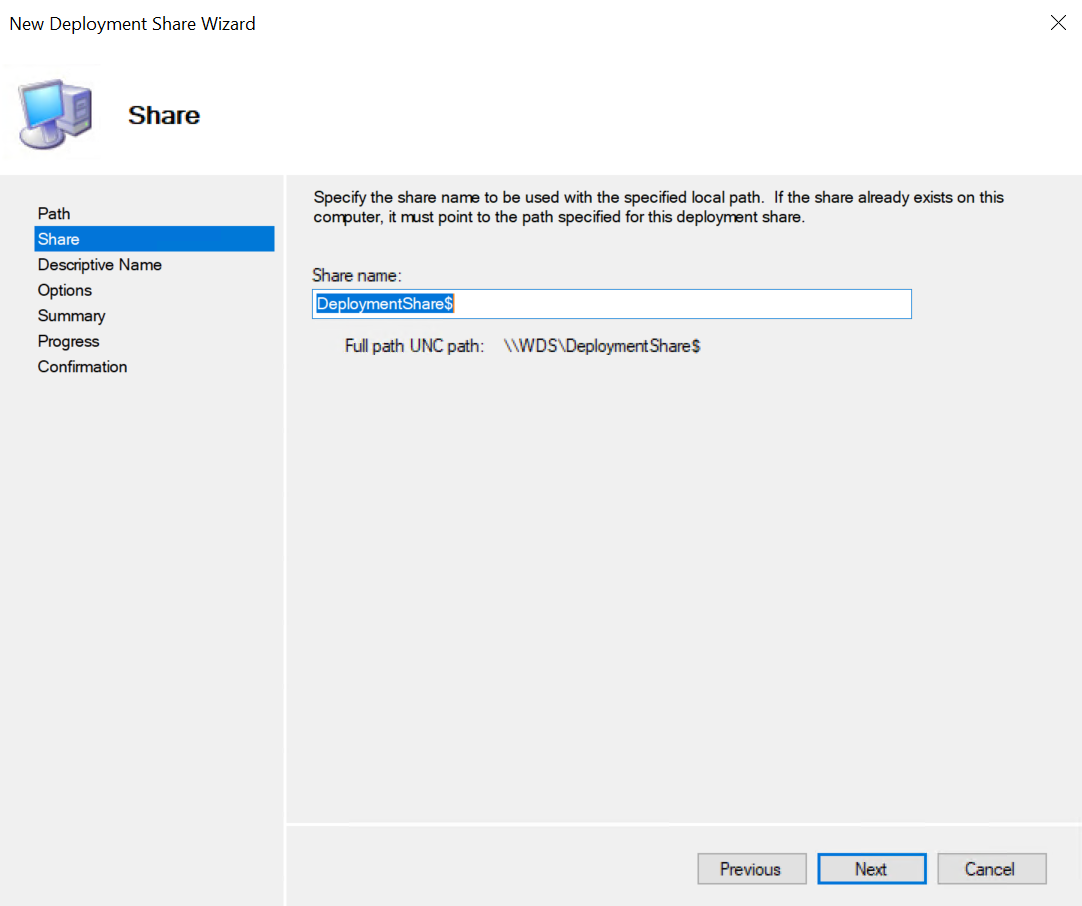
We will be asked some other default questions. We can leave the share name as is.
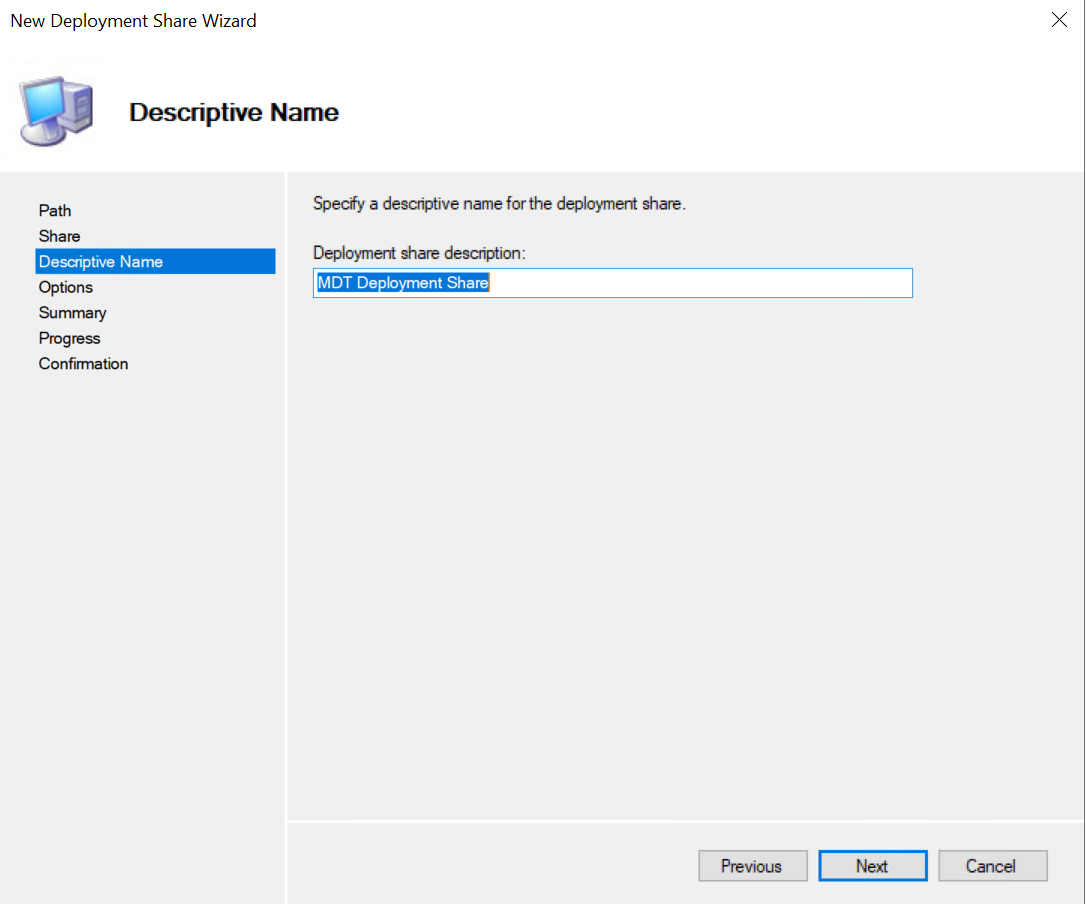
The share description can also be left default.
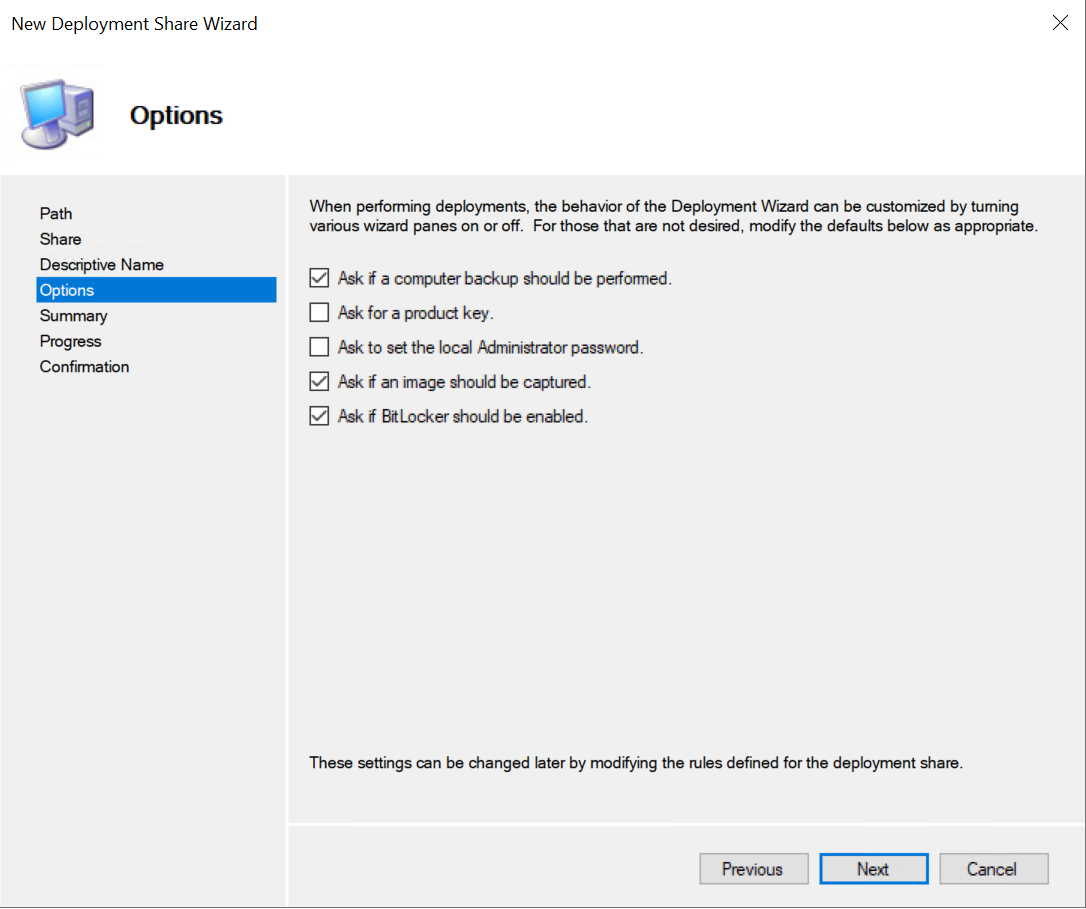
The next screen gives us some default options for the actual deployment. Remember we can be as hands on or hands off as we want. These boxes check configuration options that we will be changing later. They can be changed at any time, so for now lets leave them as is. Click "Next".
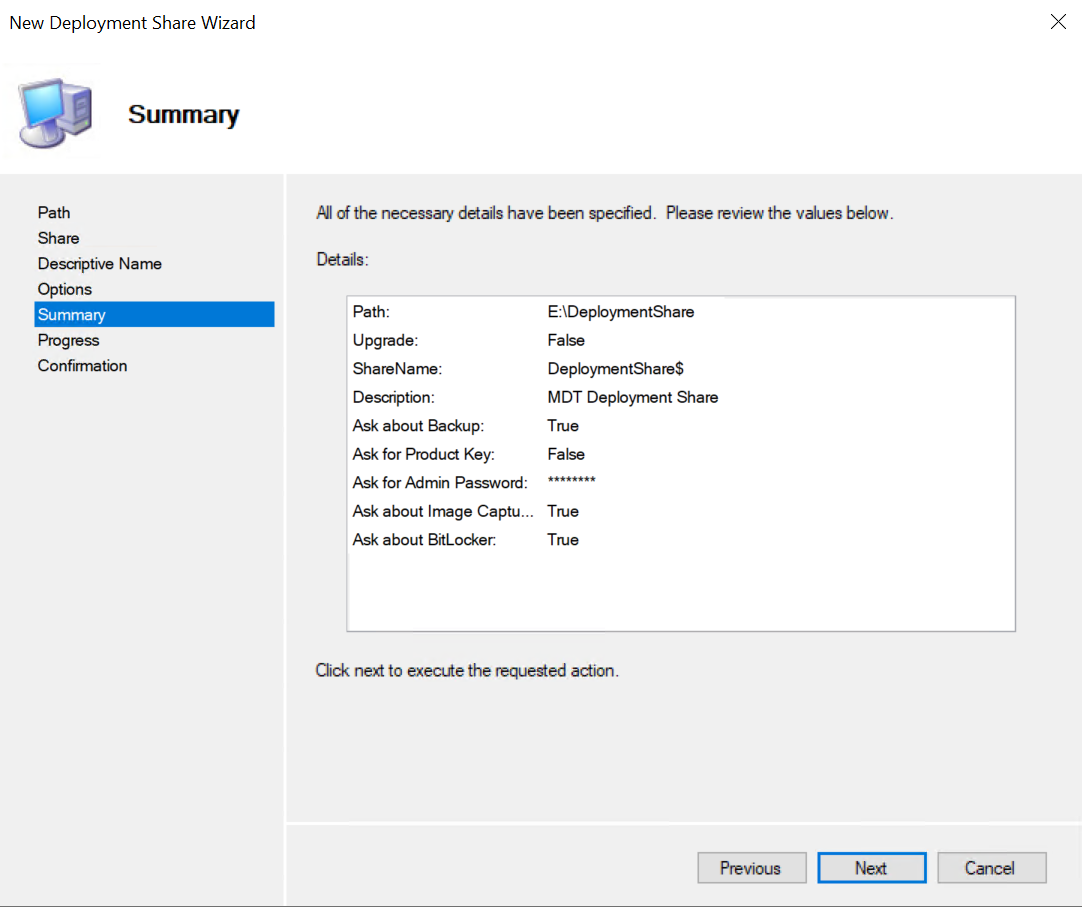
We are now presented with a summary screen, click "Next" to move forward.
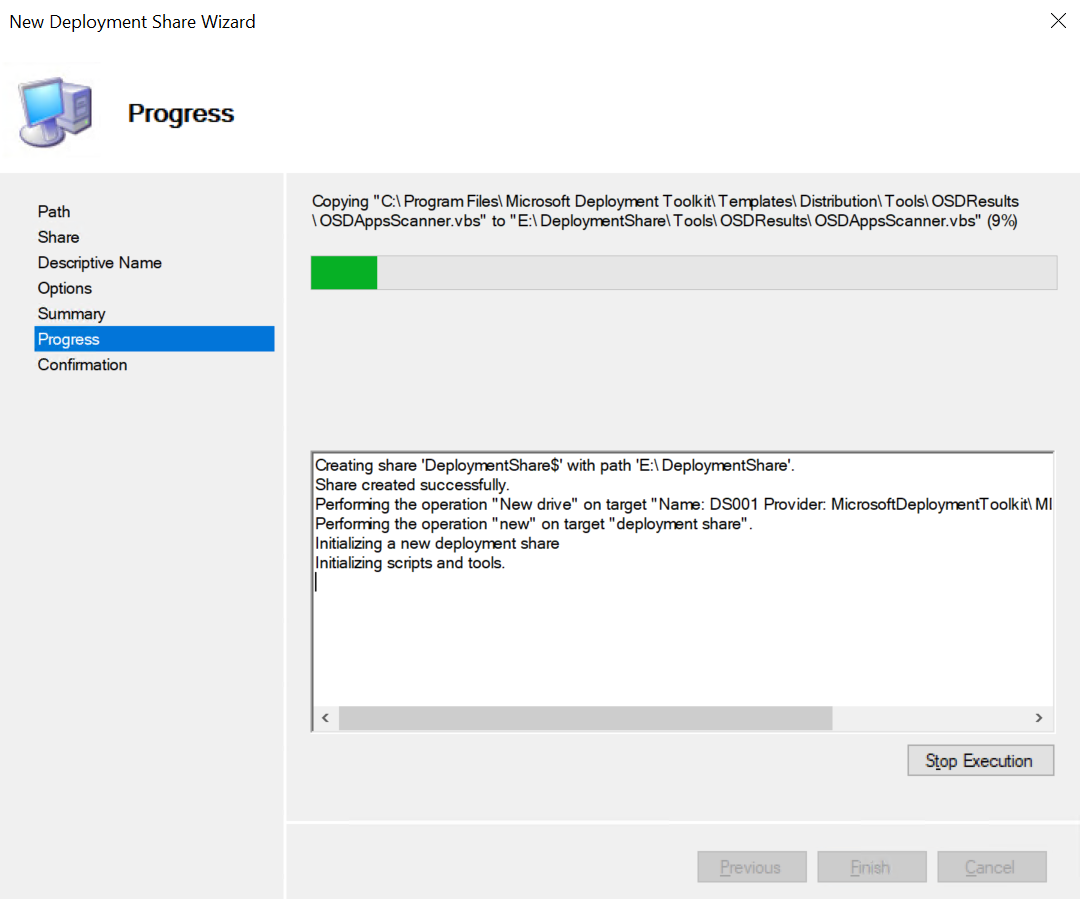
The configuration will now begin and build the share that WDS/MDT will use when deploying images.
Once its complete just hit finish.
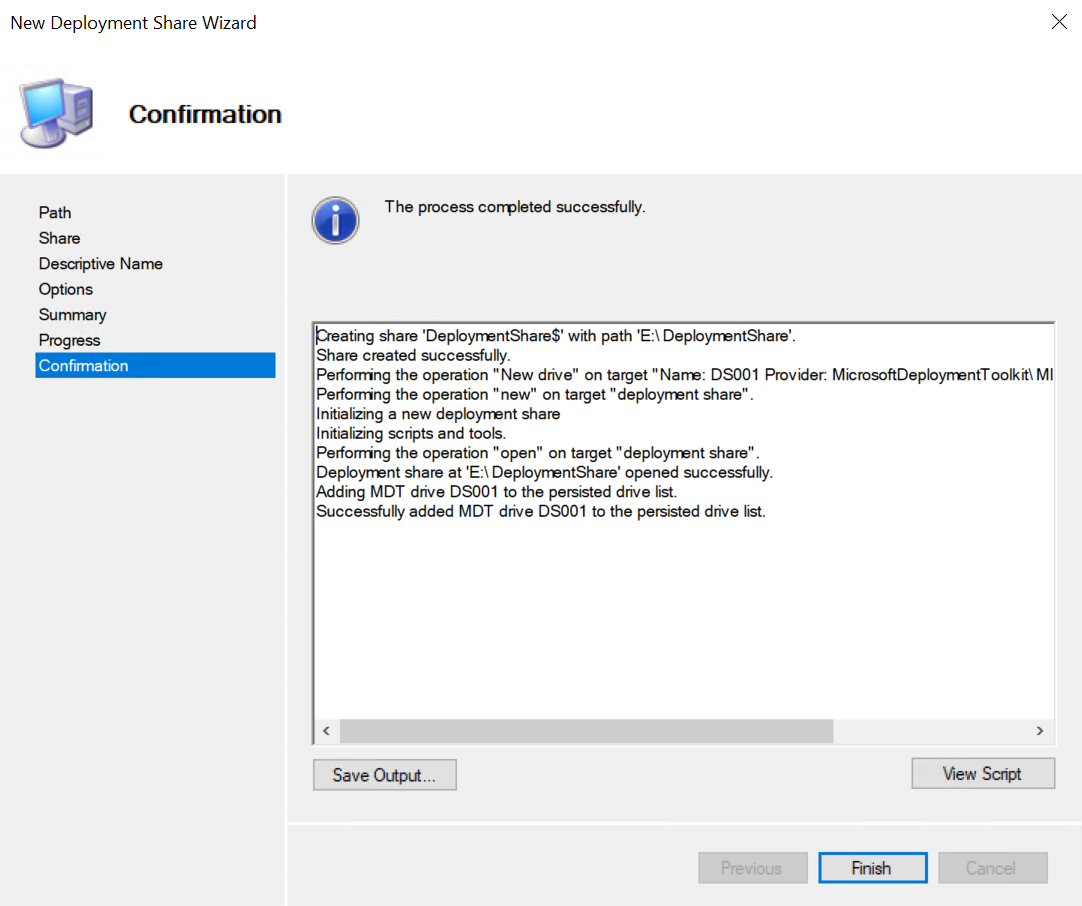
Sweet!! We can now expand the share in MDT we have options!
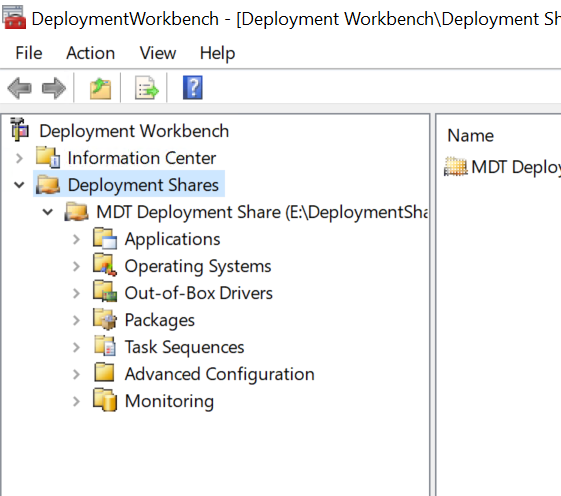
Great job!
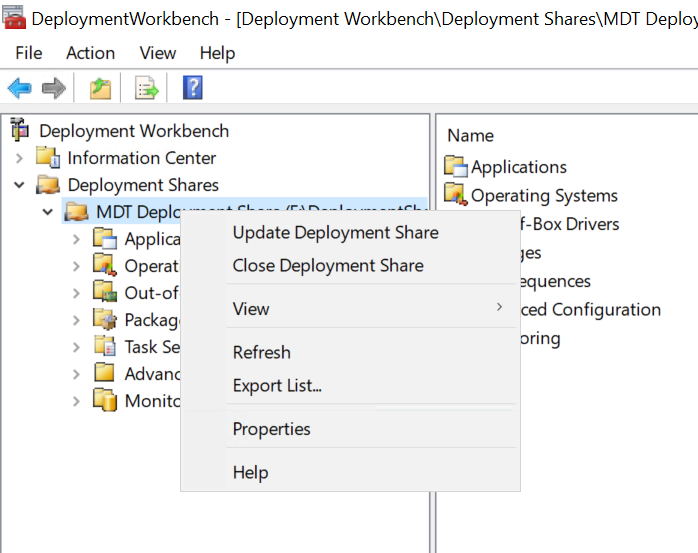
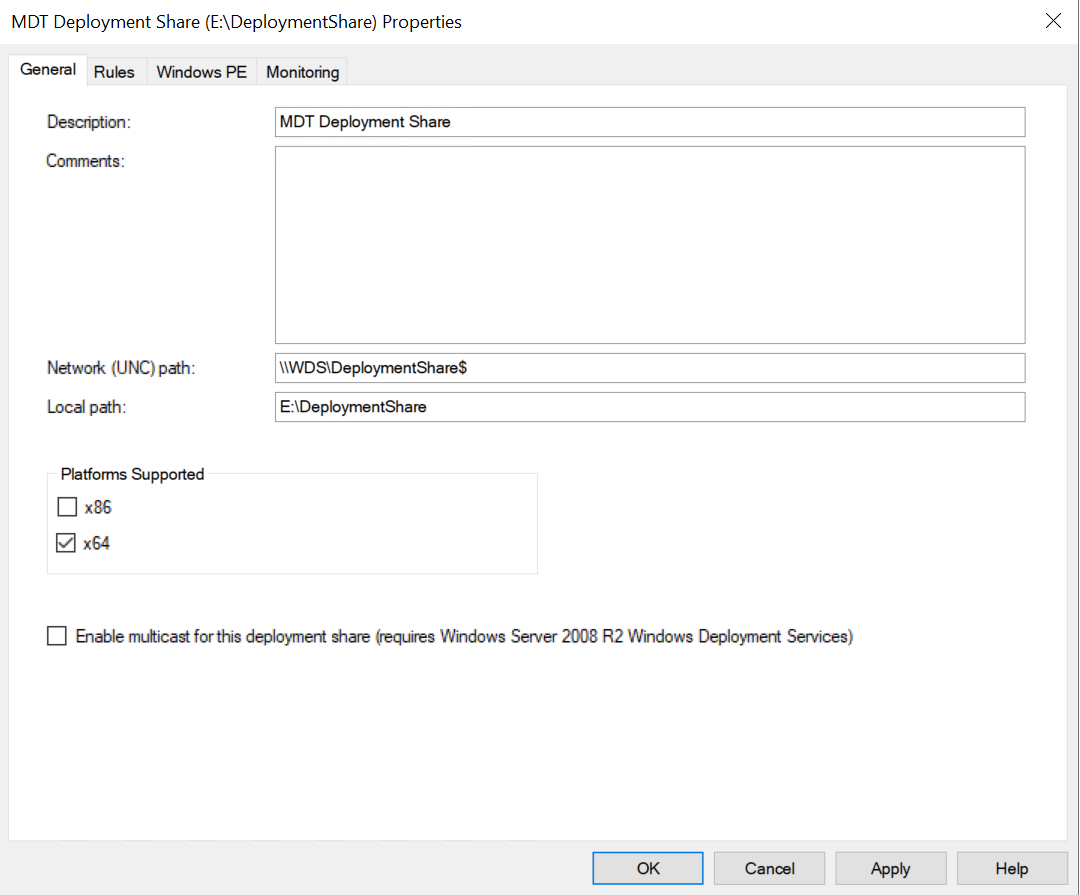
Lets set some basic properties. This is how we will handle modifications to our settings. These changes are stored in the "boot/pe .wim" that is loaded over PXE into ram. I am sure you remember talking to me about it. With that said, anytime you want to make changes we will need to update this wim since these changes are written to it. Lets start by right clicking on the share and selecting properties.
Now that the configuration window is open, we land on the "General" tab. For starters, since you should embrace this century we can uncheck x86 under "Platforms Supported". It will save us some space.
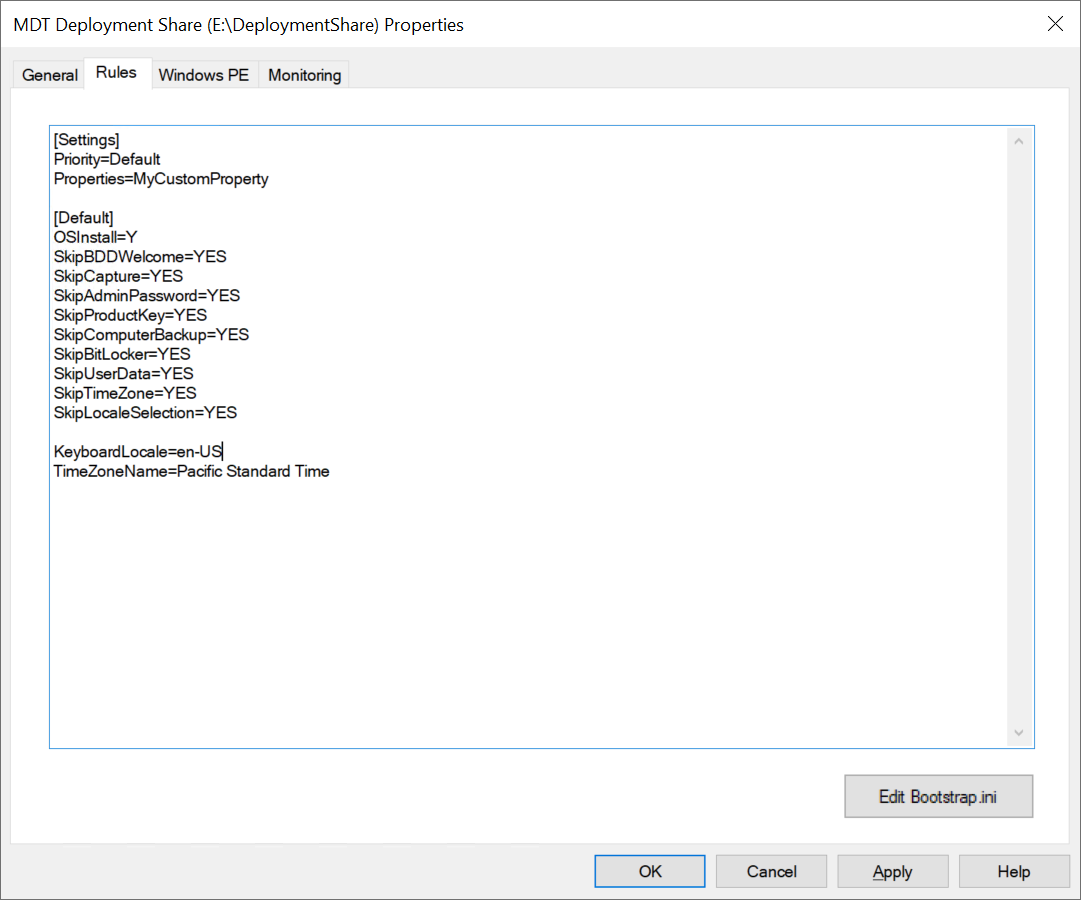
Next we want to go to the "Rules" tab. This tab controls the main sequencing of MDT. Those checkboxes I mentioned earlier were just a few of the ones that show up here. You can take a look at articles regarding the options that can be used: https://www.google.com/search?q=windows+mdt+rules&sxsrf=APwXEdcVNgiWeQXk0i1roFJX3qbOegwvCQ:1681511045527&ei=hdI5ZPbbH5HpxgHgrp3YCA&ved=0ahUKEwi2srfktKr-AhWRtDEKHWBXB4sQ4dUDCBA&uact=5&oq=windows+mdt+rules&gs_lcp=Cgxnd3Mtd2l6LXNlcnAQAzIFCAAQgAQyBggAEBYQHjIGCAAQFhAeMggIABCKBRCGAzIICAAQigUQhgMyCAgAEIoFEIYDMggIABCKBRCGAzoKCAAQRxDWBBCwA0oECEEYAFDSCViOD2CQEGgBcAB4AIABqAGIAdcEkgEDMC40mAEAoAEByAEIwAEB&sclient=gws-wiz-serp
These are the defaults for "Rules" specifically:
Code:
[Settings]
Priority=Default
Properties=MyCustomProperty

[Default]
OSInstall=Y
SkipCapture=NO
SkipAdminPassword=YES
SkipProductKey=YES
SkipComputerBackup=NO
SkipBitLocker=NO
Here are some sane defaults you can use:
Grab you TZ info etc from here: https://www.ronnipedersen.com/2017/08/14/find-the-timezonename-for-your-sccmmdt-deployments/
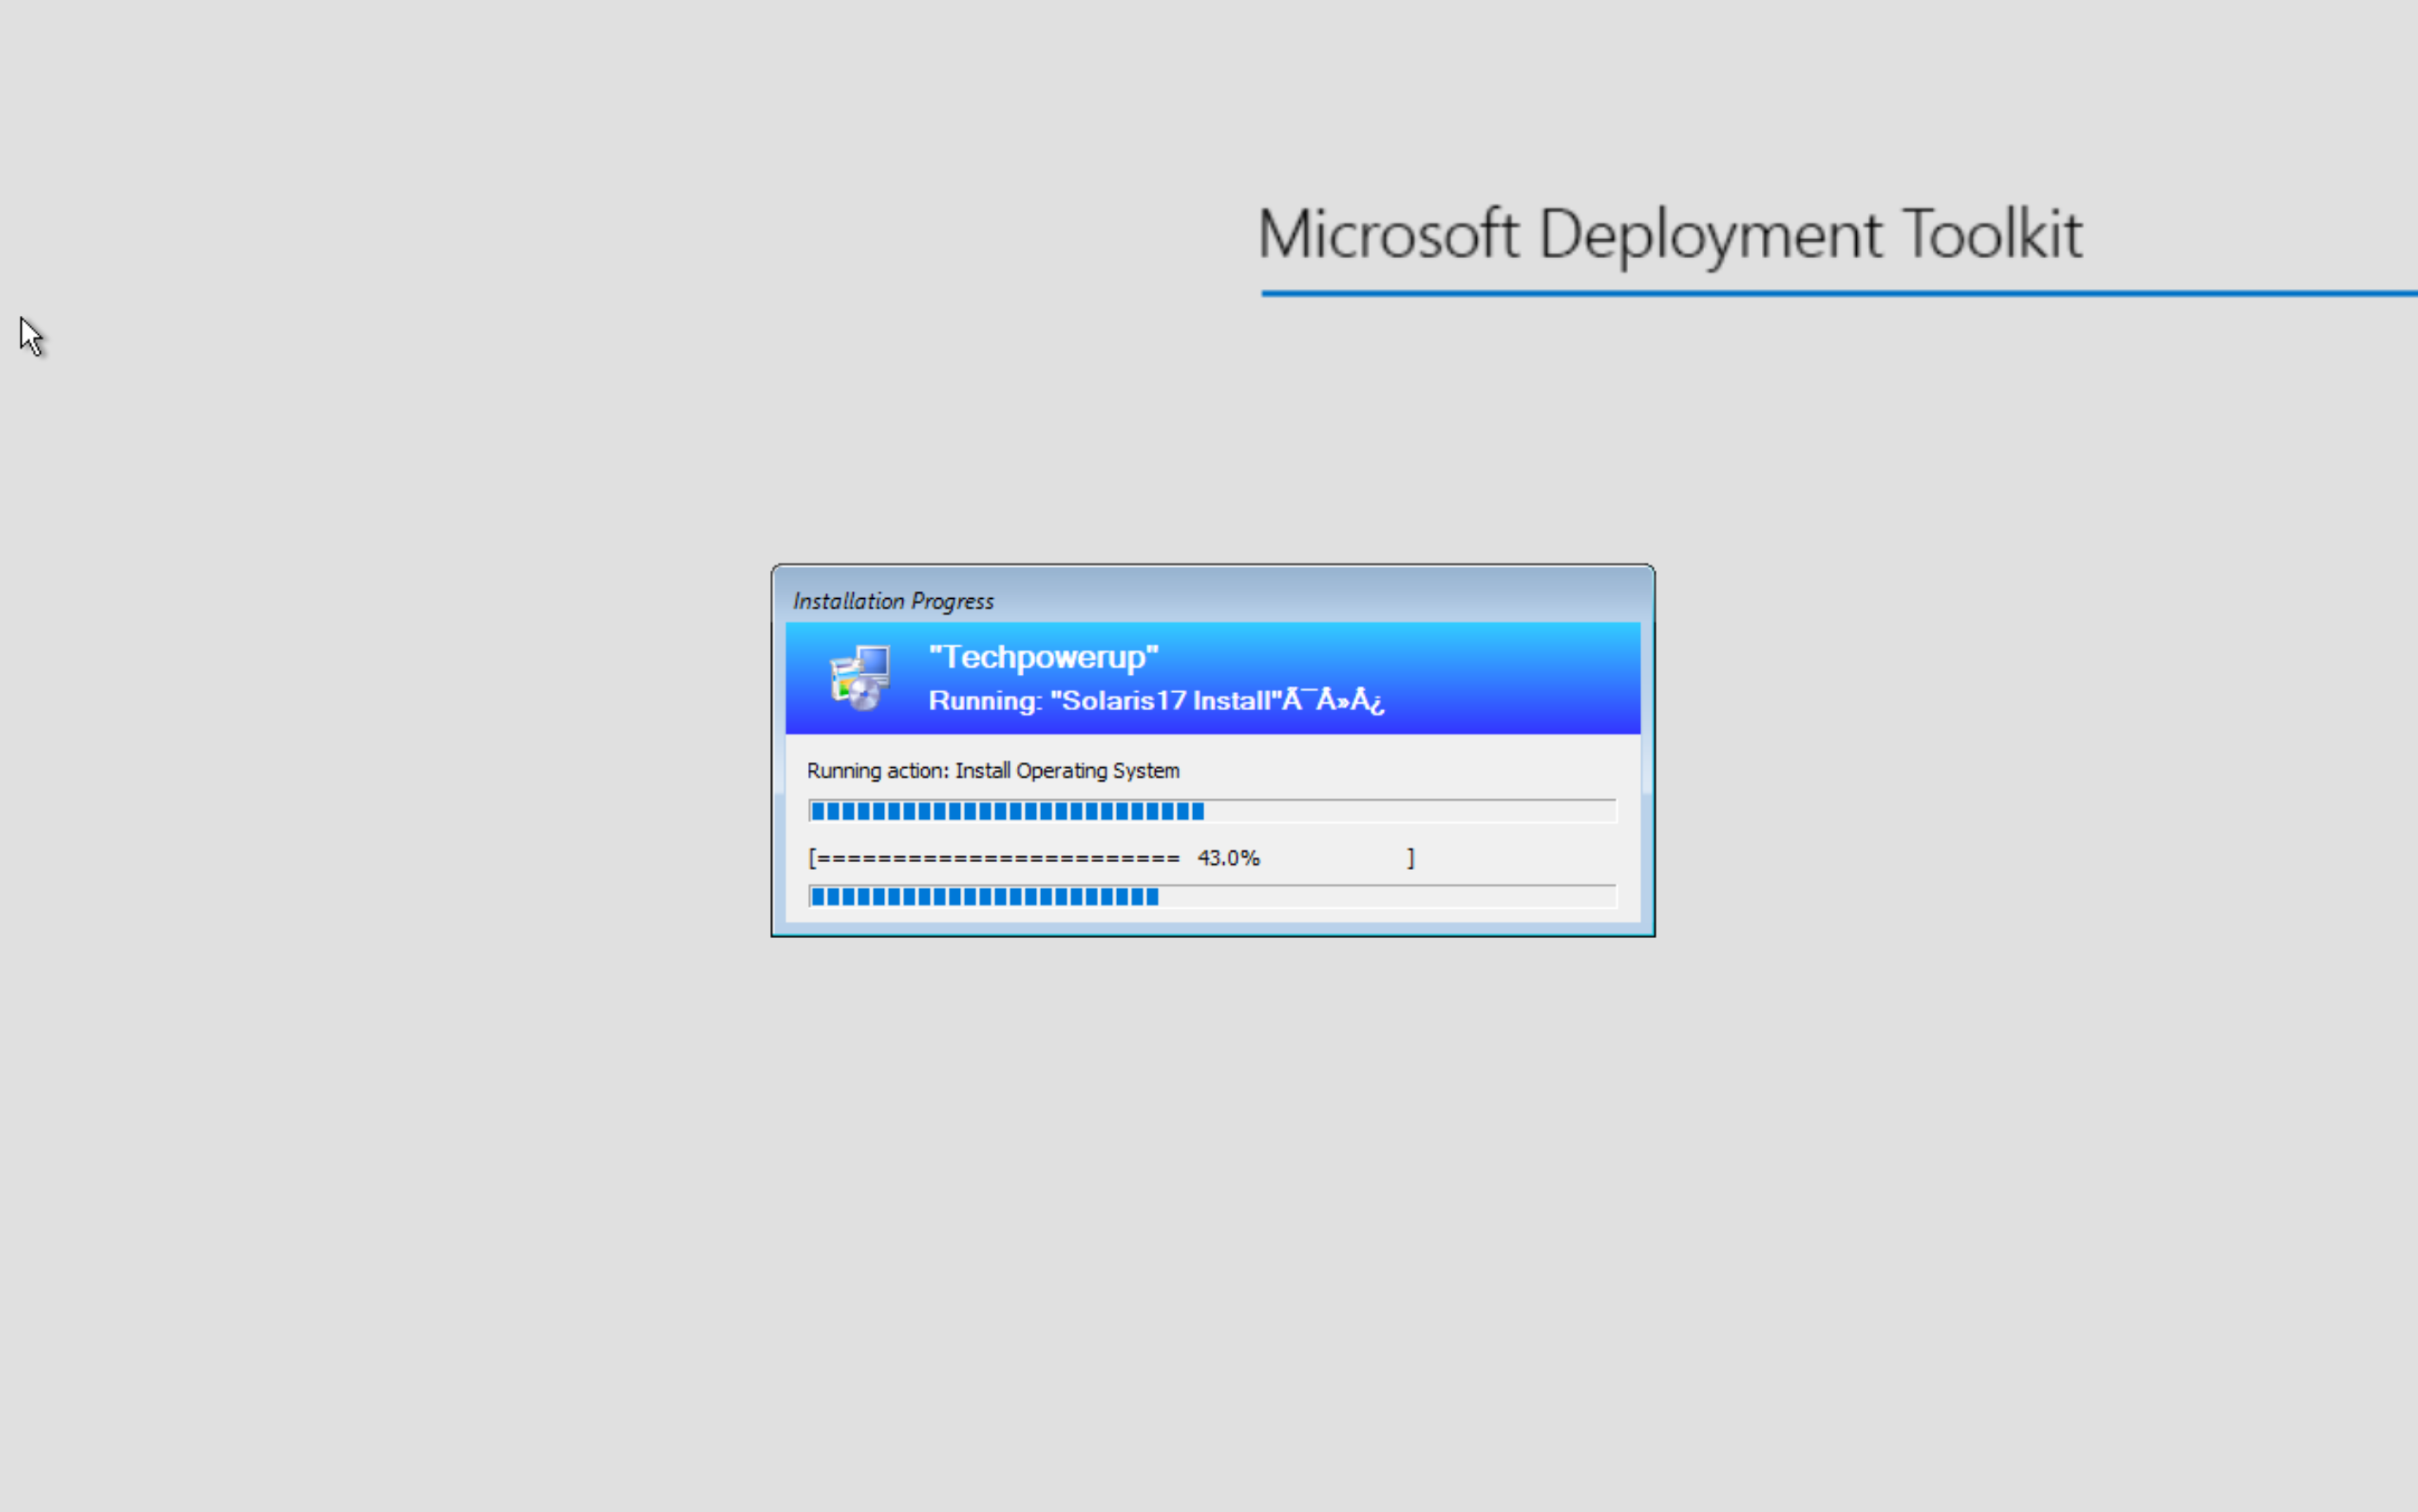
You will see the attributes I added that say "techpowerup" and "Solaris17 Install". You can change these, but I left them as is so you can see where they appear during the install process.
Code:
[Settings]
Priority=Default
Properties=MyCustomProperty

[Default]
OSInstall=Y
SkipBDDWelcome=YES
SkipCapture=YES
SkipAdminPassword=YES
SkipProductKey=YES
SkipComputerBackup=YES
SkipBitLocker=YES
SkipUserData=YES
SkipTimeZone=YES
SkipLocaleSelection=YES

_SMSTSORGNAME="Techpowerup"

_SMSTSPackageName="Solaris17 Install"

KeyboardLocale=en-US
TimeZoneName=Pacific Standard Time
It should look like this. For now we will leave "Bootstrap.ini" as is.
With this complete lets move on to the "Windows PE" tab. Select "x64" from the "Platform" dropdown at the top.
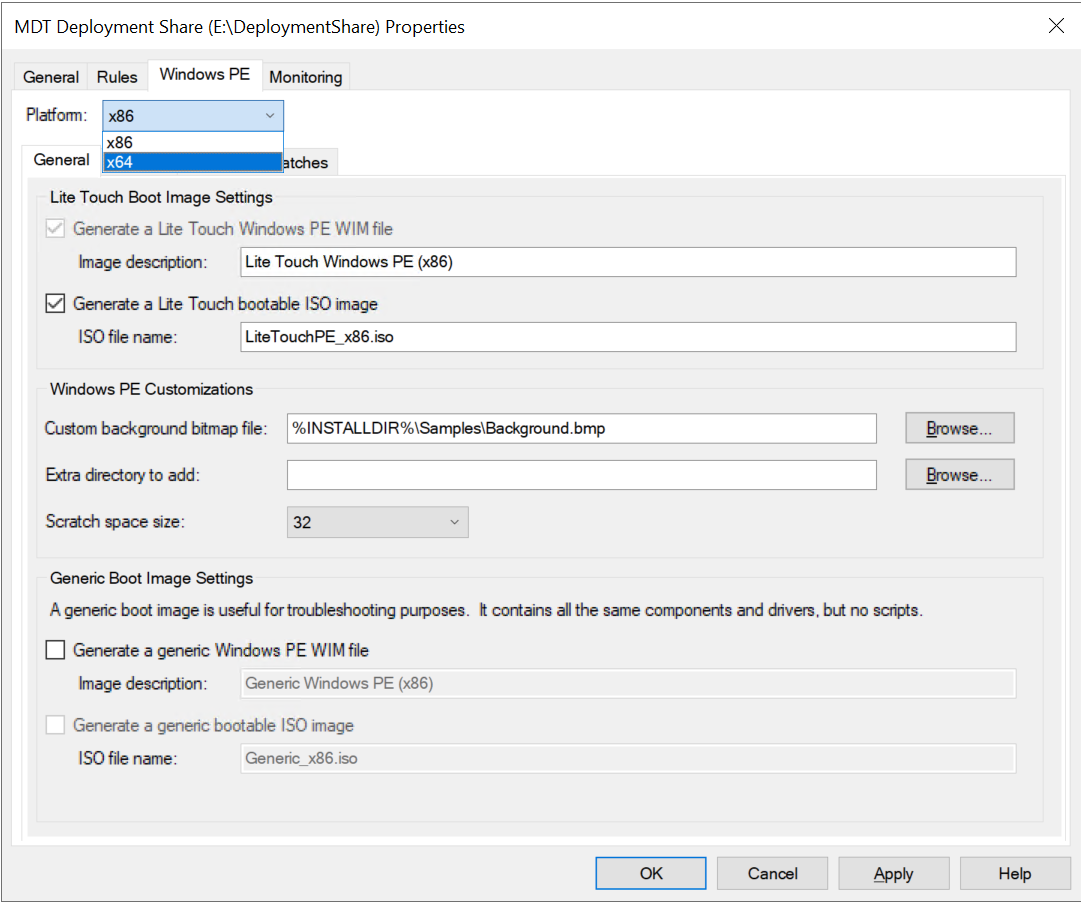
We only want the wim. So we will uncheck the box that generates the ISO image.
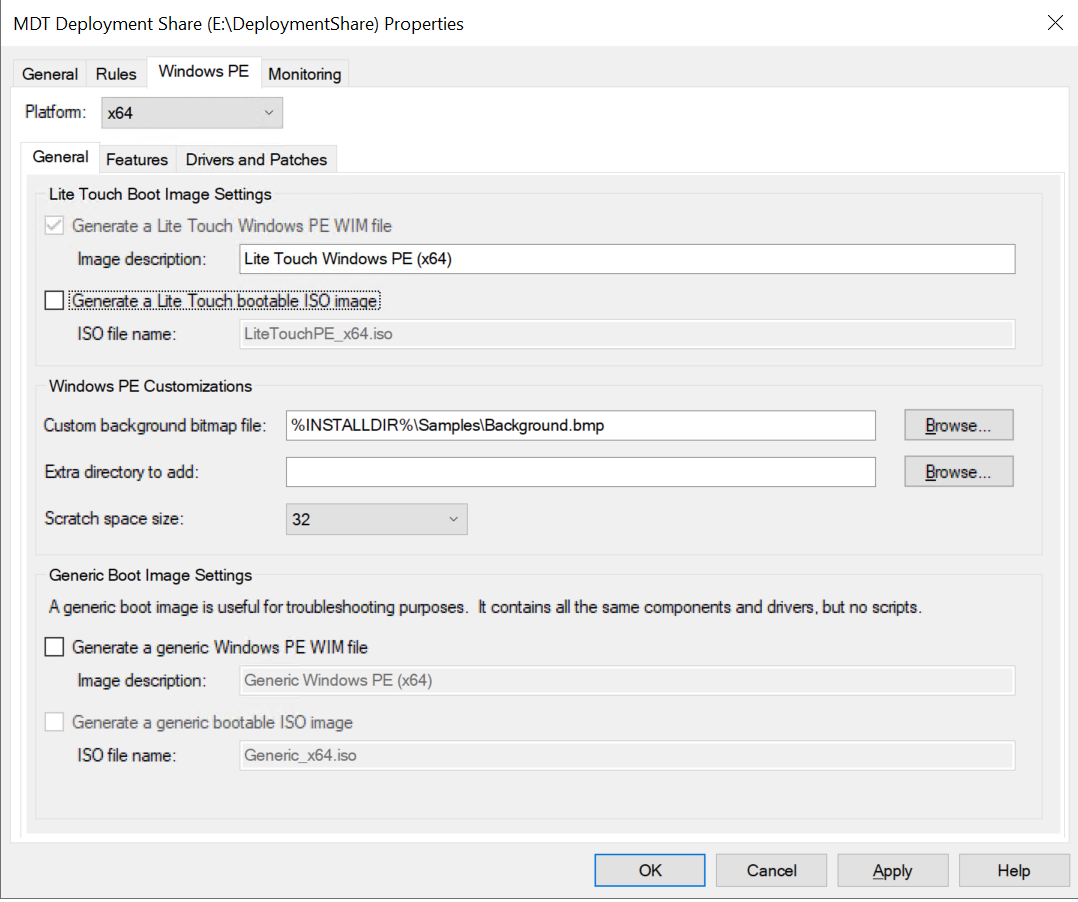
It should be noted that we can do all kinds of things here. Like change the image name. Change the background we see during install, add drivers etc. Today we will only work on these modifications though.
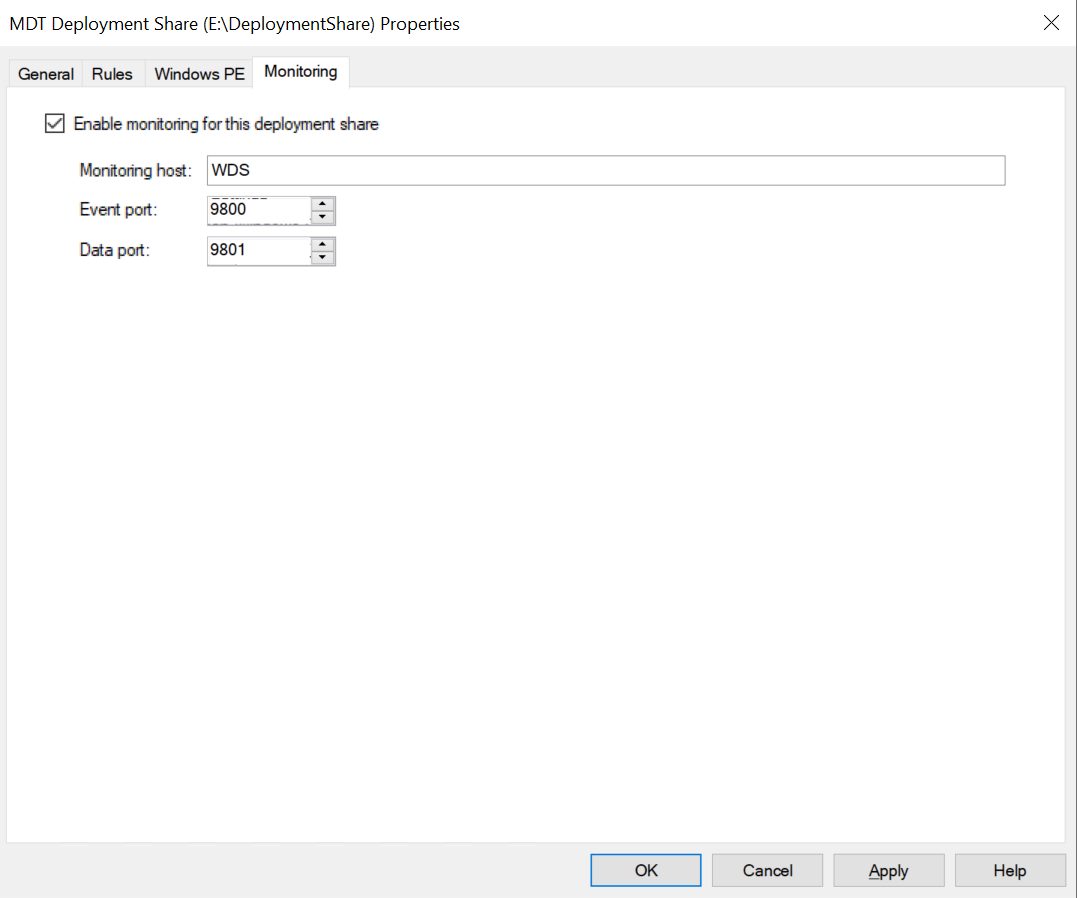
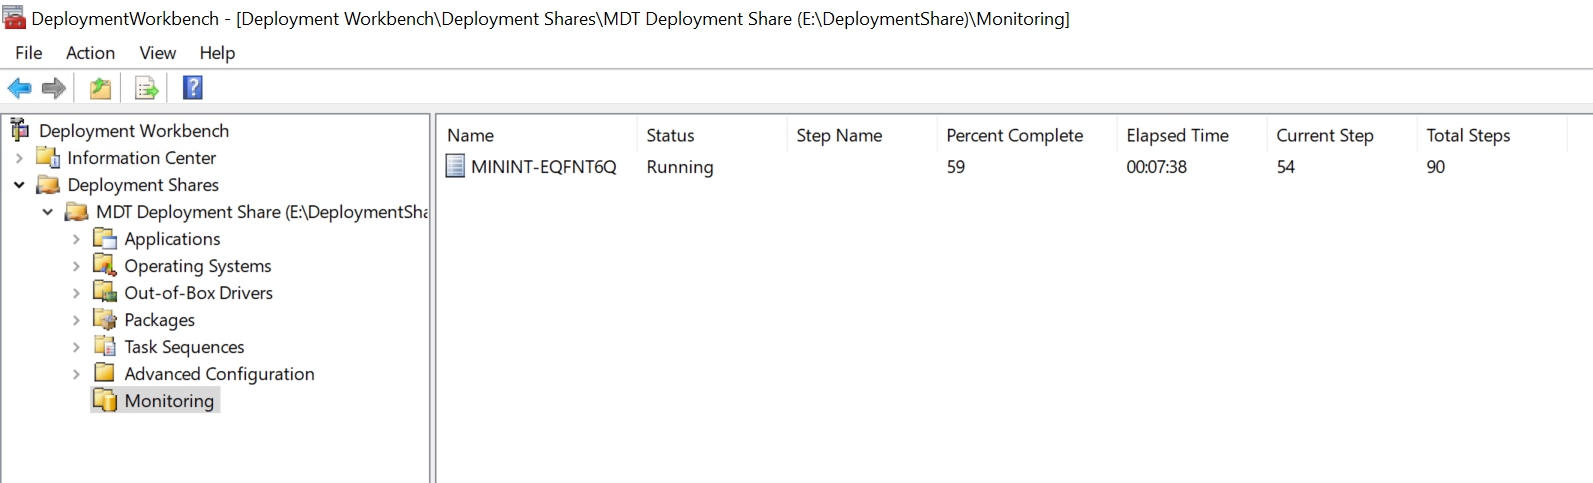
Now that that is done, go to the "Monitoring" tab. Its always good to enable monitoring, even if we wont be using it initially. Just check the box "Enable monitoring for this deployment share"
With the configuration now complete click "Apply" followed by "OK".
Getting our Images
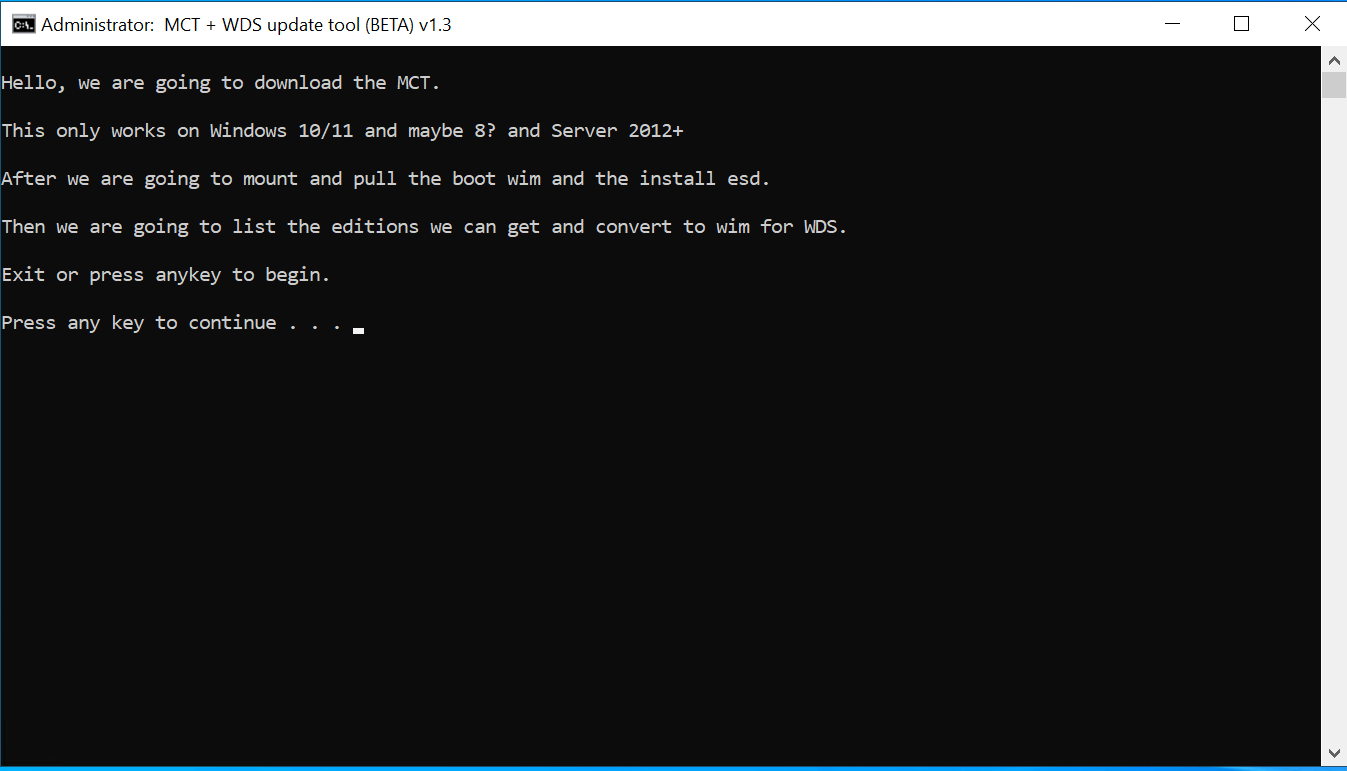
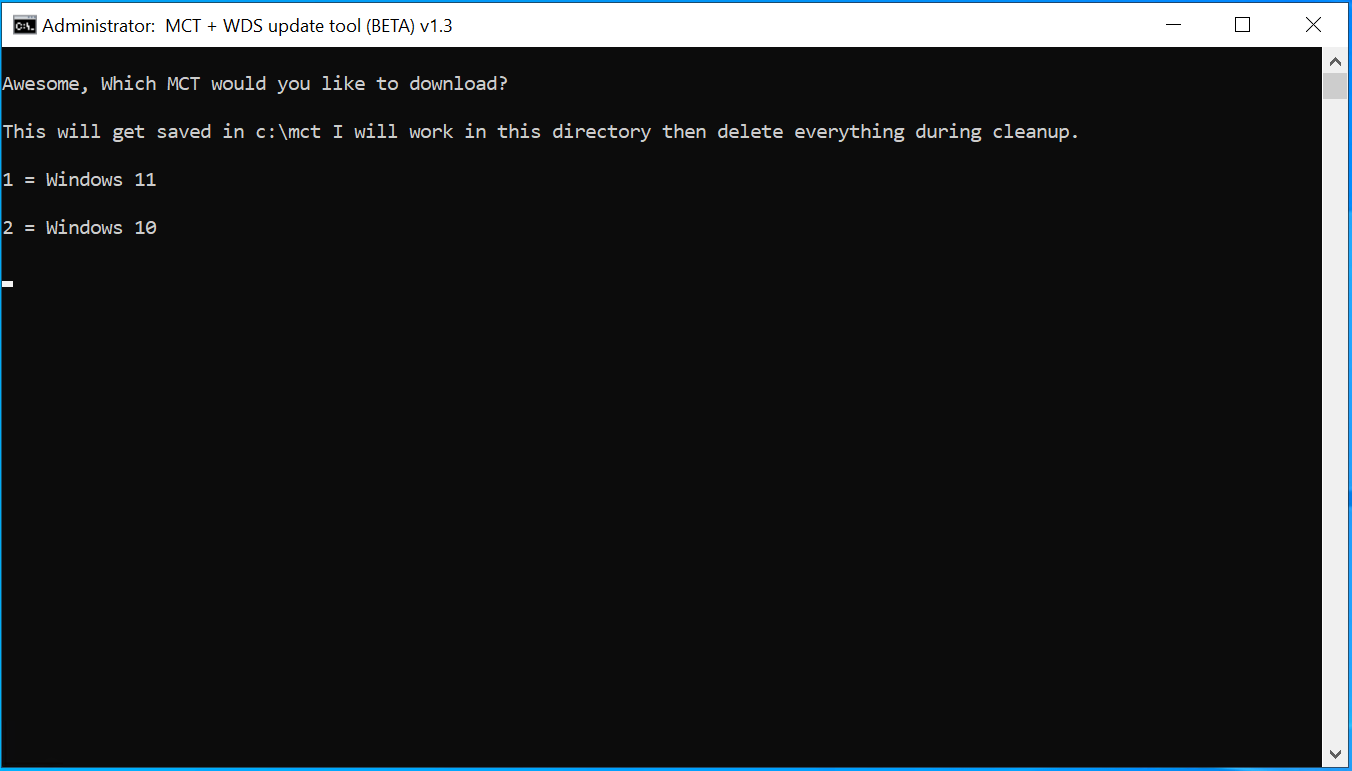
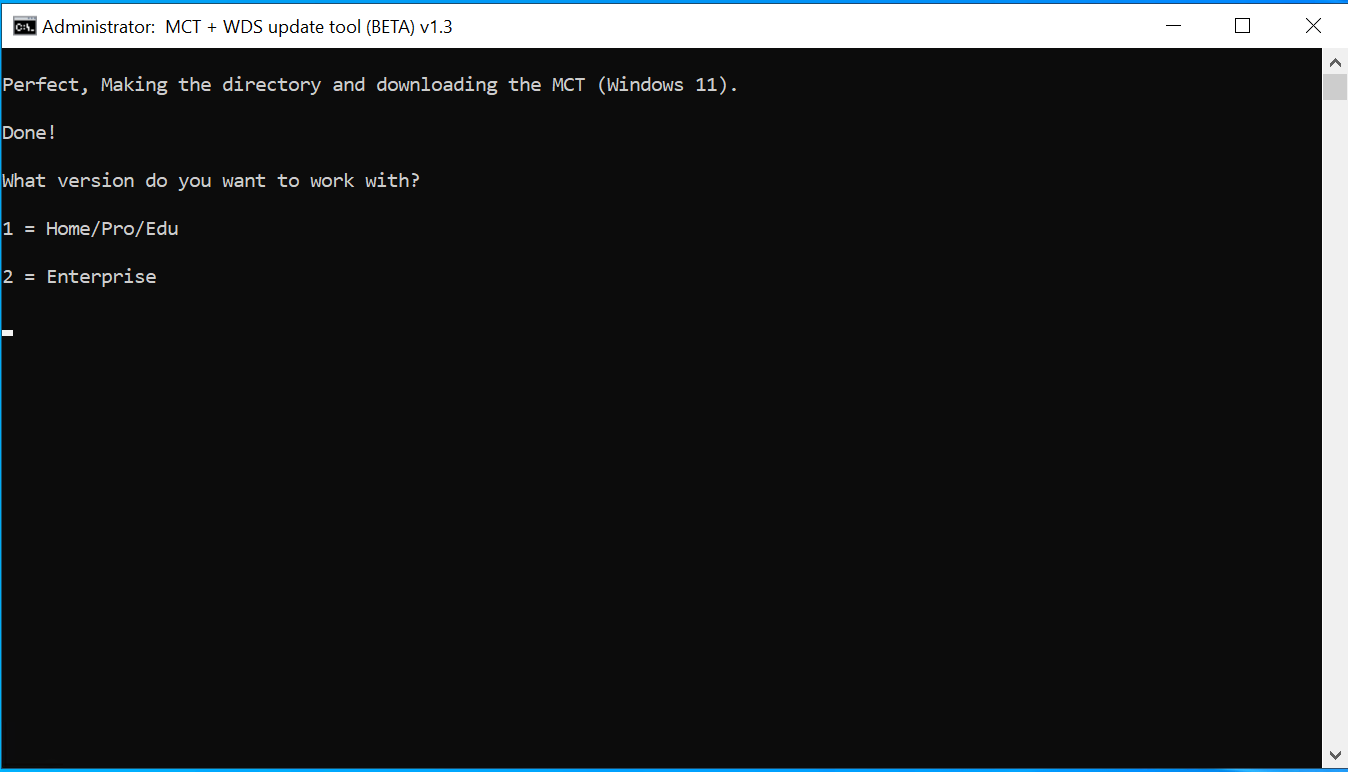
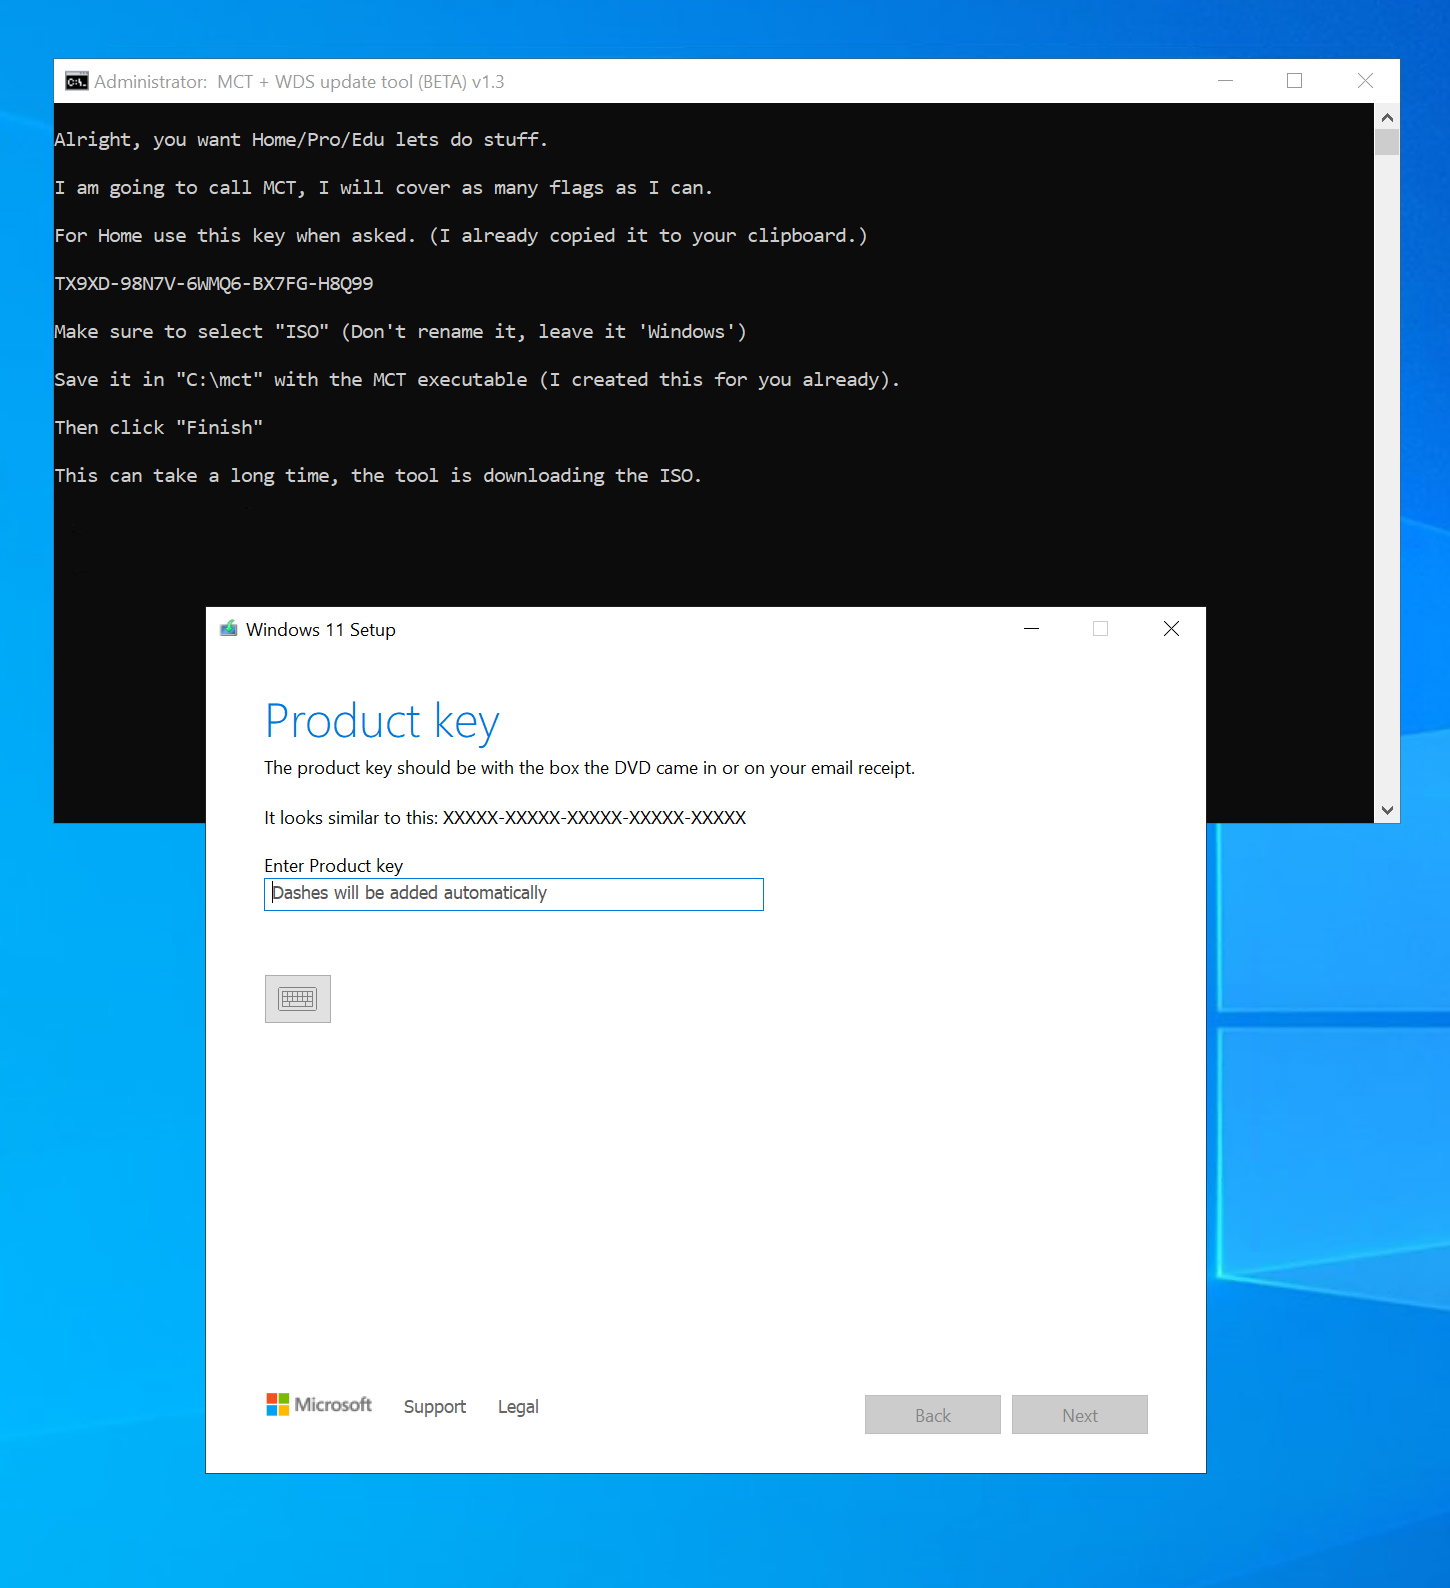
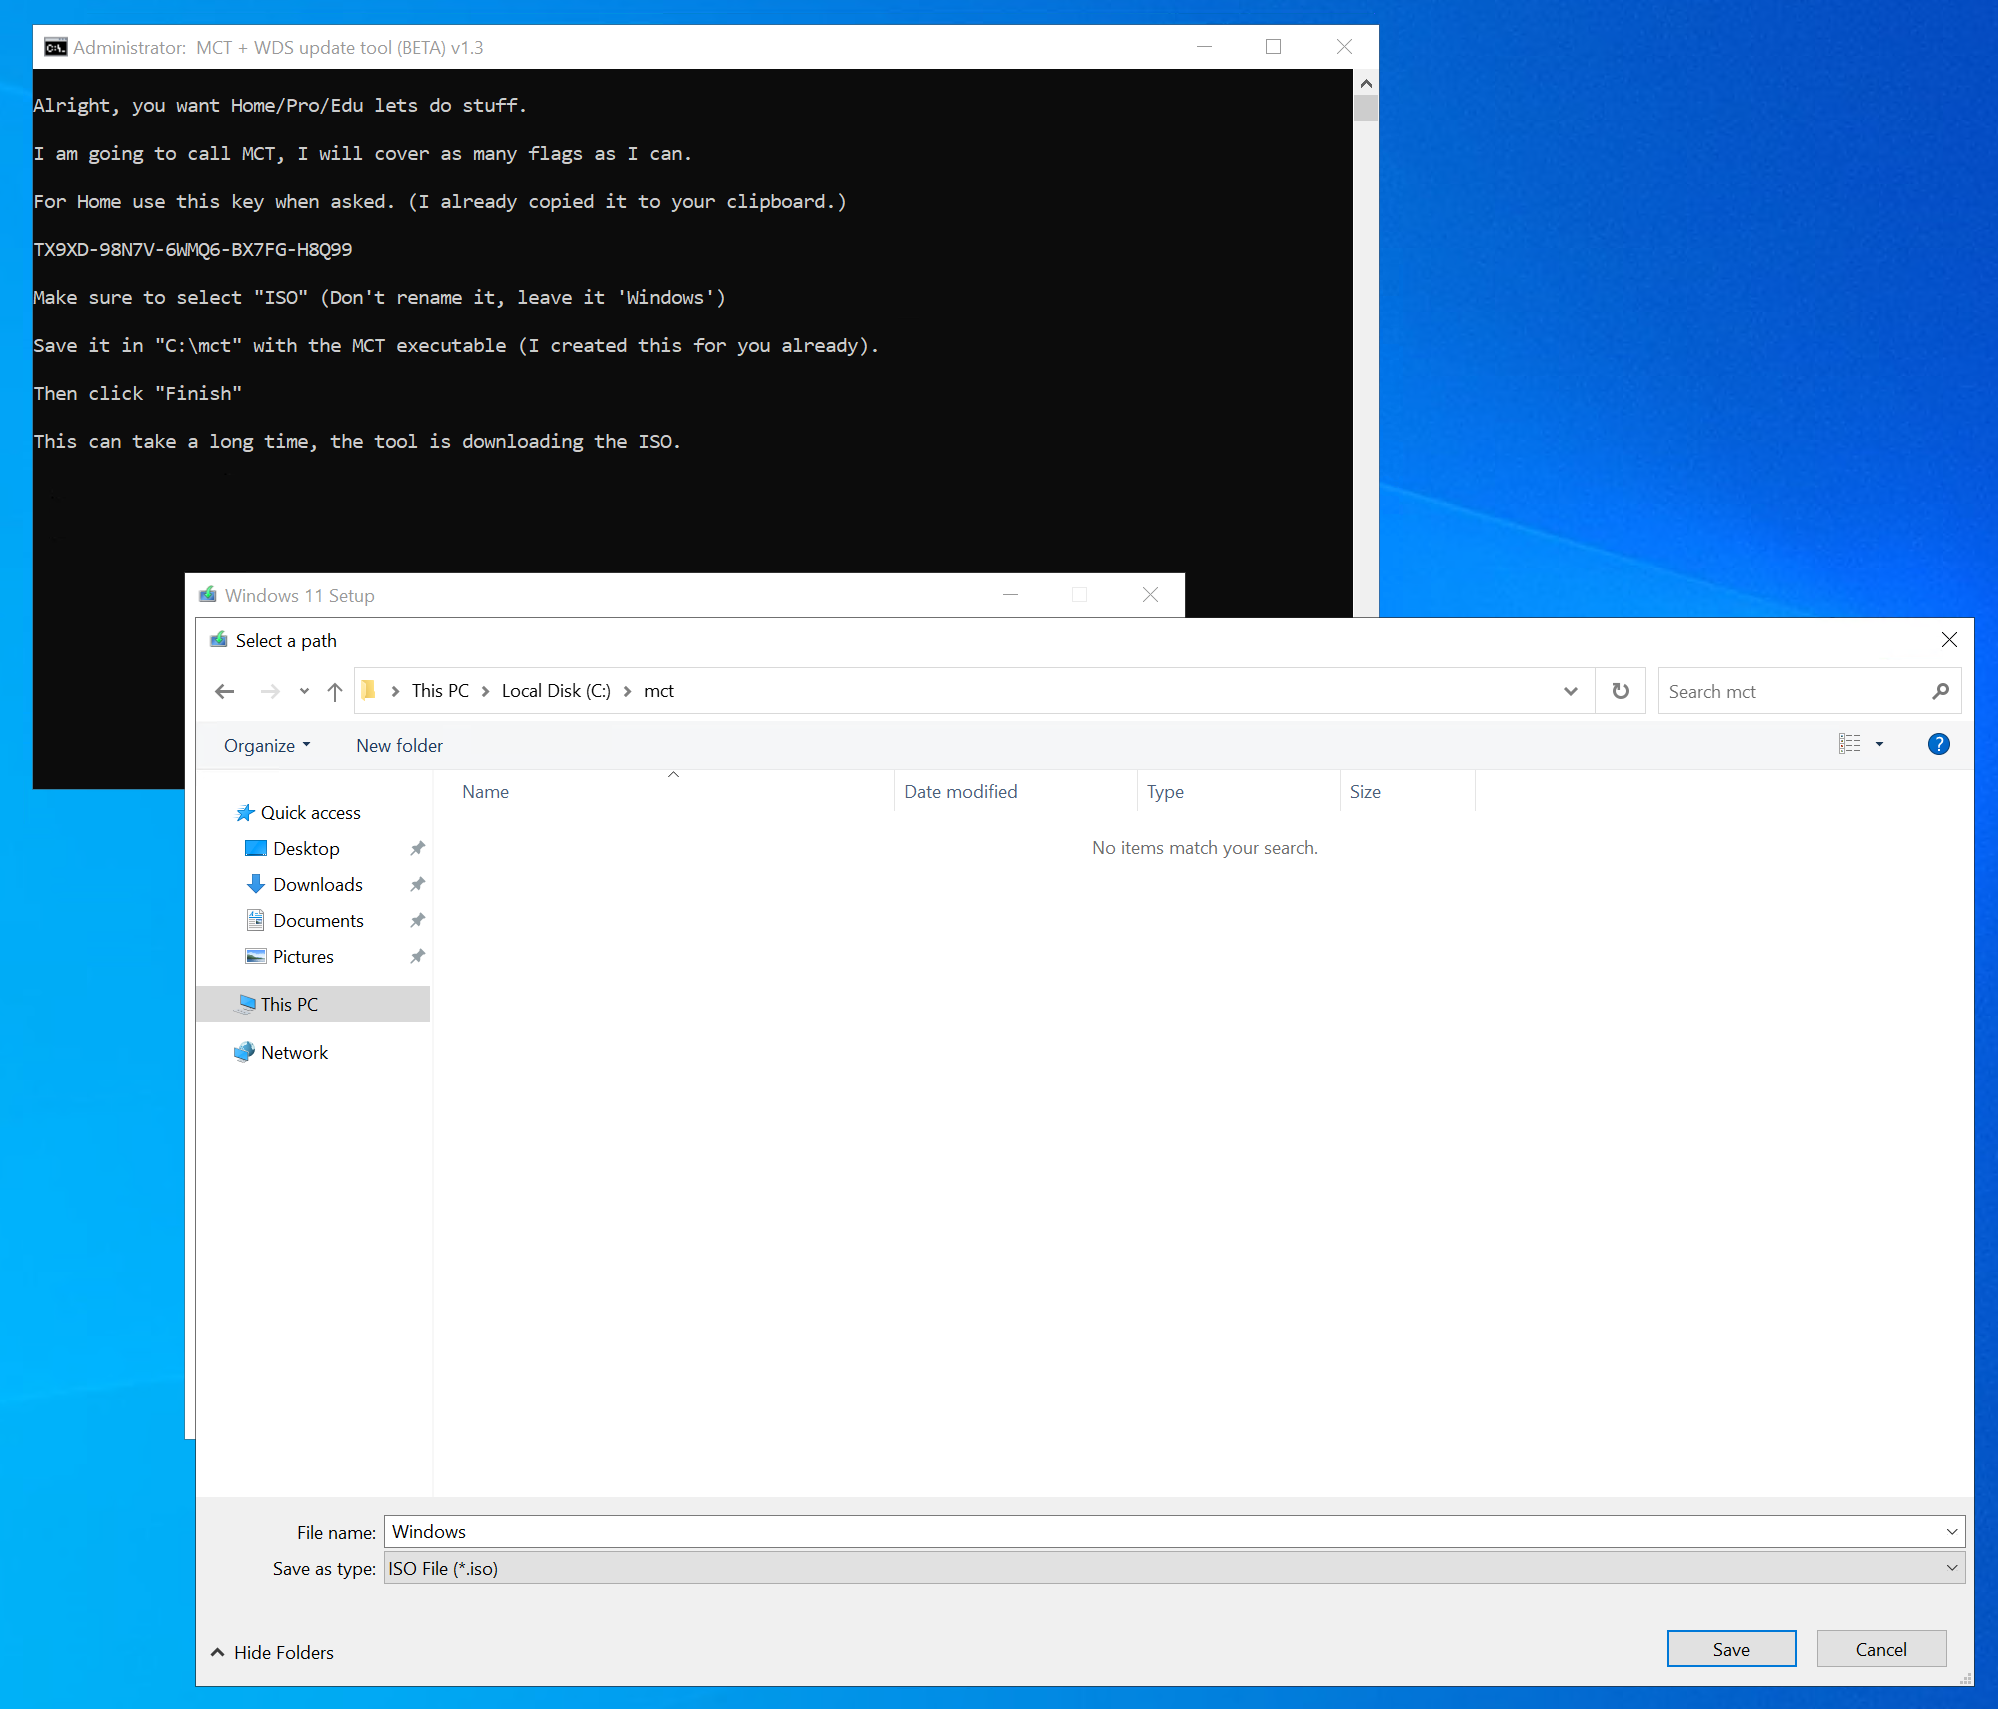
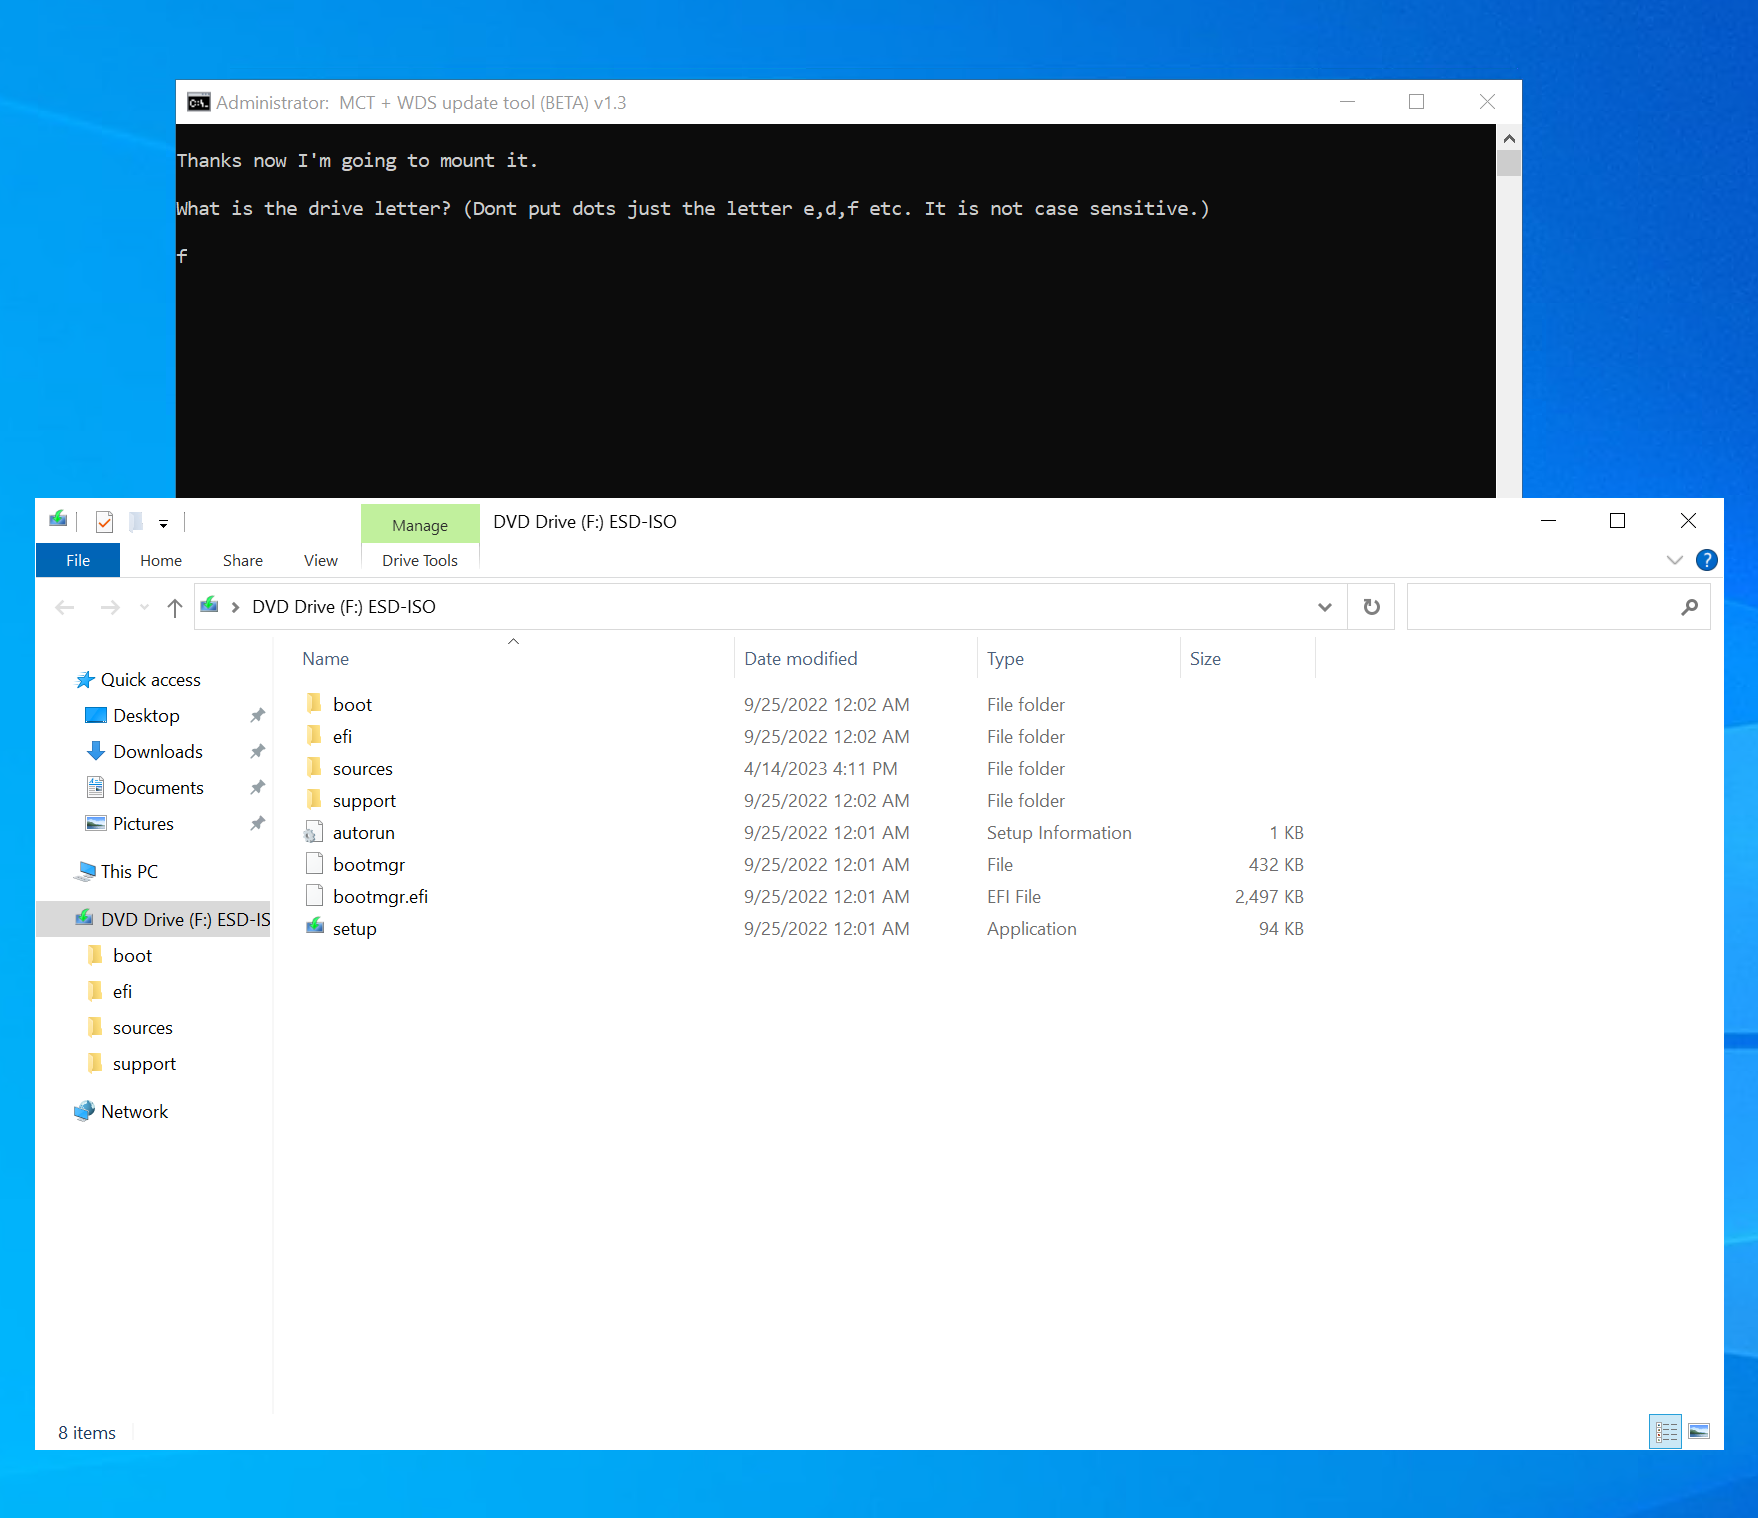
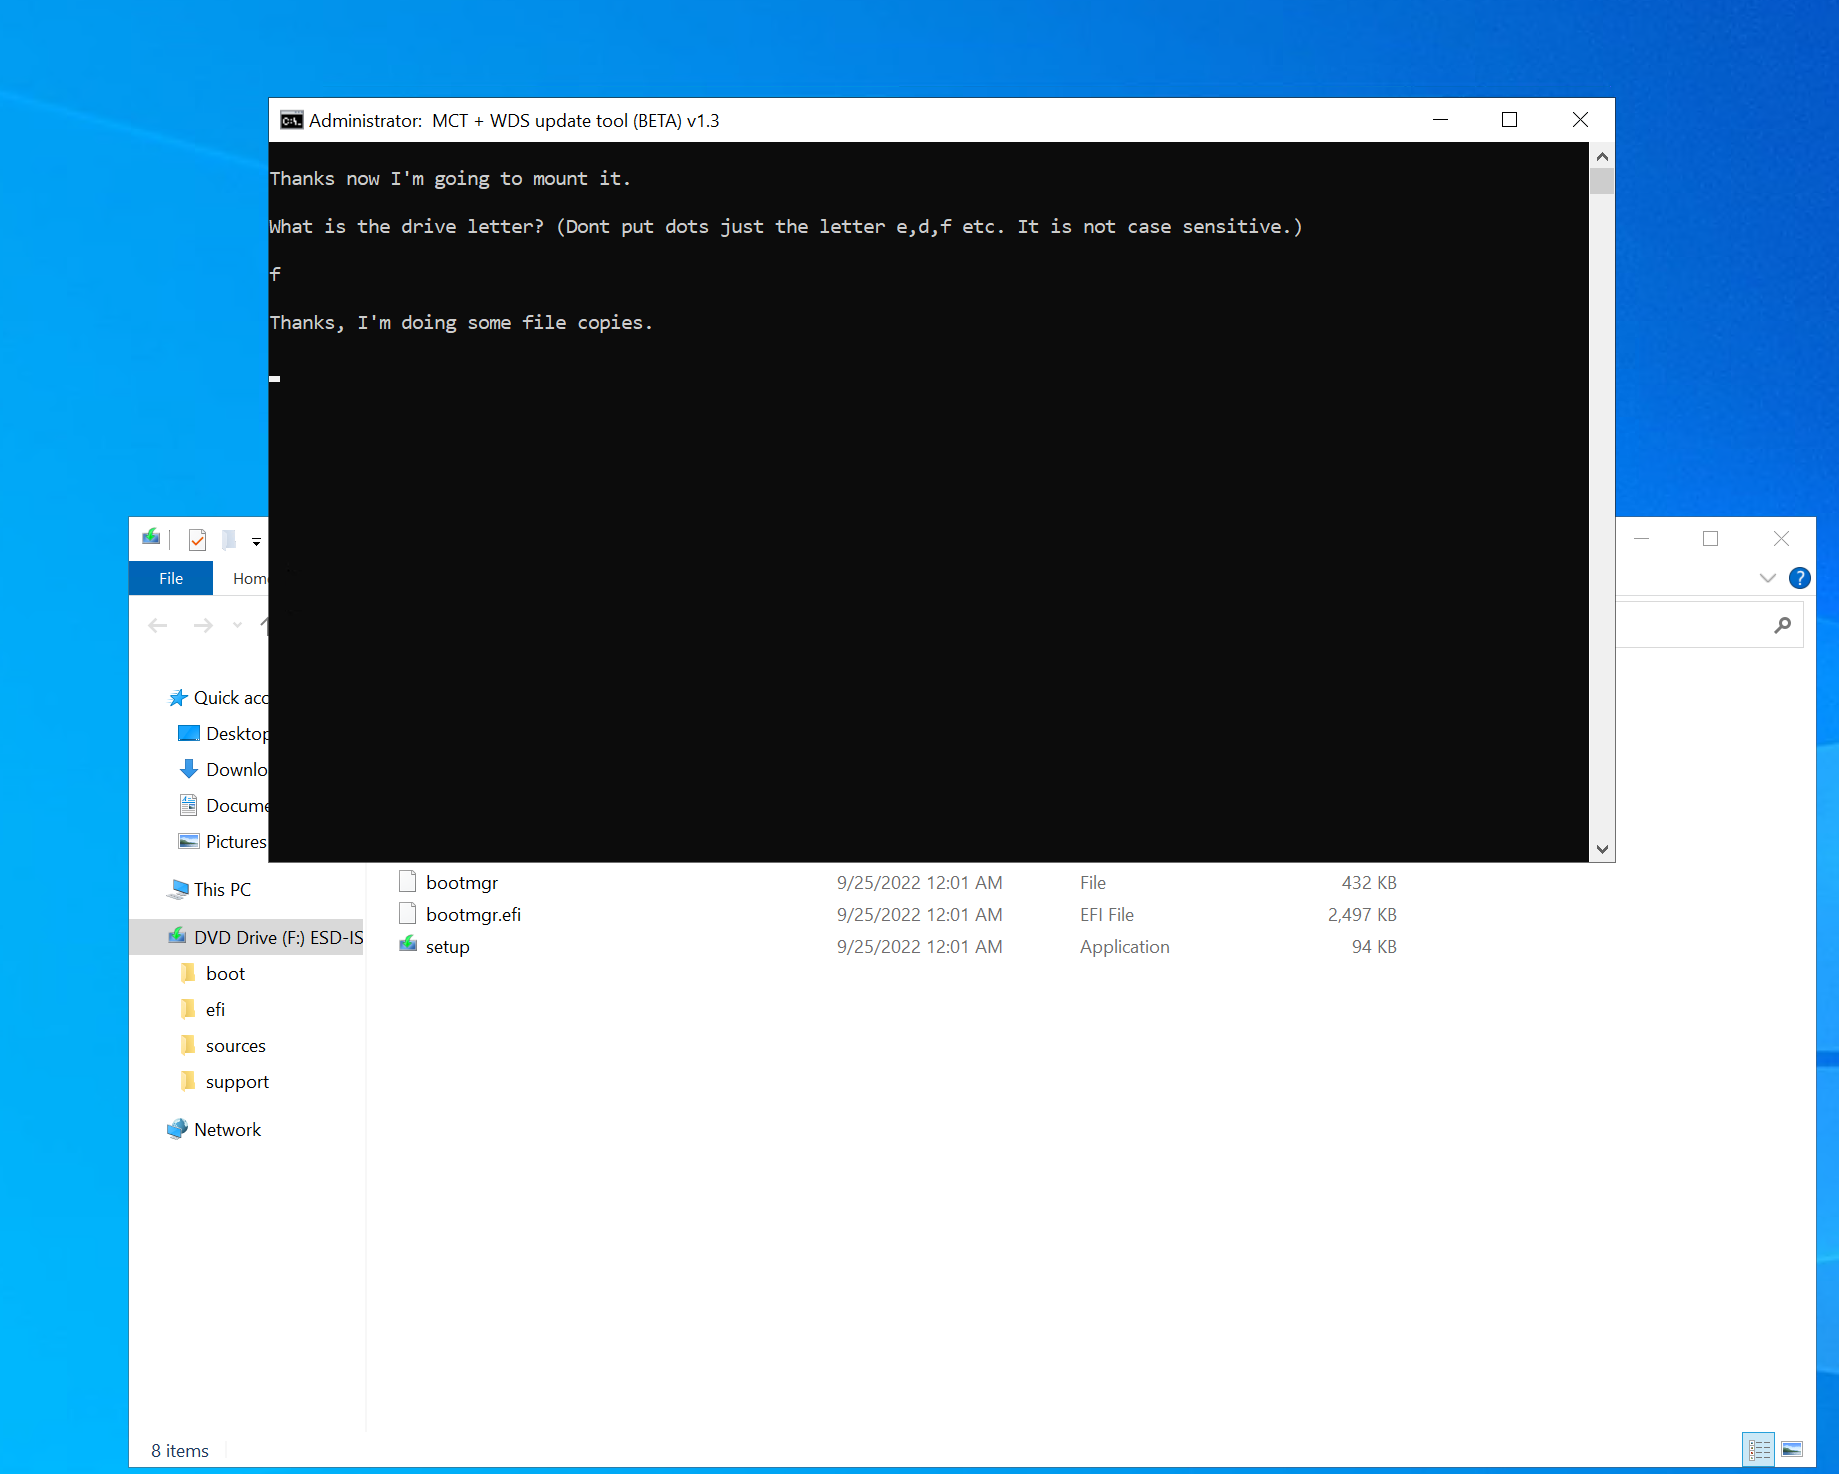
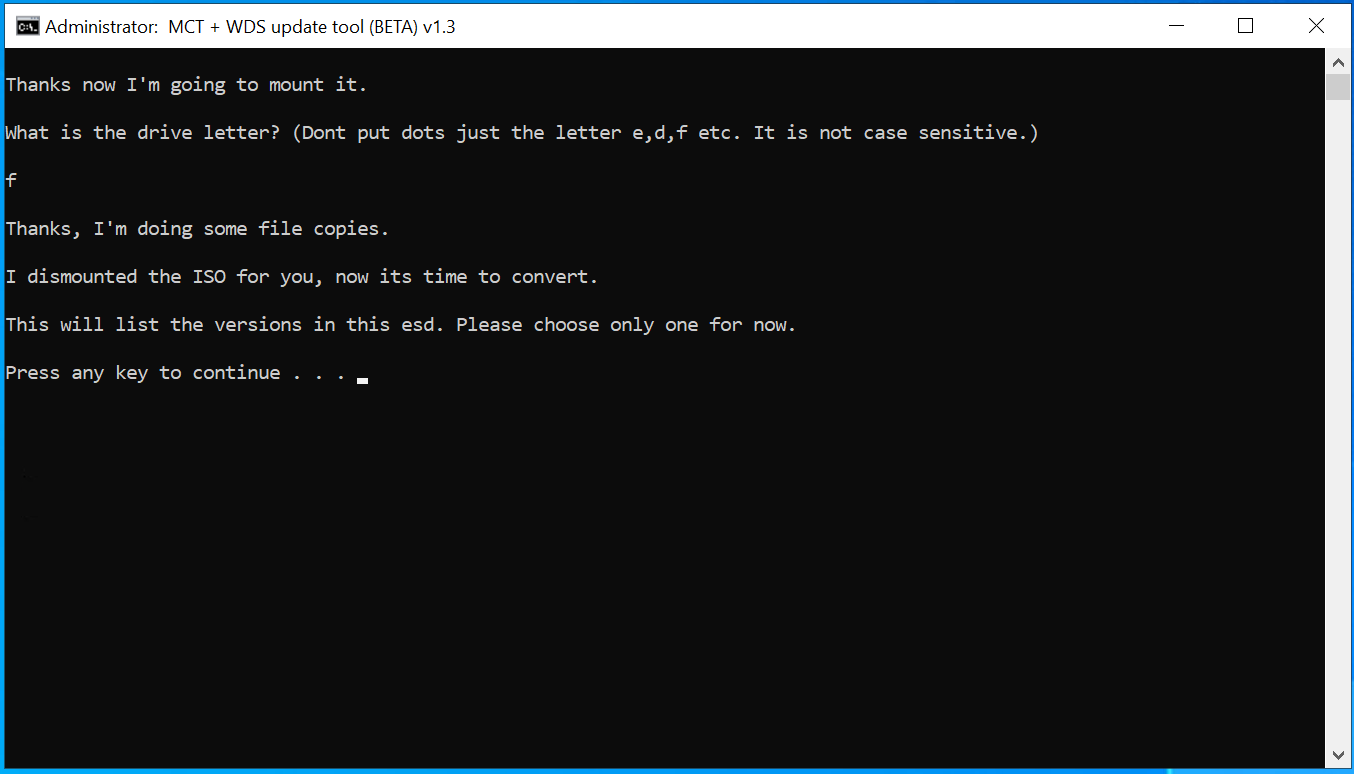
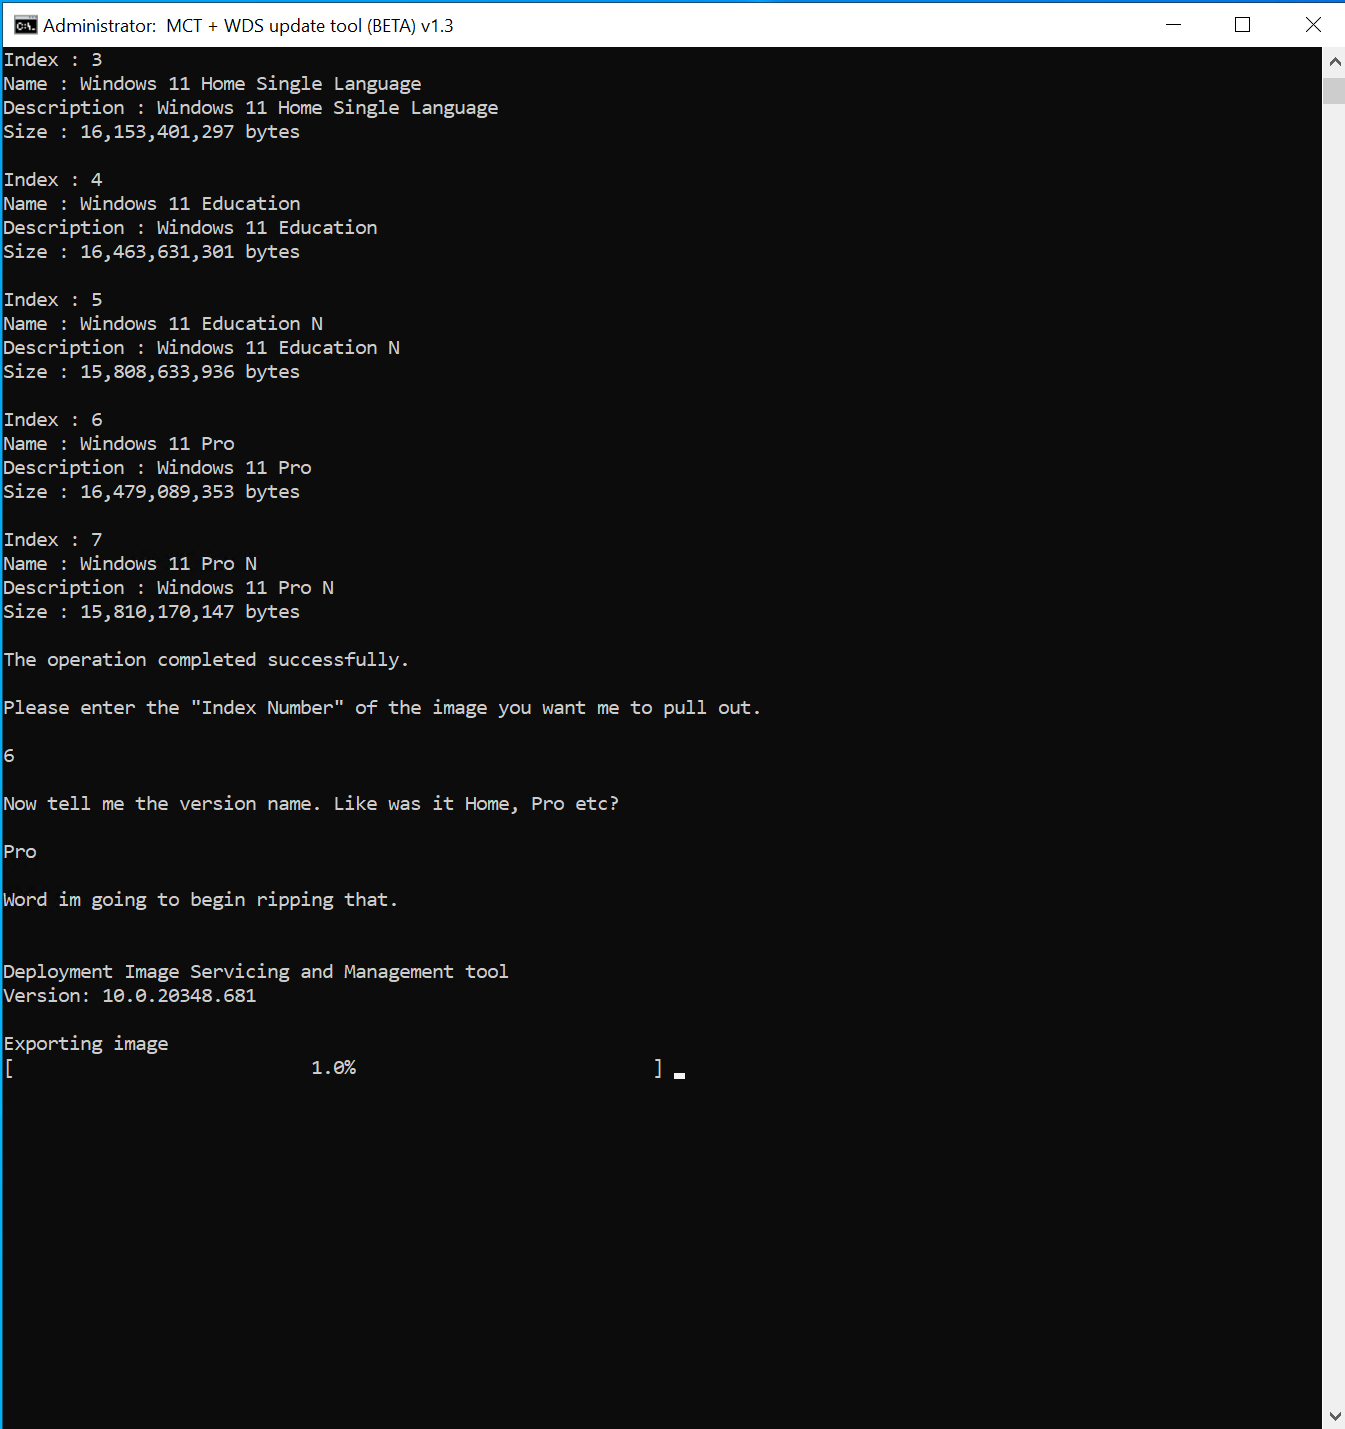
Now that we have MDT configured, we need to import some images into it. To do that we need to get them. This is where the script I wrote comes in. You should already have it so lets open it up.The script will download the windows media creation tool and using some fancy command flags we can tear out and generate some windows images. I will tuck away the screenshots as they are really self explanatory. I will pick back up when its time to do stuff. For now when the script complete DO NOT delete the files it generates, we need them.
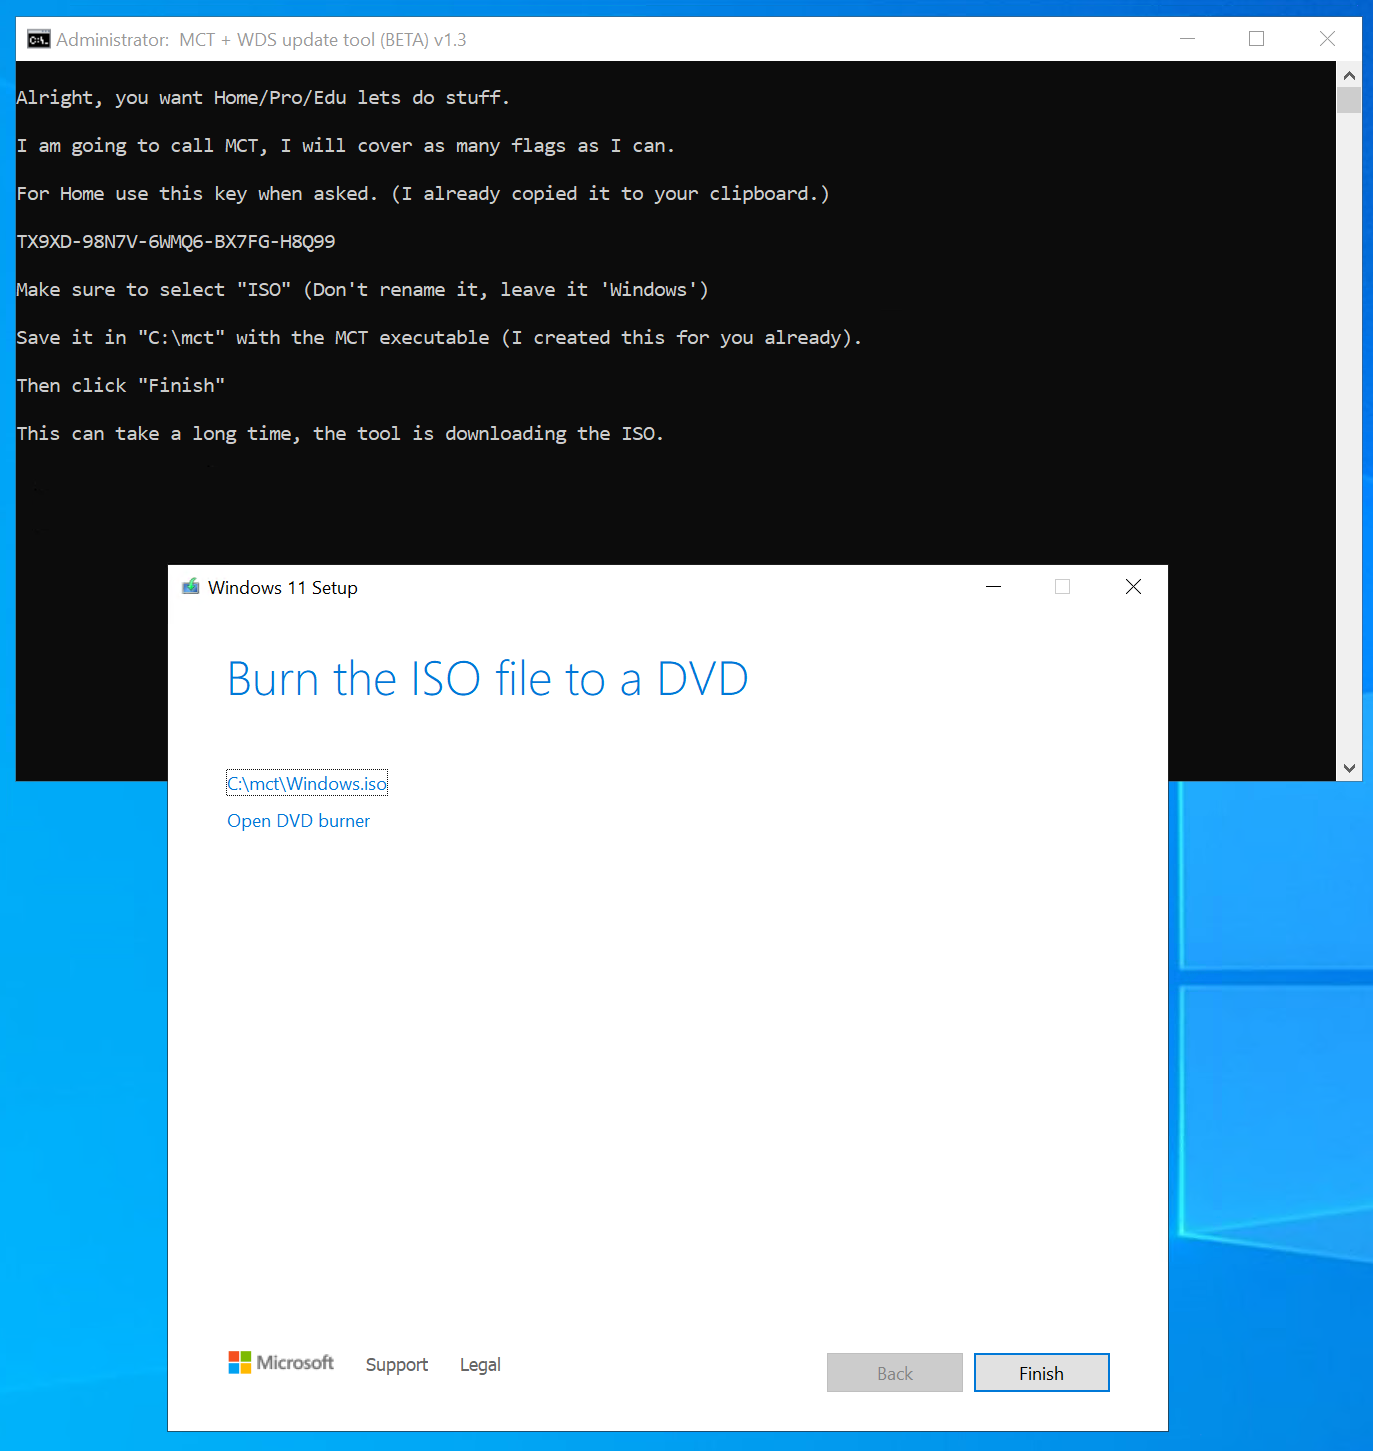
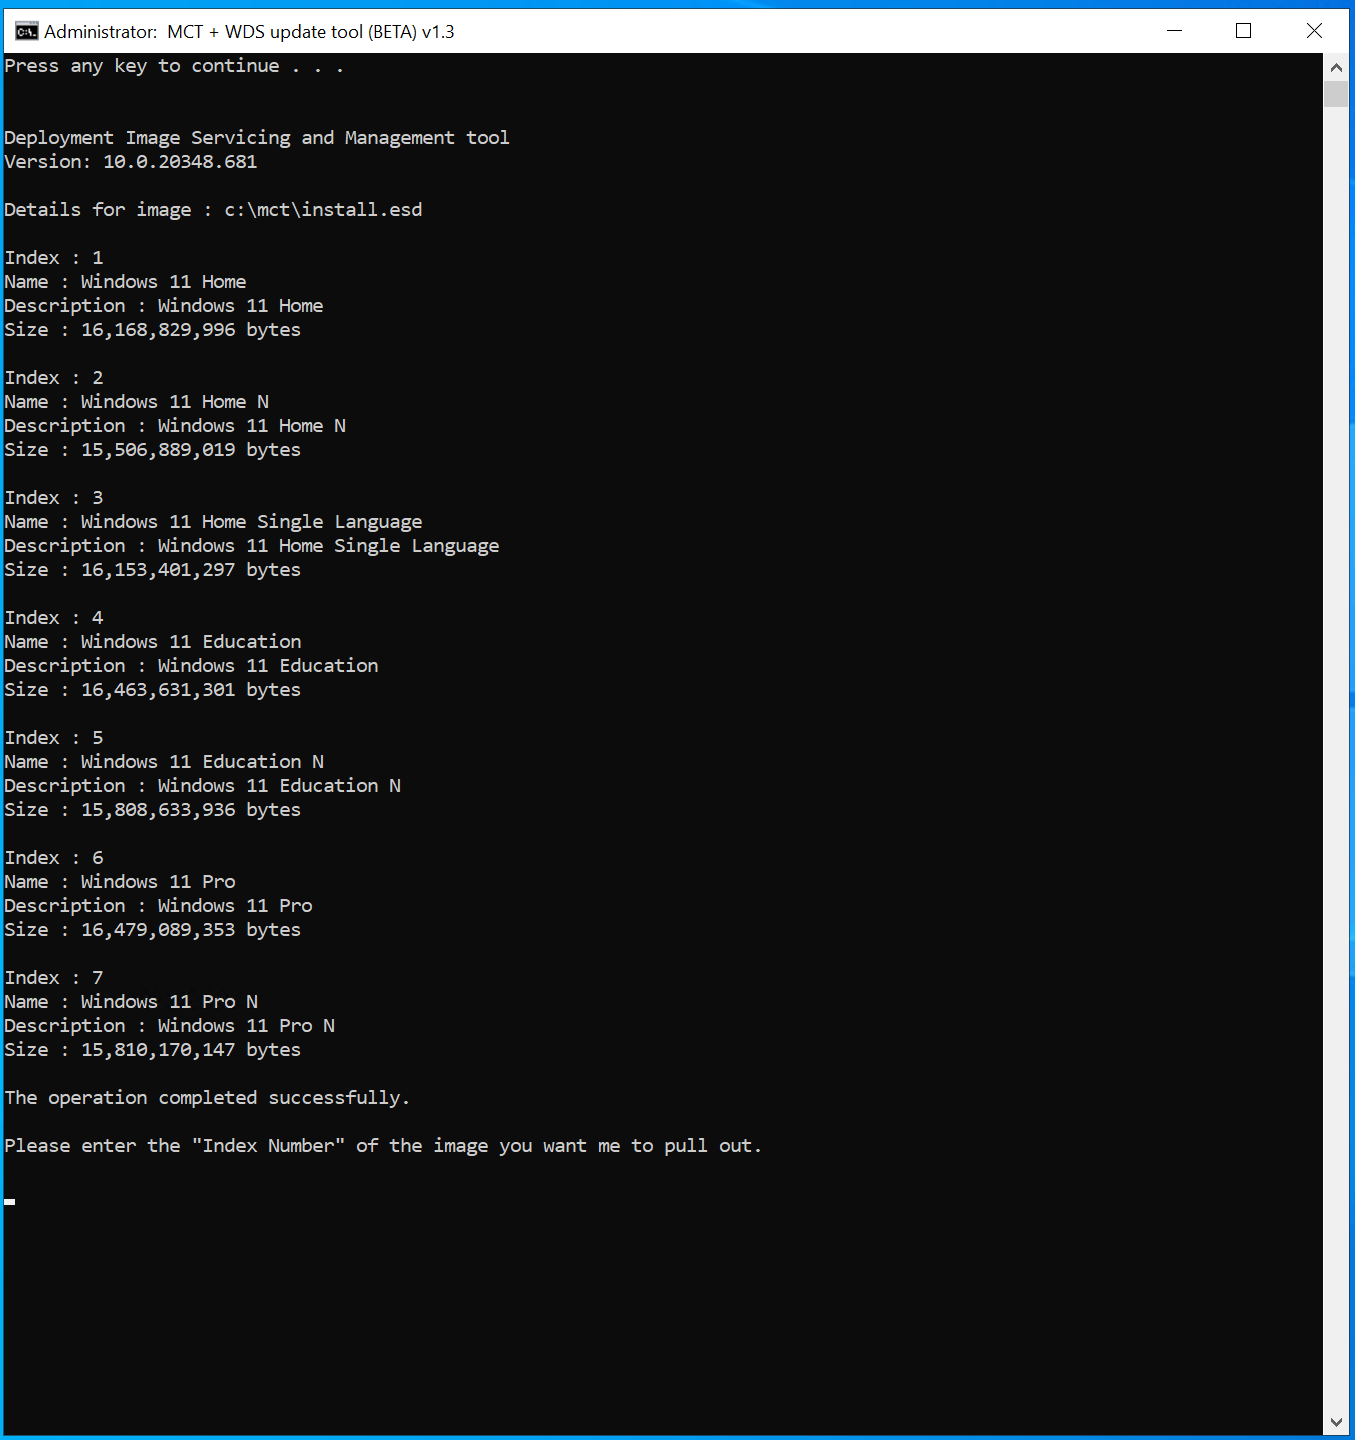
Nice! We finally have some images!
We don't need to go again for this guide so just select "No".
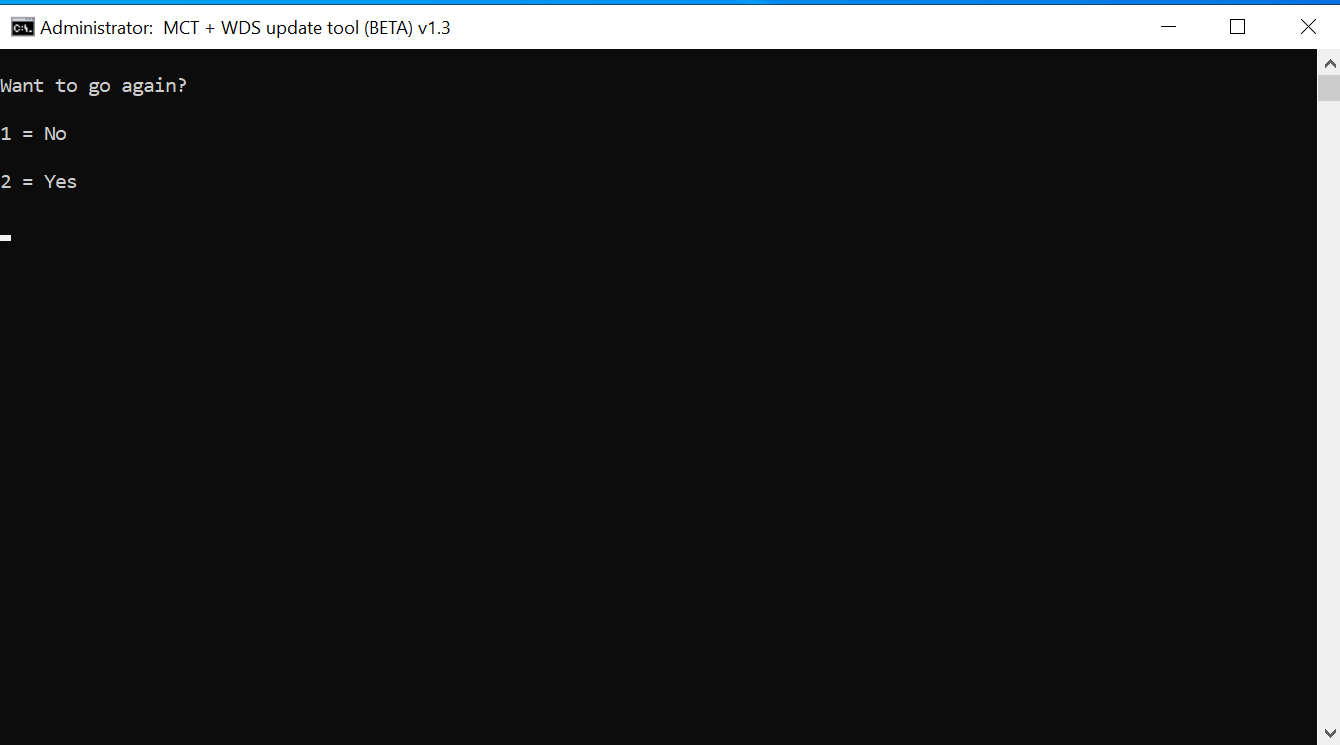
Finally it will ask us if we want to delete the files we need. This is good if we have already worked with them, but we have not. We will select "No" here.
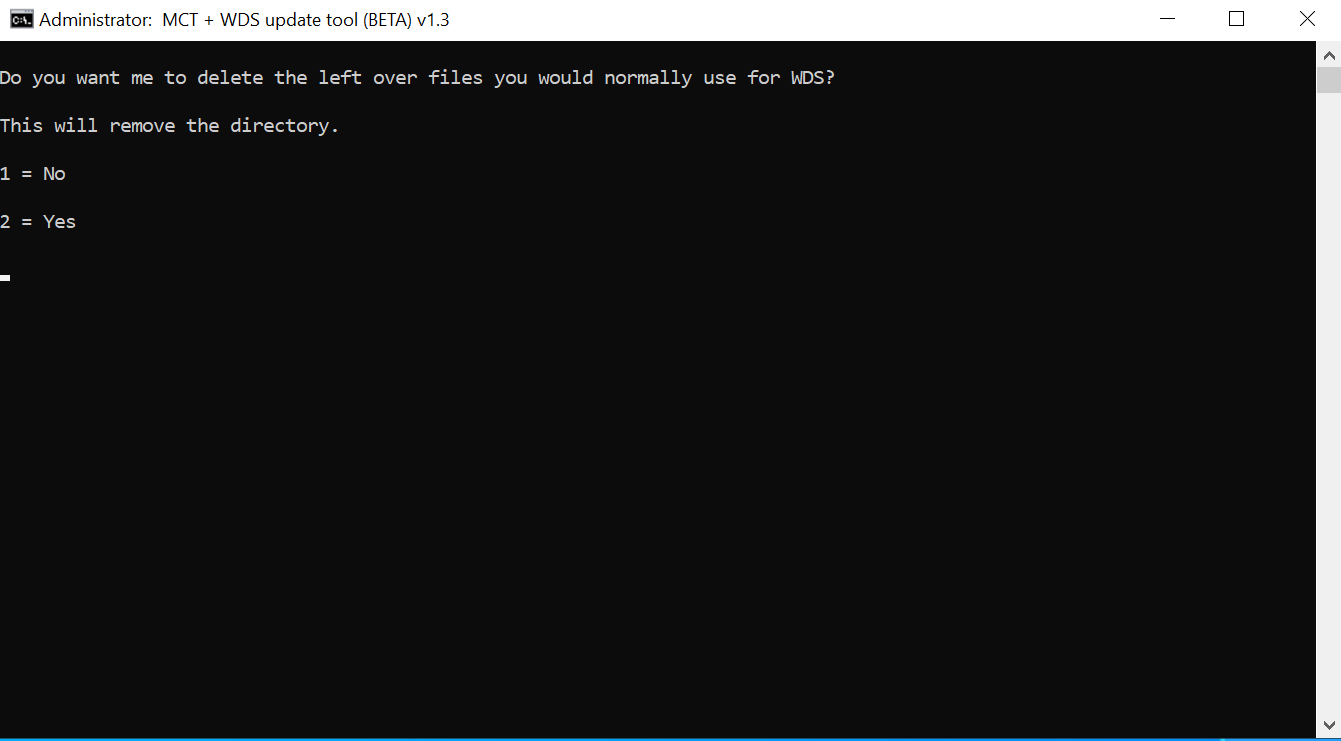
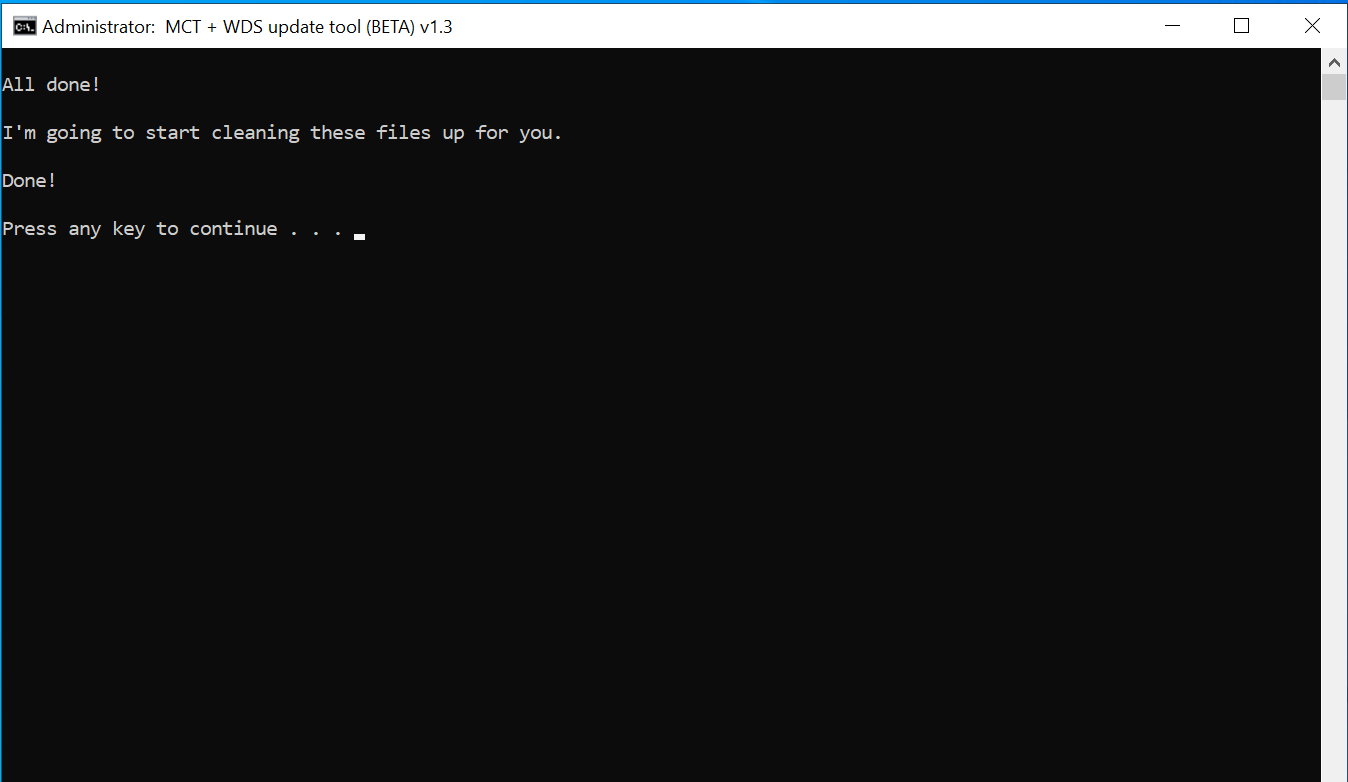
The script will close and we move forward!
With our images in hand we need to import them into MDT and prepare WDS.
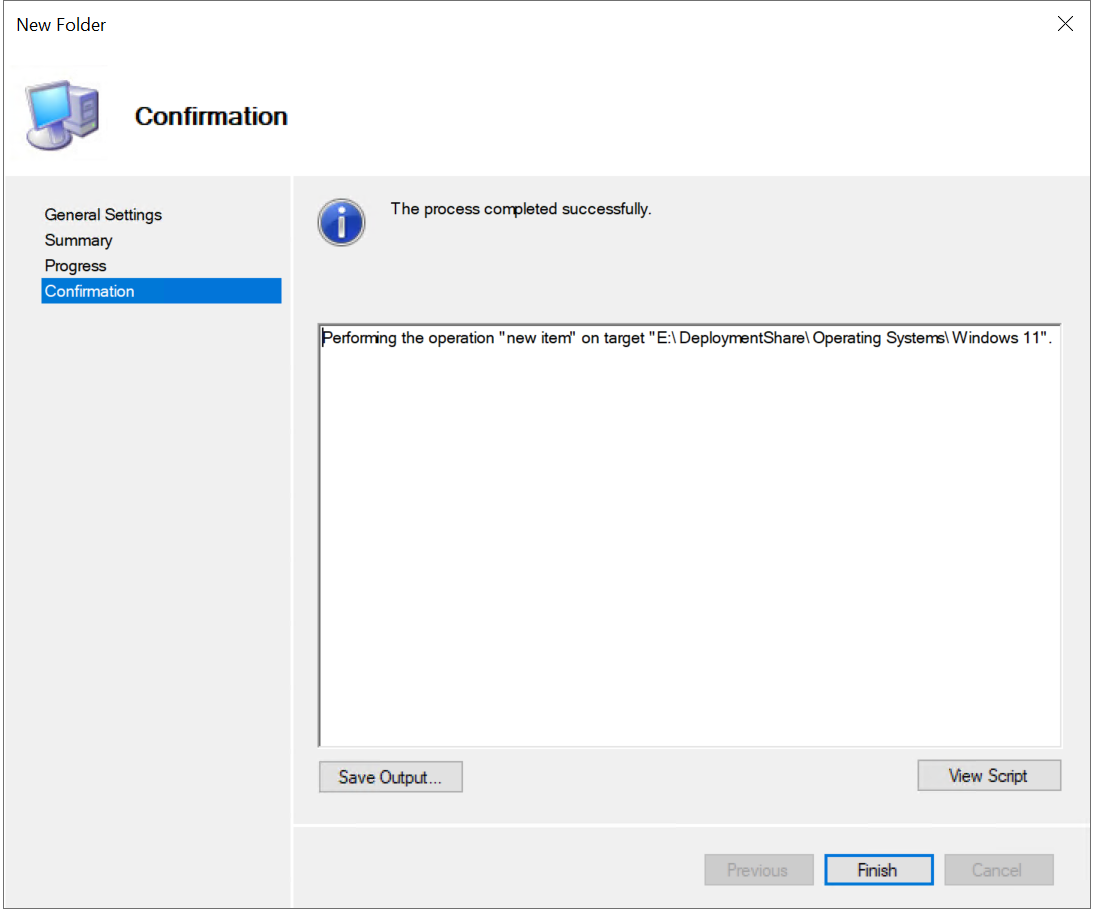
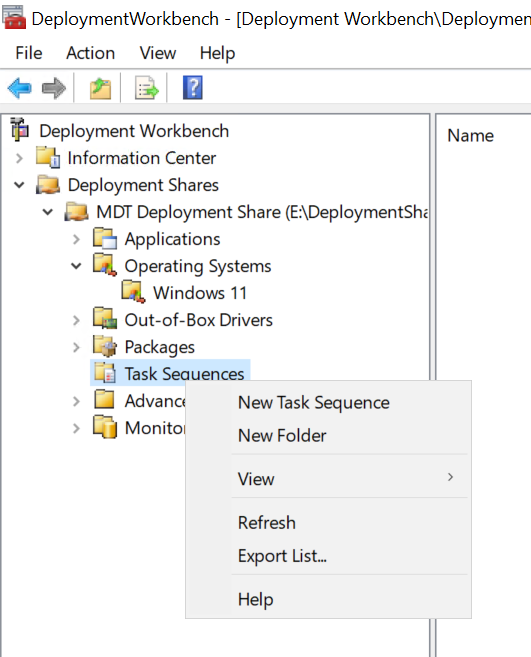
Open MDT and right click on "Operating Systems" then select "New Folder". Folders help us manage where we are placing images. Since we can have several flavors of the same OS. We will make a folder named "Windows 11".
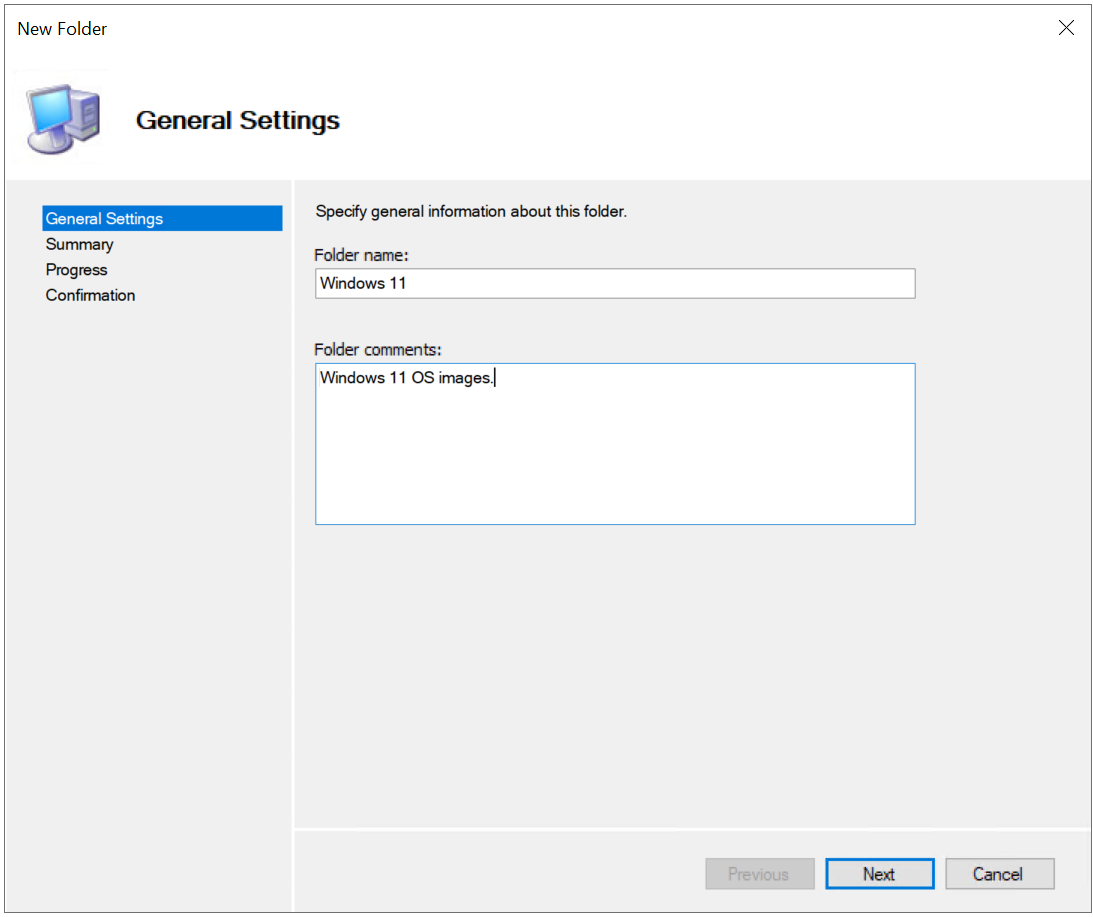
Go ahead and press "Next" a few times followed by "Finish" to create the folder.
With our folder created we are going to right click on it and select "Import Operating System". Since we used the script to get us a wim we are going to select "Custom image file".
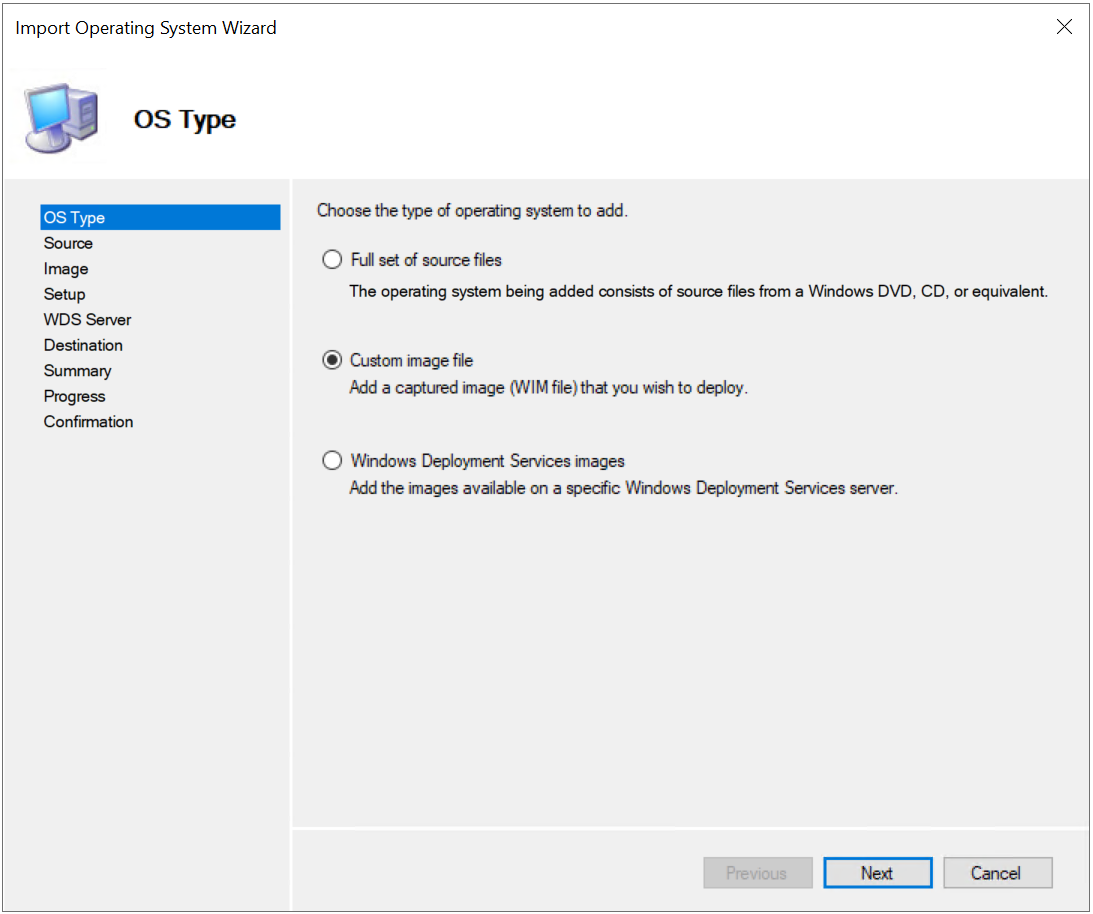
Browse to the scripts working directory "C:\mct" to select the wim we created.
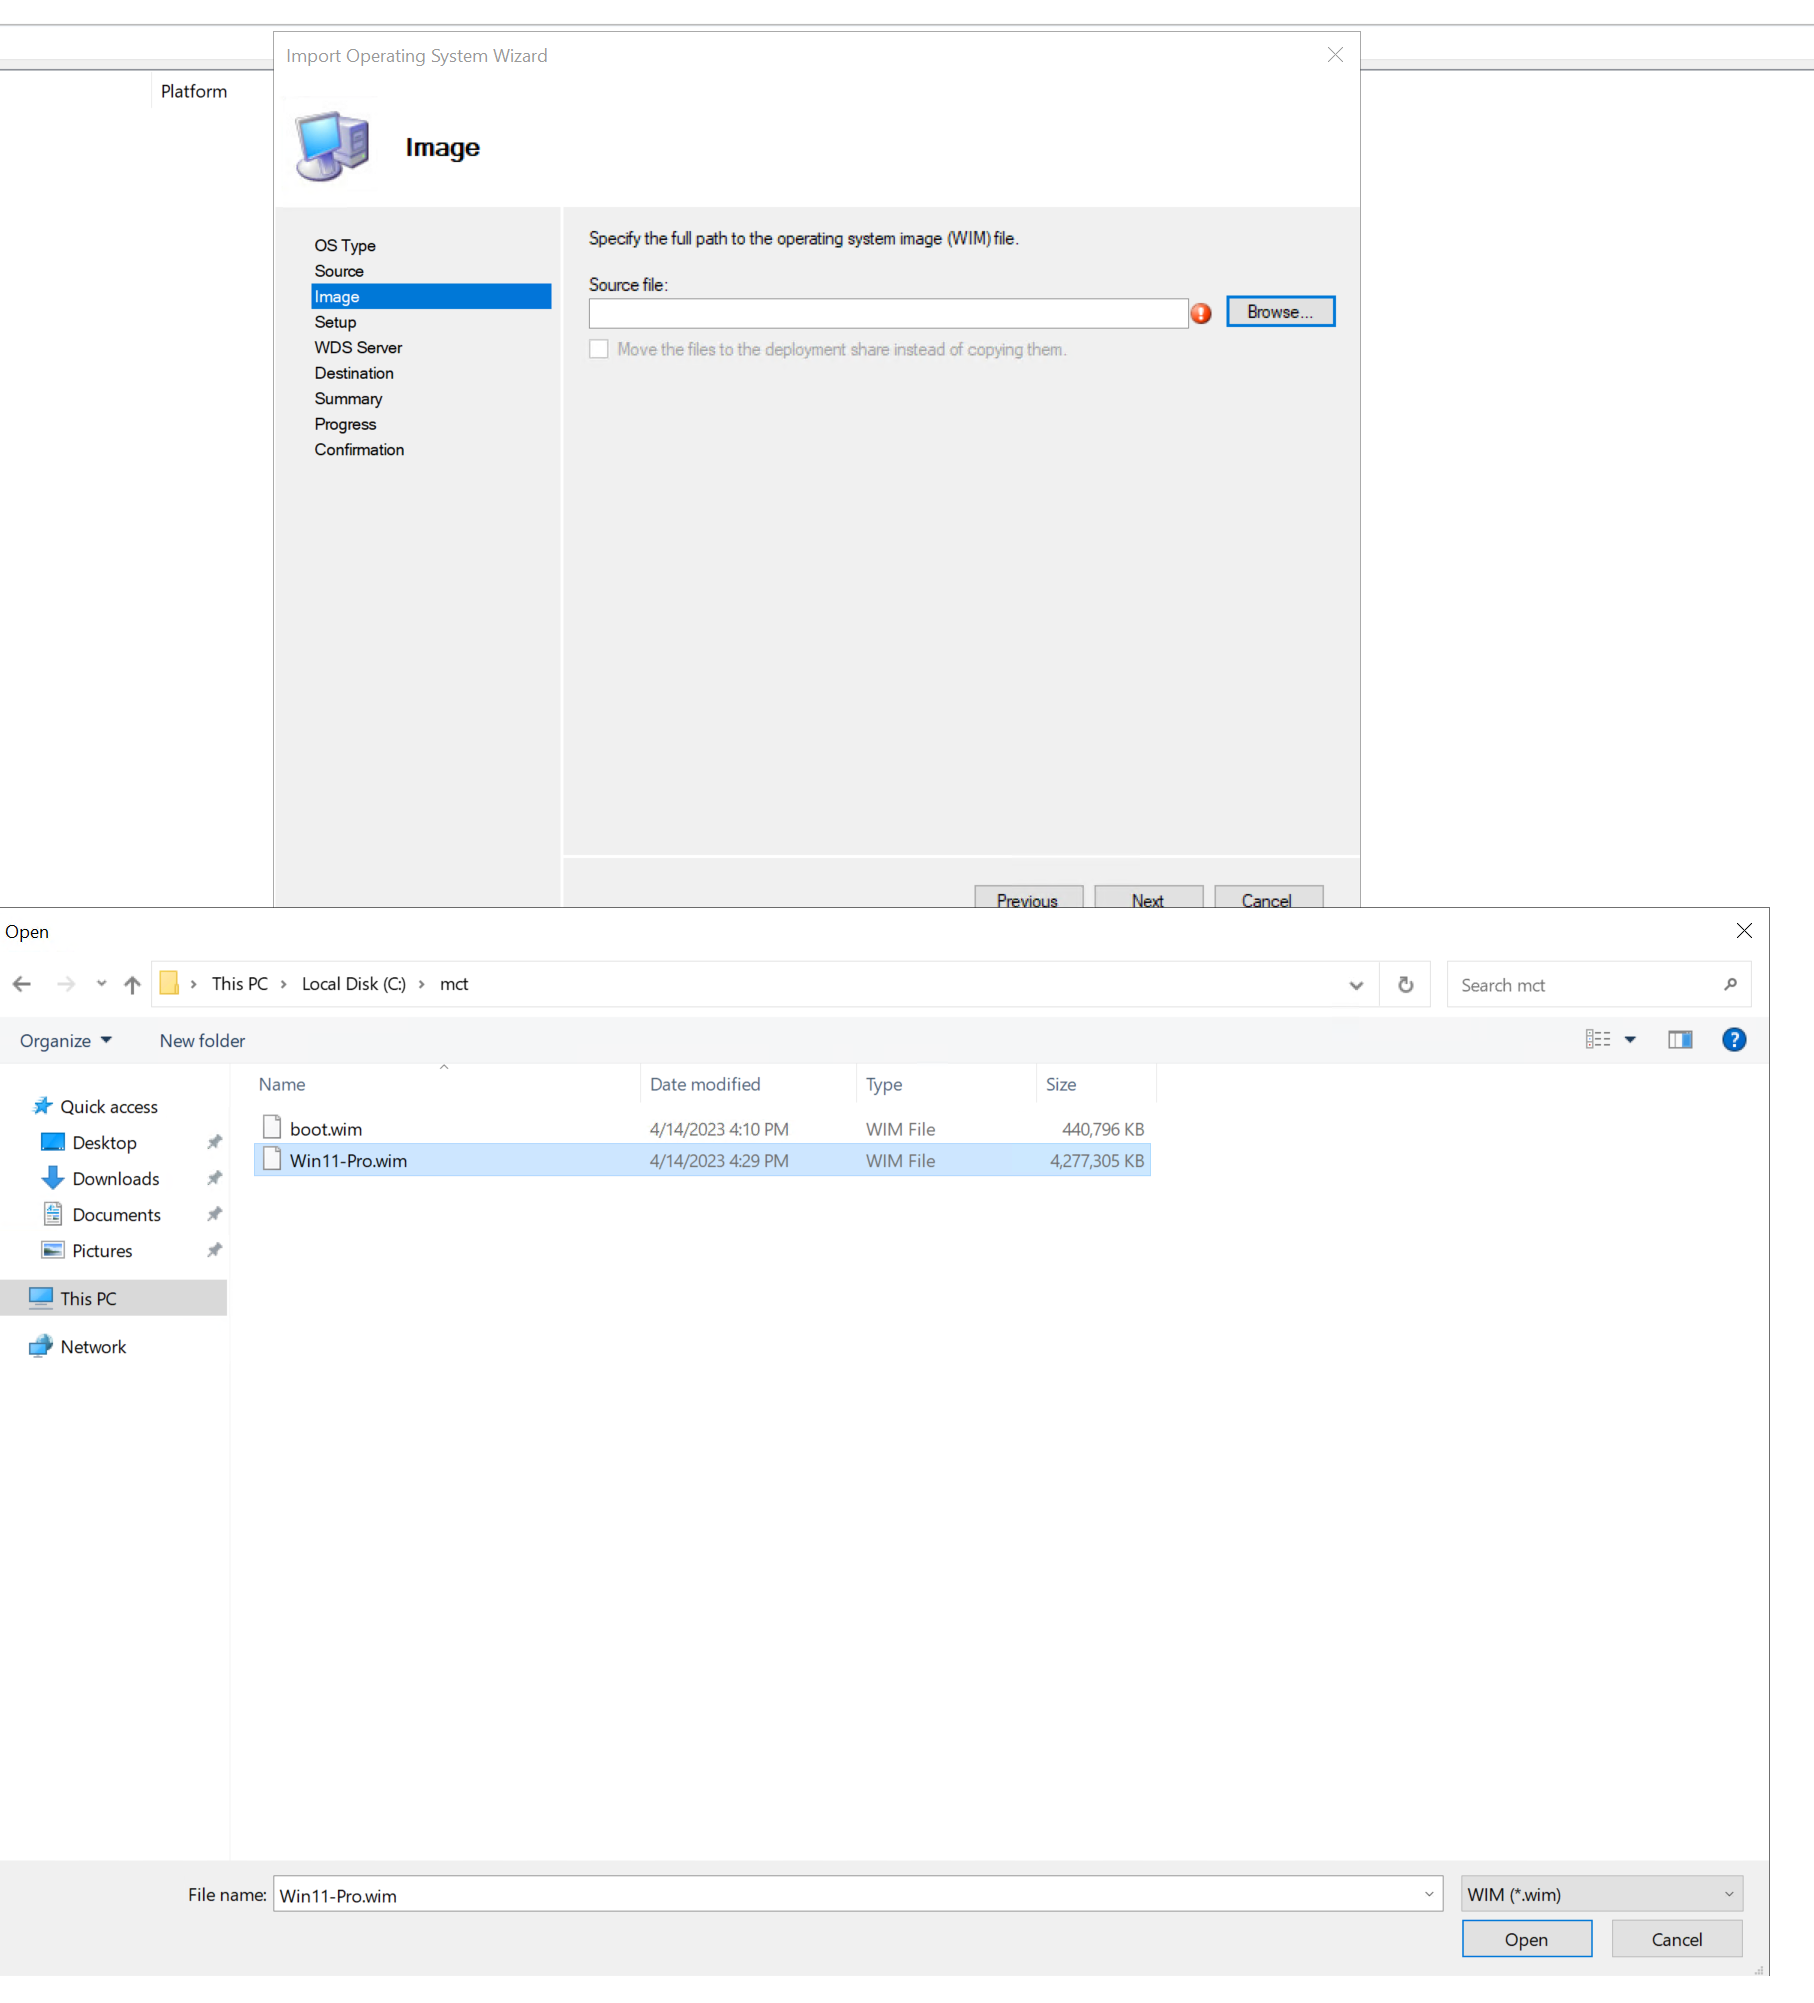
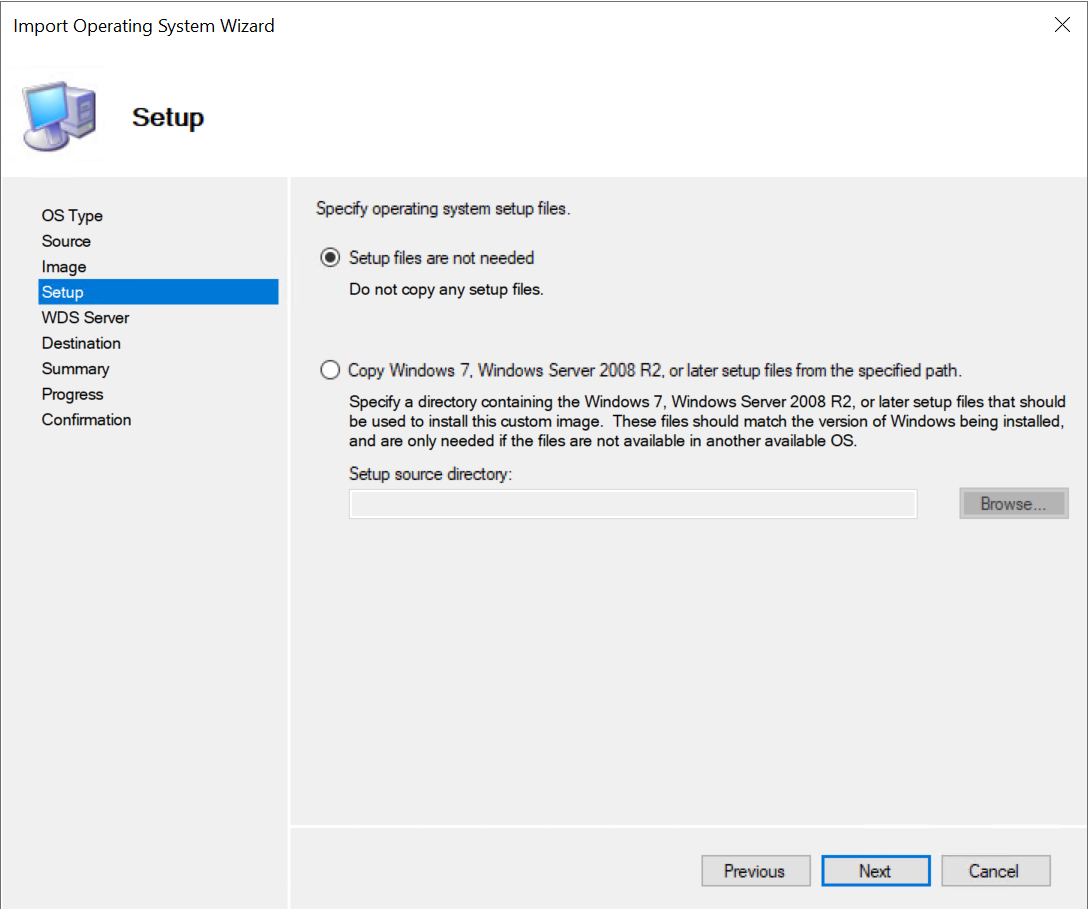
With our image selected click "Next" to proceed. We will NOT need setup files so we will press "Next" again the the following window.
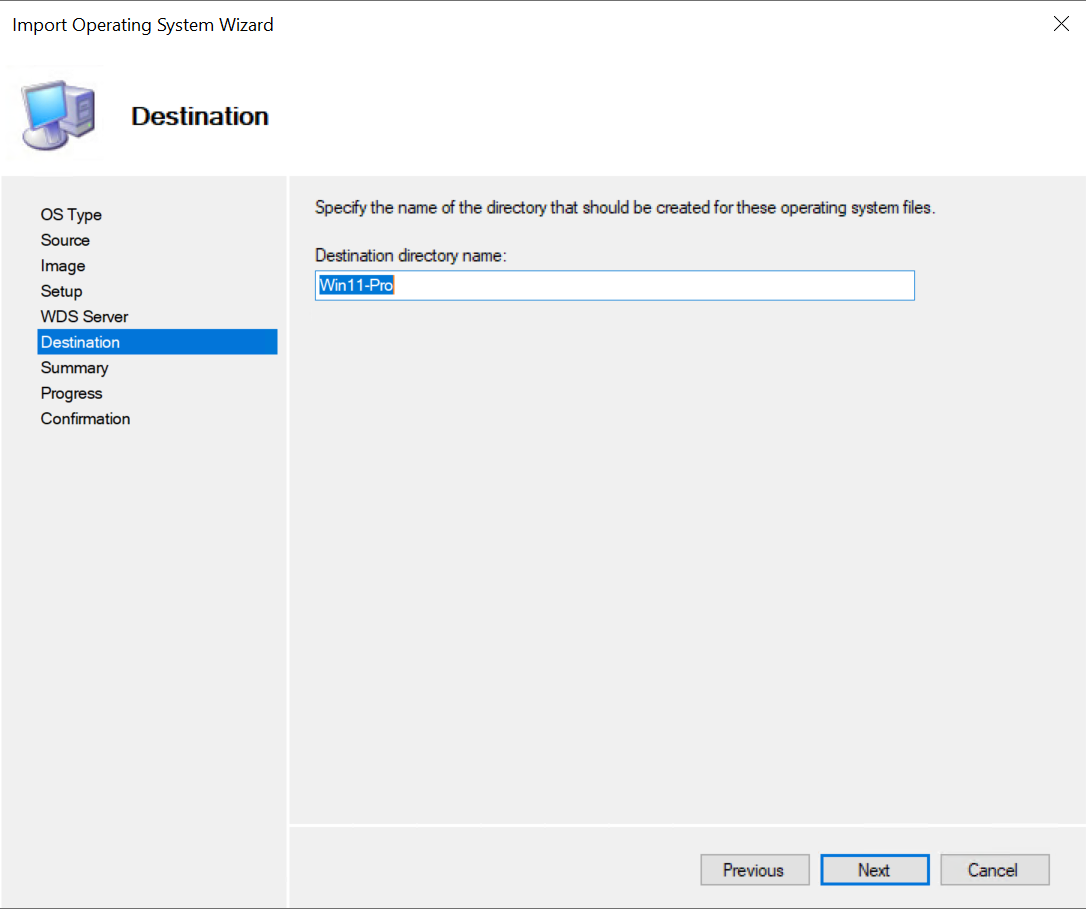
The directory name is asked for next. It defaults the name to that of the ISO. We can leave this as is for now and continue by clicking "Next".
The rest is just a summary page and a finalization page for the import. Press "Next" and "Finish" as needed until the wizard closes.
With our new image uploaded it is time to create the "Task Sequence" the task sequence is the "job" that MDT sends to MDS when you request a format. We will stop here so you can catch your breath.
Creating your task sequence
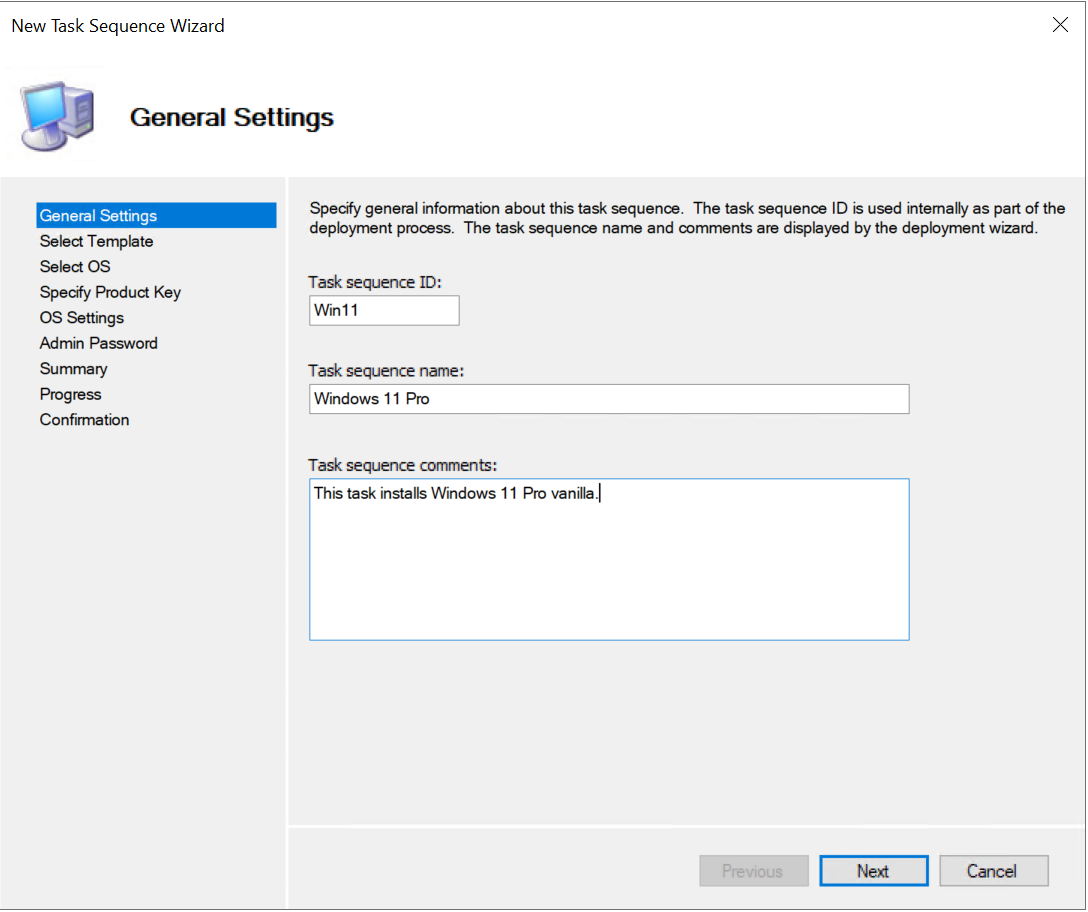
Welcome back! So far so good! It's a lot of reading but really this is flying by! Lets create you task sequence now!First lets open MDT if you haven't. Under your deployment share we want to right click on "Task Sequences" and finally "New Task Sequence".
You are prompted with the first steps in our task. Names. You can copy something direct like I have here. The task sequence is the BREAD AND BUTTER of MDT deployments, it is very powerful, but we will be taking it easy today. Feel free to come back and play with it later!
Now it will ask us what kind of deployment we are doing. There are several to choose from and I am showing you them just so you have an idea. Today however, we will be choosing the plain old "Standard Client Task Sequence".
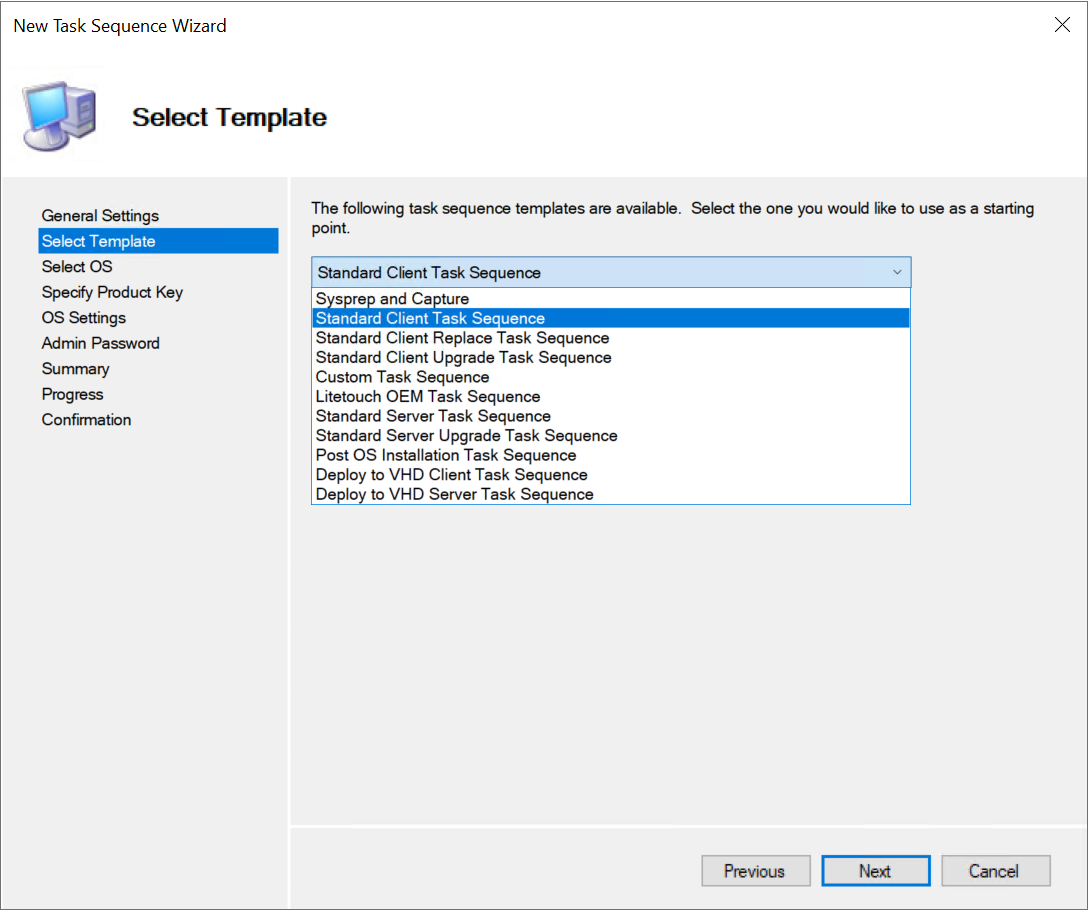
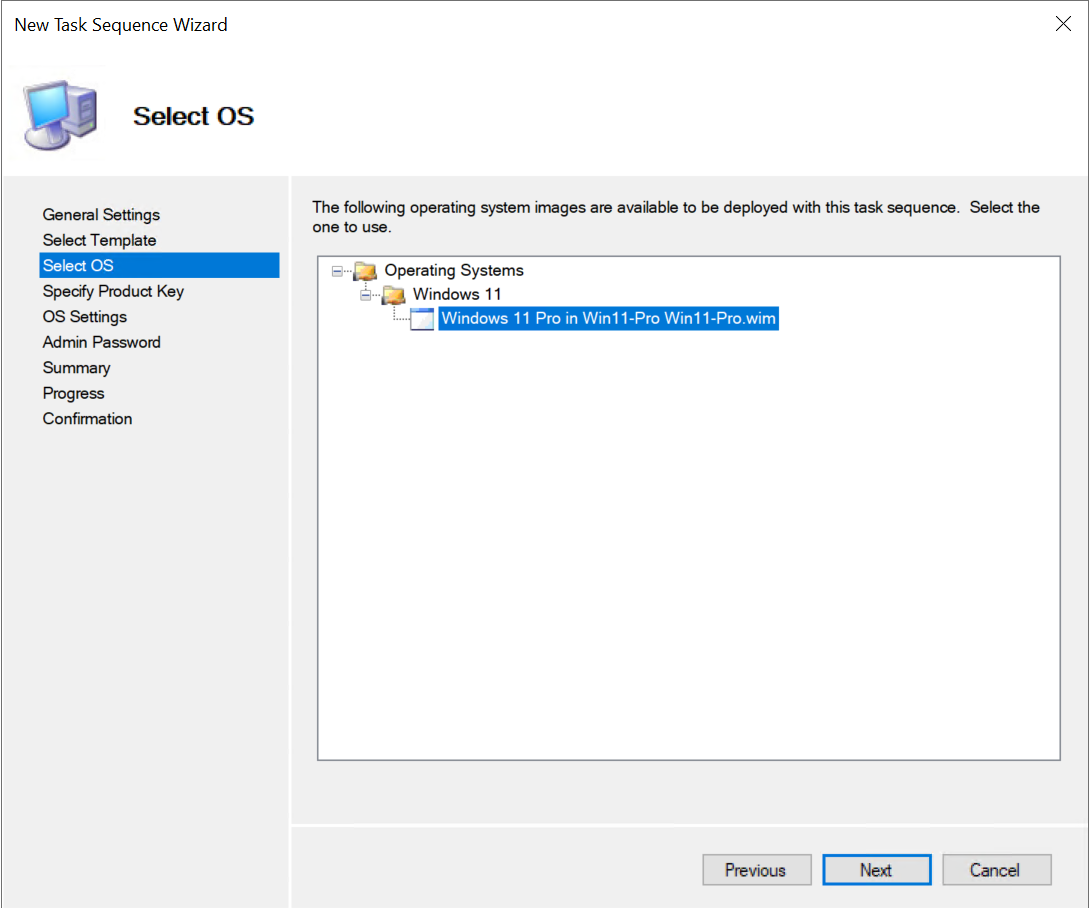
Once our task sequence is selected hit "Next" to move us along. We will choose our OS next.
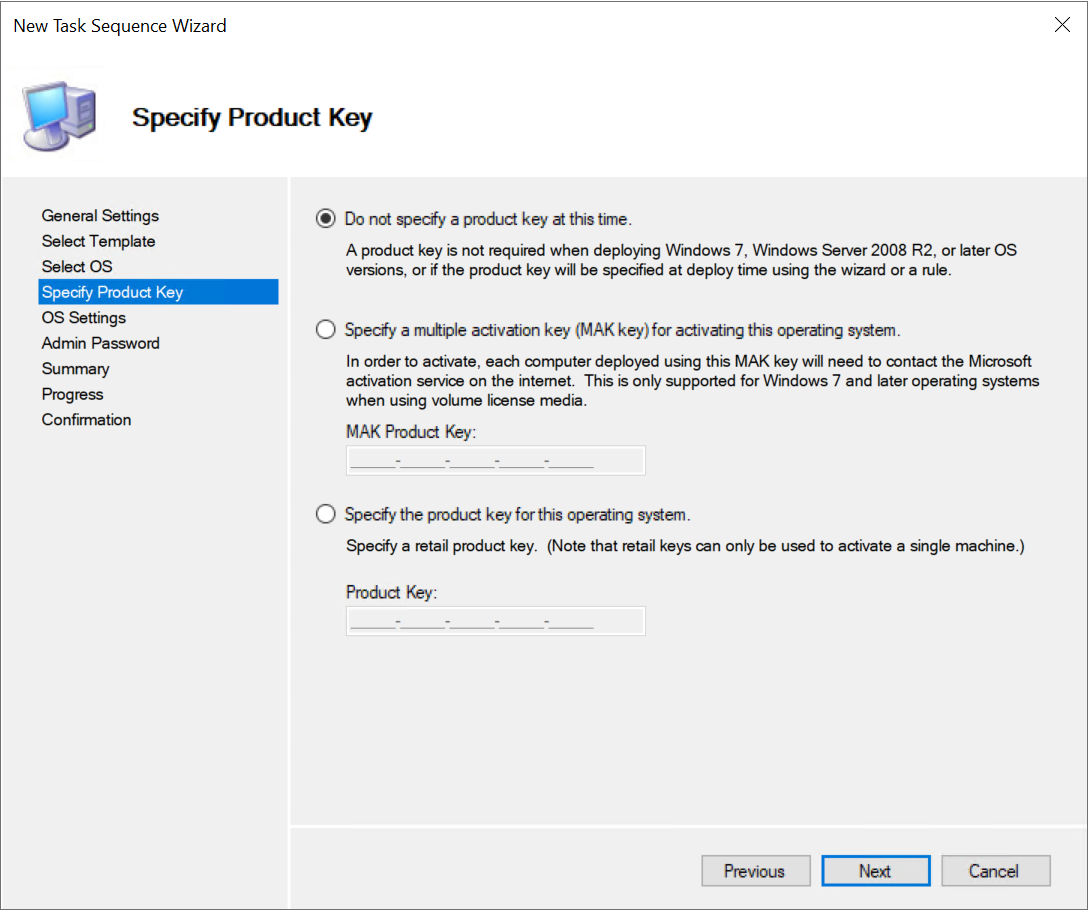
We now have a few activation options we can select. For now we will select "Do not specify a product key at this time" No sense wasting one you might have lying around for a test!
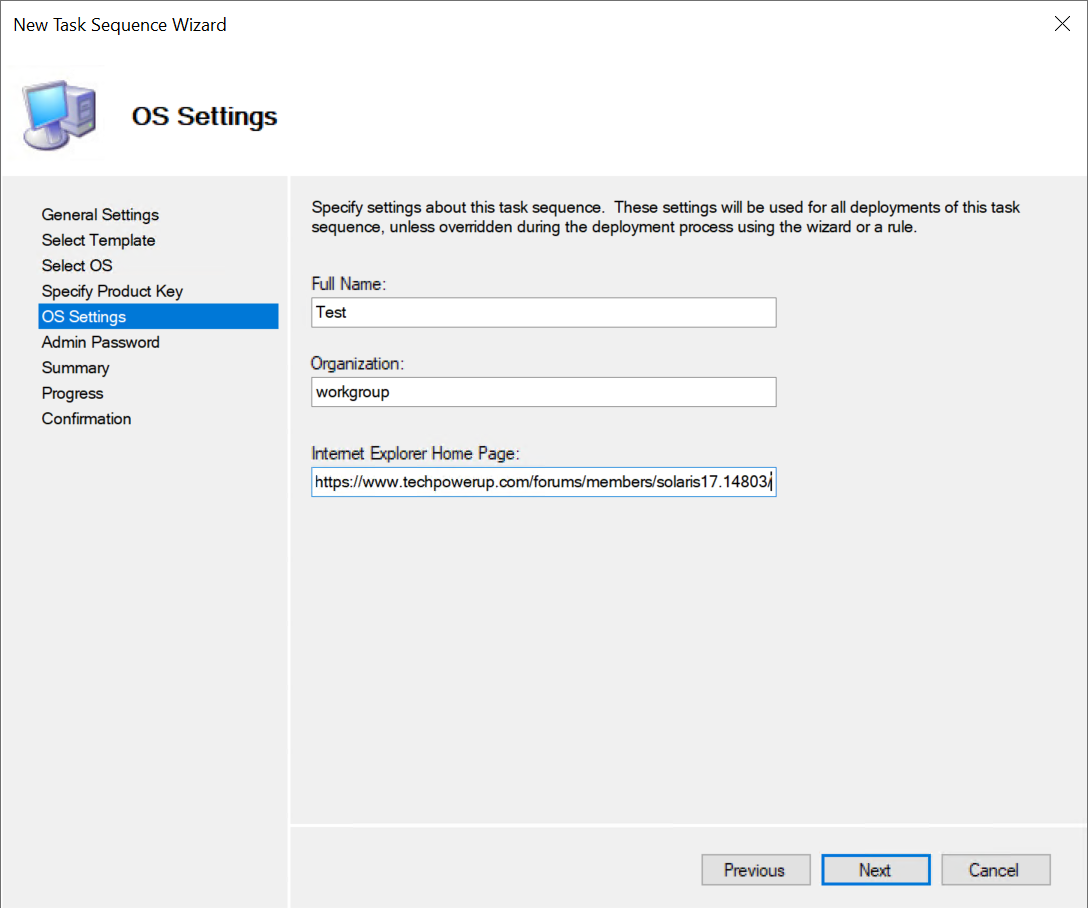
Go ahead name your account and select a default homepage if you want. For Organization we will use want to put in the windows default "workgroup".
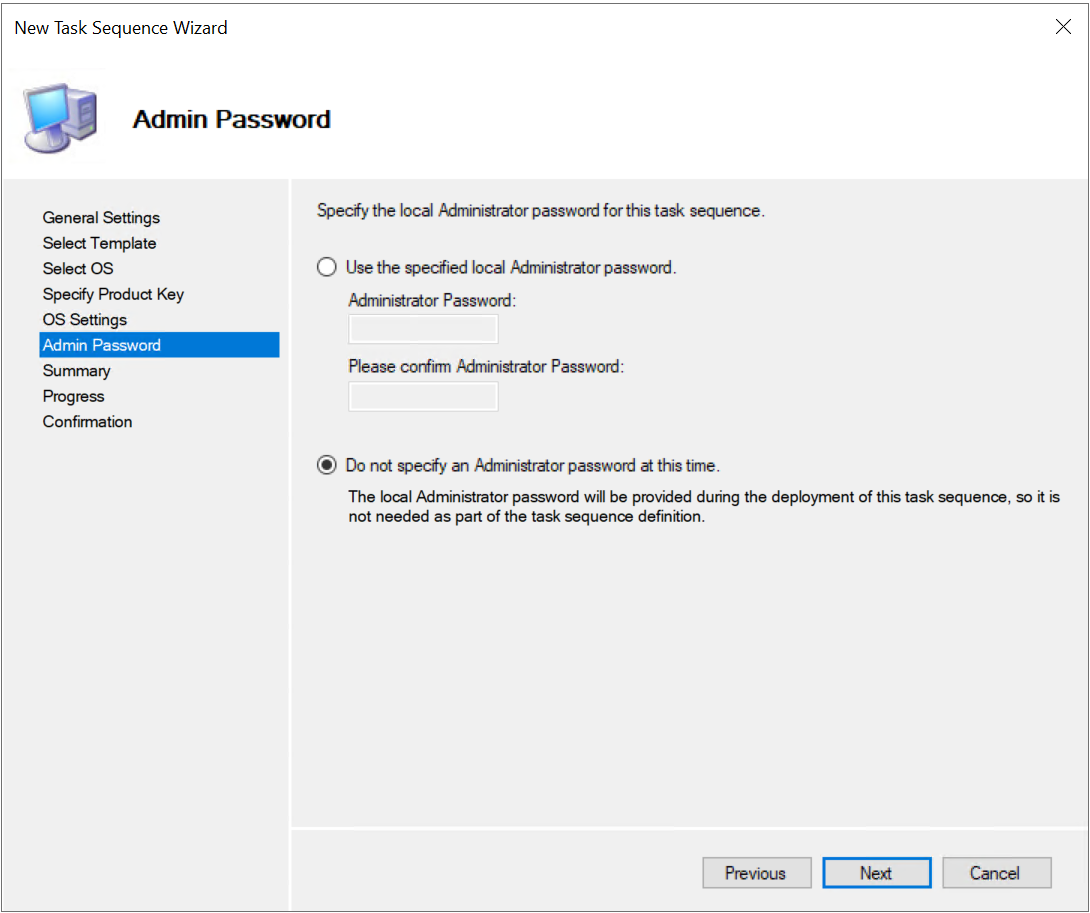
This one will make a lot of you happy. We are going to elect not to provide a password on the next screen.
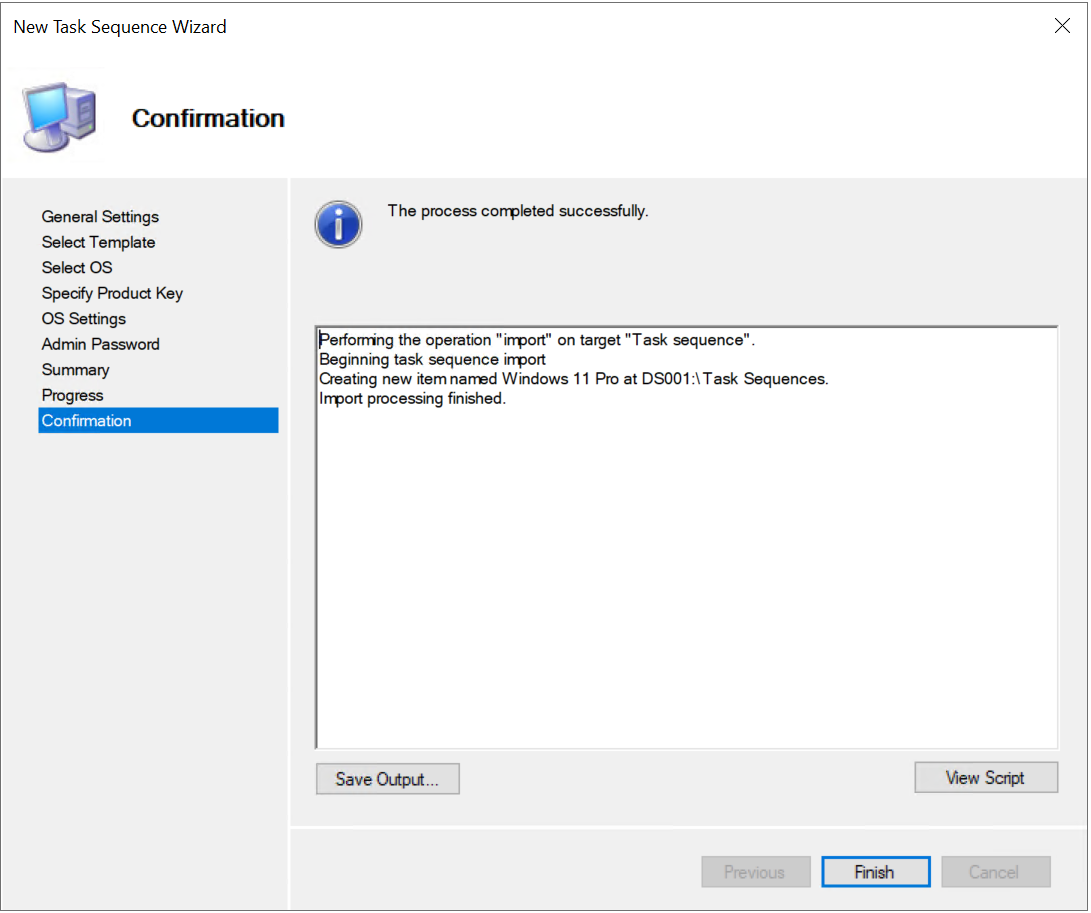
In my best Cortana voice: A little "Next" "Next" here a little "Finish" there and we'll have your PC ready for all you plan to do!
Nice all created!
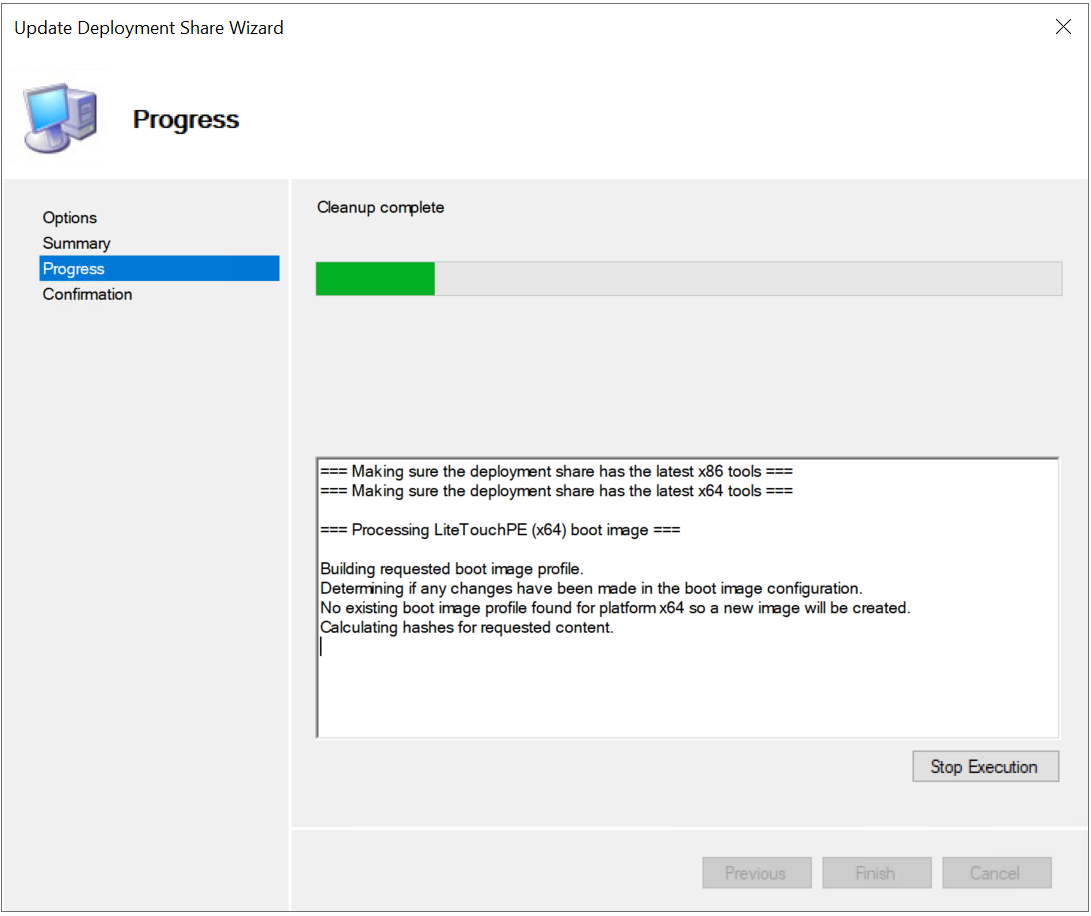
Now right click on the share again and select "Update Deployment Share".
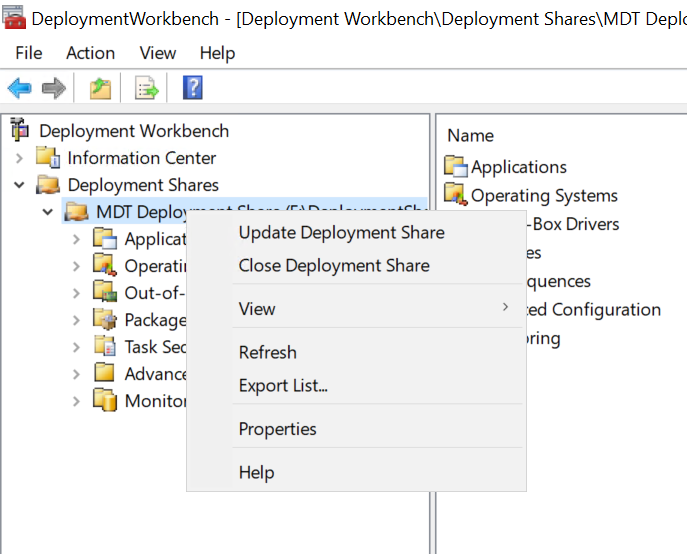
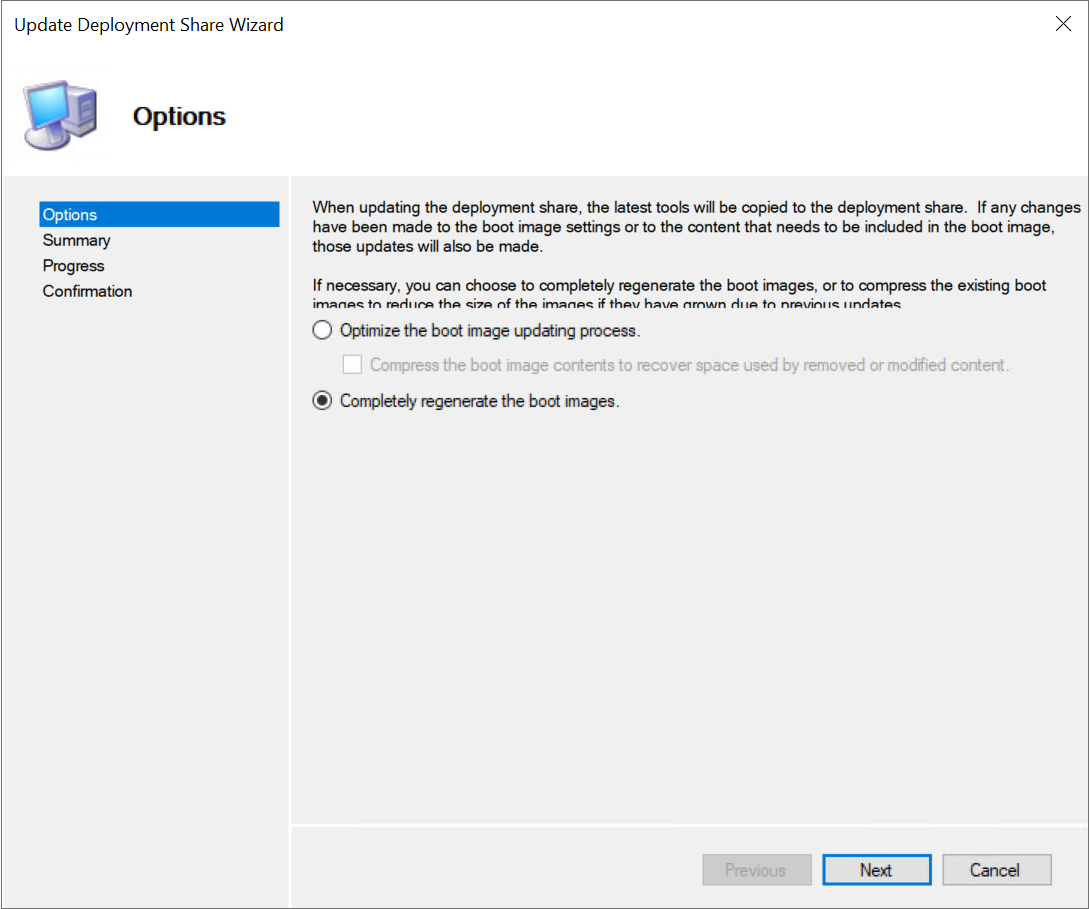
I found through experience its less of an issue to simply select "completely regenerate the boot images."
Select "Next" at the summary window so the build can begin.
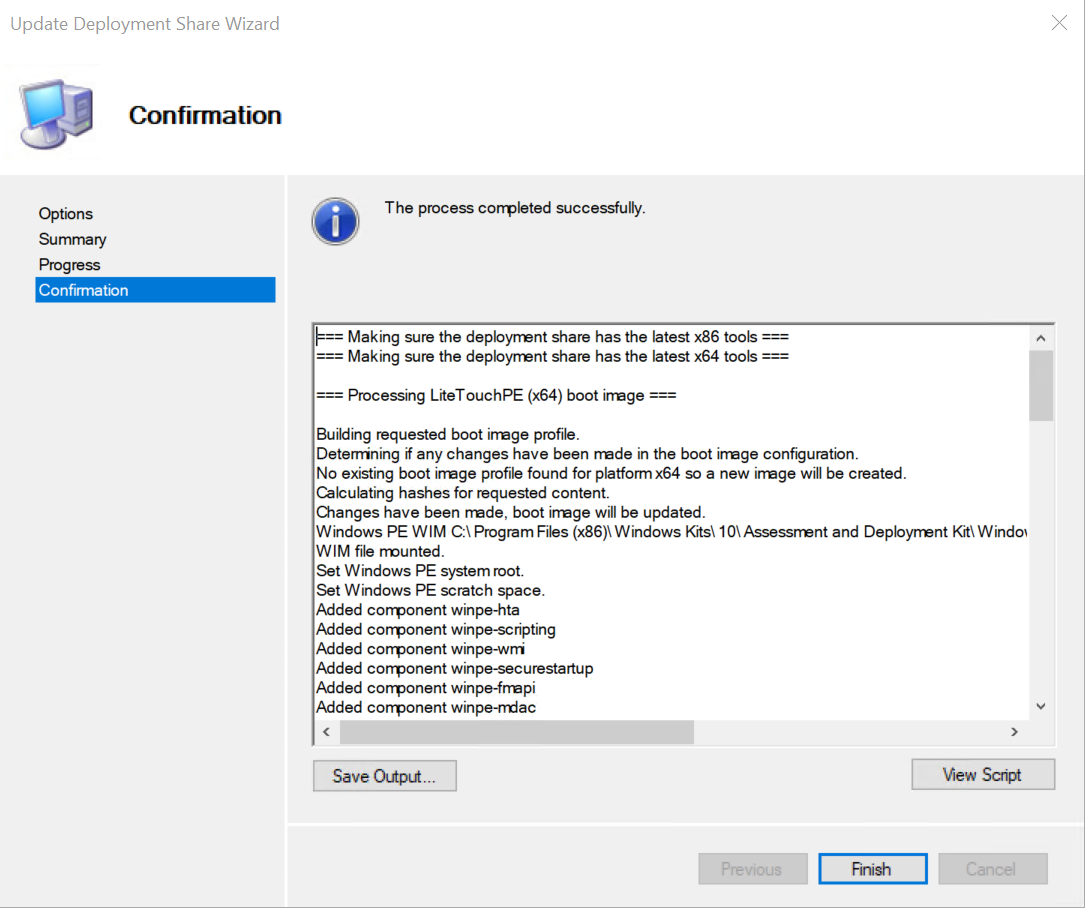
You did it! Click "Finish".
Import your image
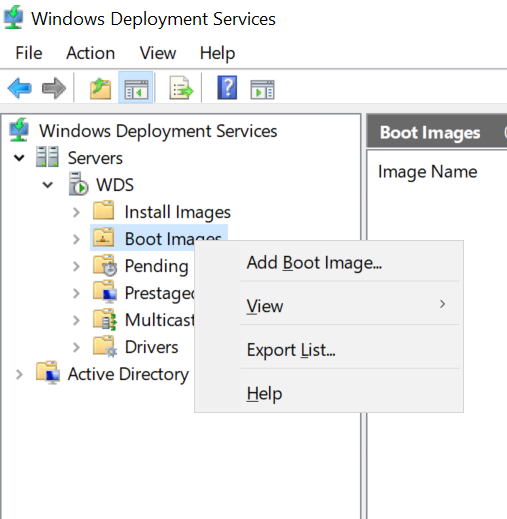
YAY! We are almost done! It seems like a long drawn out process, but I am confident you will be doing this in like 30min tops next time! Great job!Lets open WDS. We need to import the wim we just created in MDT. Expand the server and right click on "Boot Images" Then select "Add Boot Image".
Click the "Browse" button, we need to go find the boot image we created in MDT. It will be on your data drive. Mine is located in:
Code:
E:\DeploymentShare\BootYour drive letter may be different. Remember when we had the opportunity to rename this wim? Look for it. It should be directly in the folder listed above.
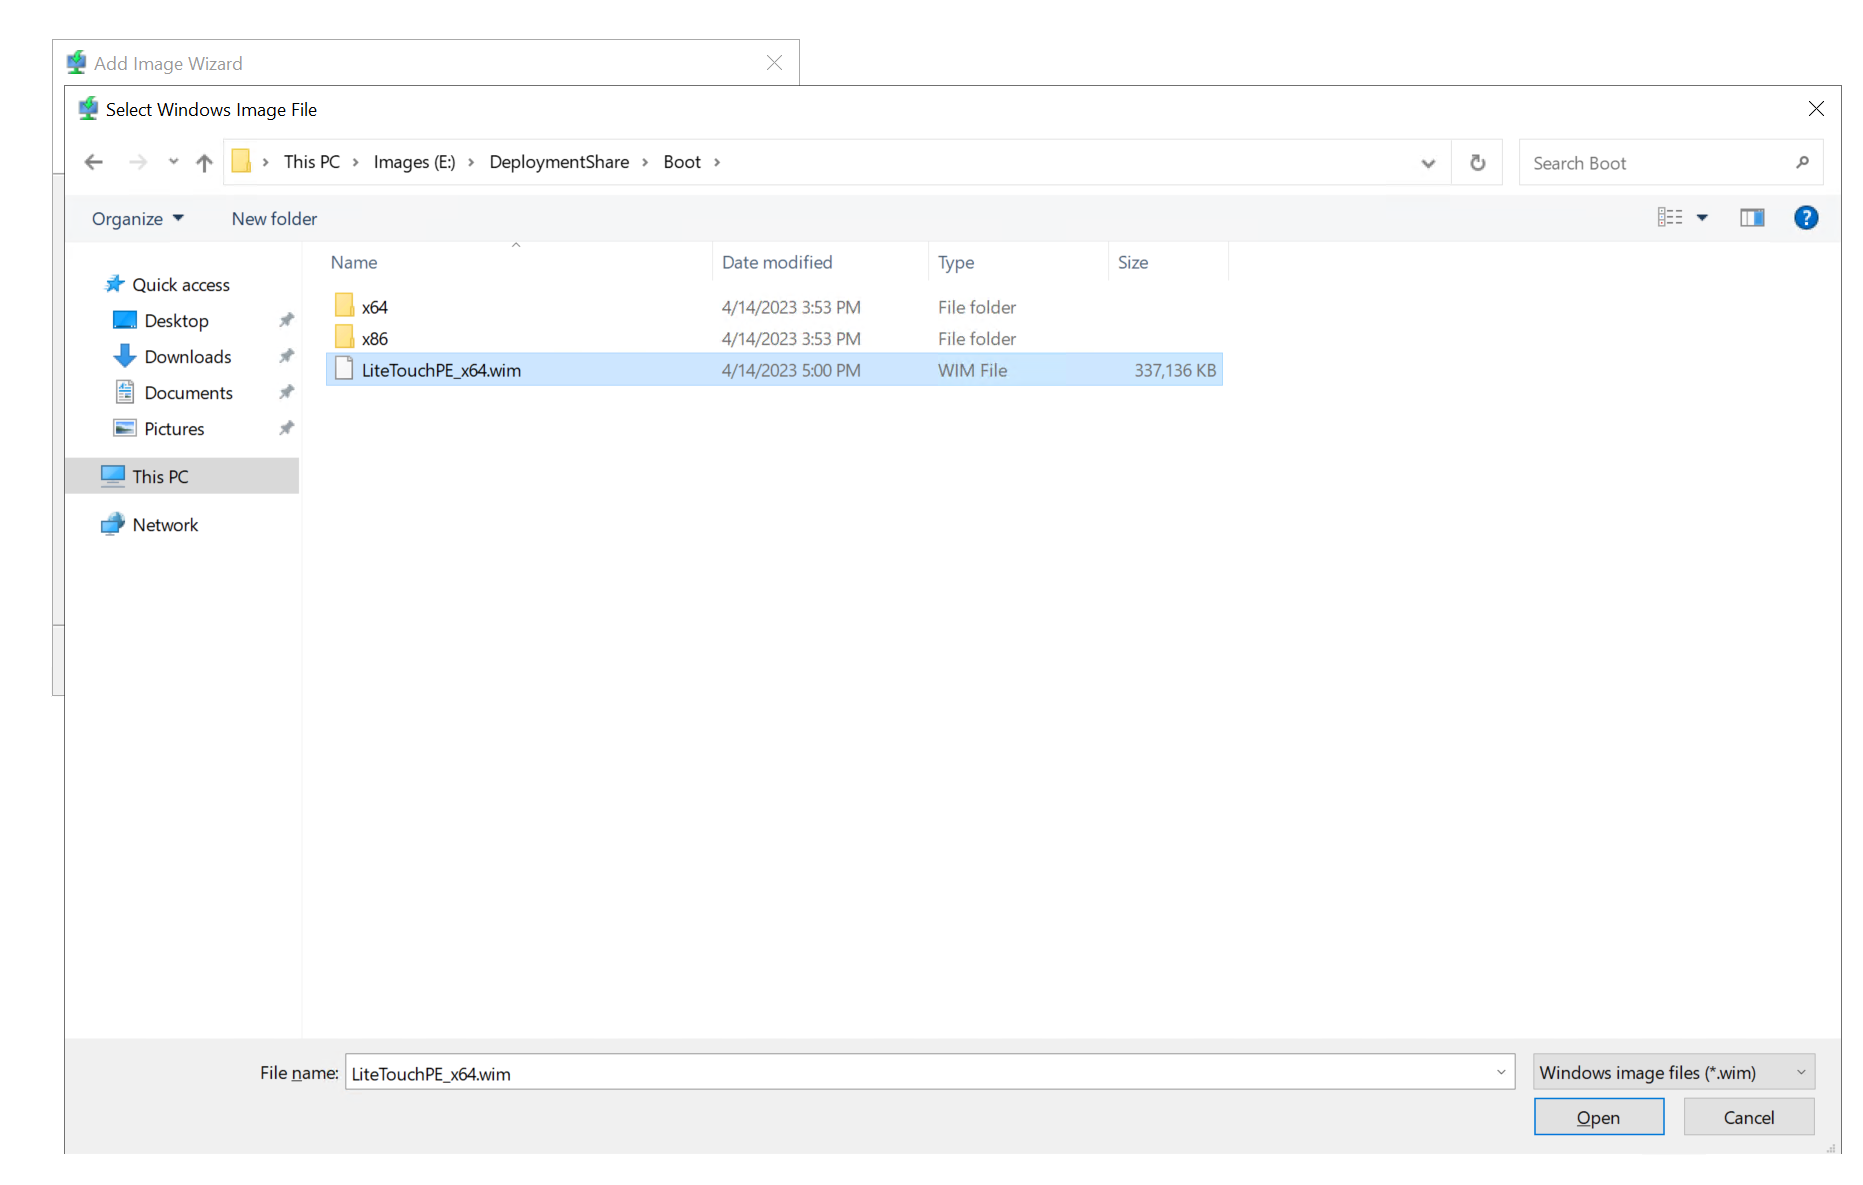
Now click "Open" followed by "Next" in the wizard.
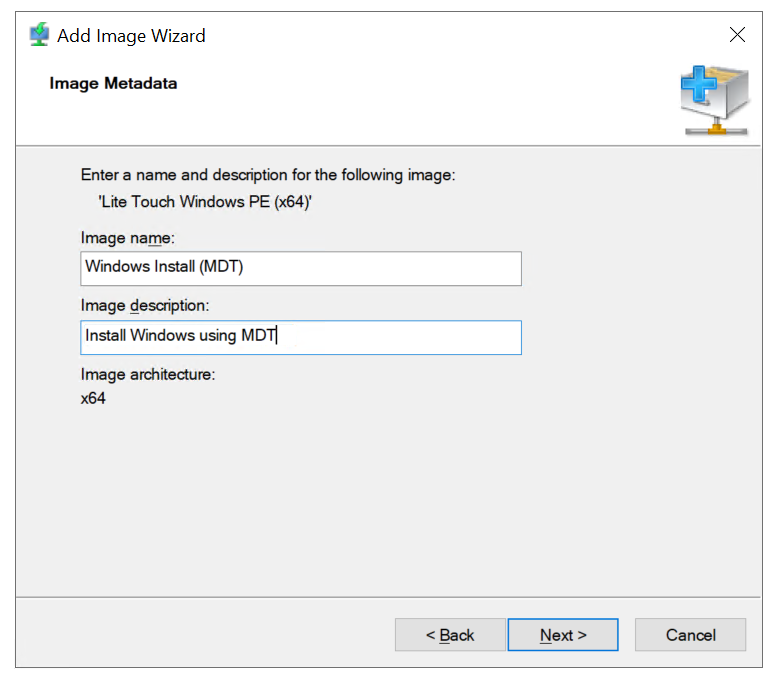
Here we will be able to change the name and description of the image. I recommend doing this, and changing it to something sane. In the event we add more to the server. After you choose a name, hit "Next".
Not much to show, pretty "Next" through the summary screens until you import the image.
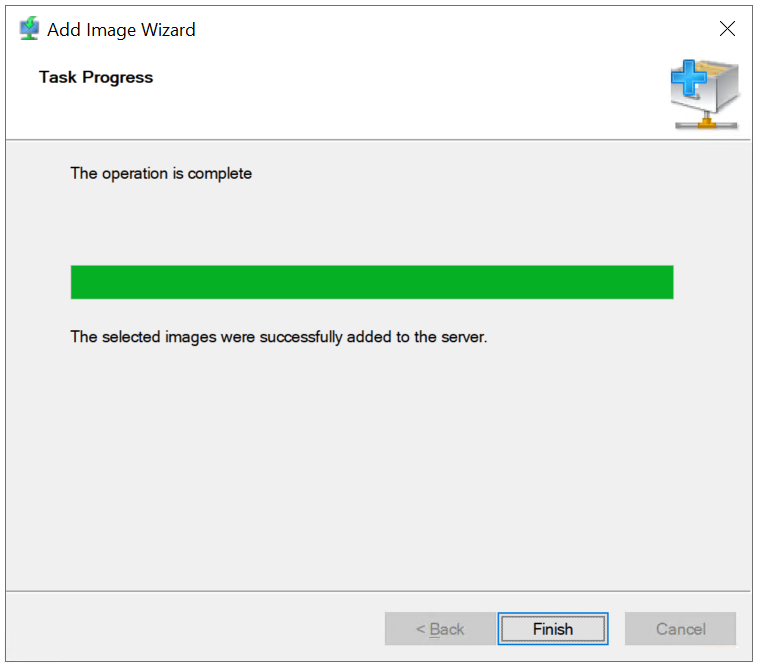
Yay! You did it! Go ahead and right click and reboot the service like we did before.
As a general rule, if you want to save yourself the headache remember the golden rules.
Any change to WDS you should restart the service!
Any change to MDT you should completely regenerate the boot image!
Formatting your first PC
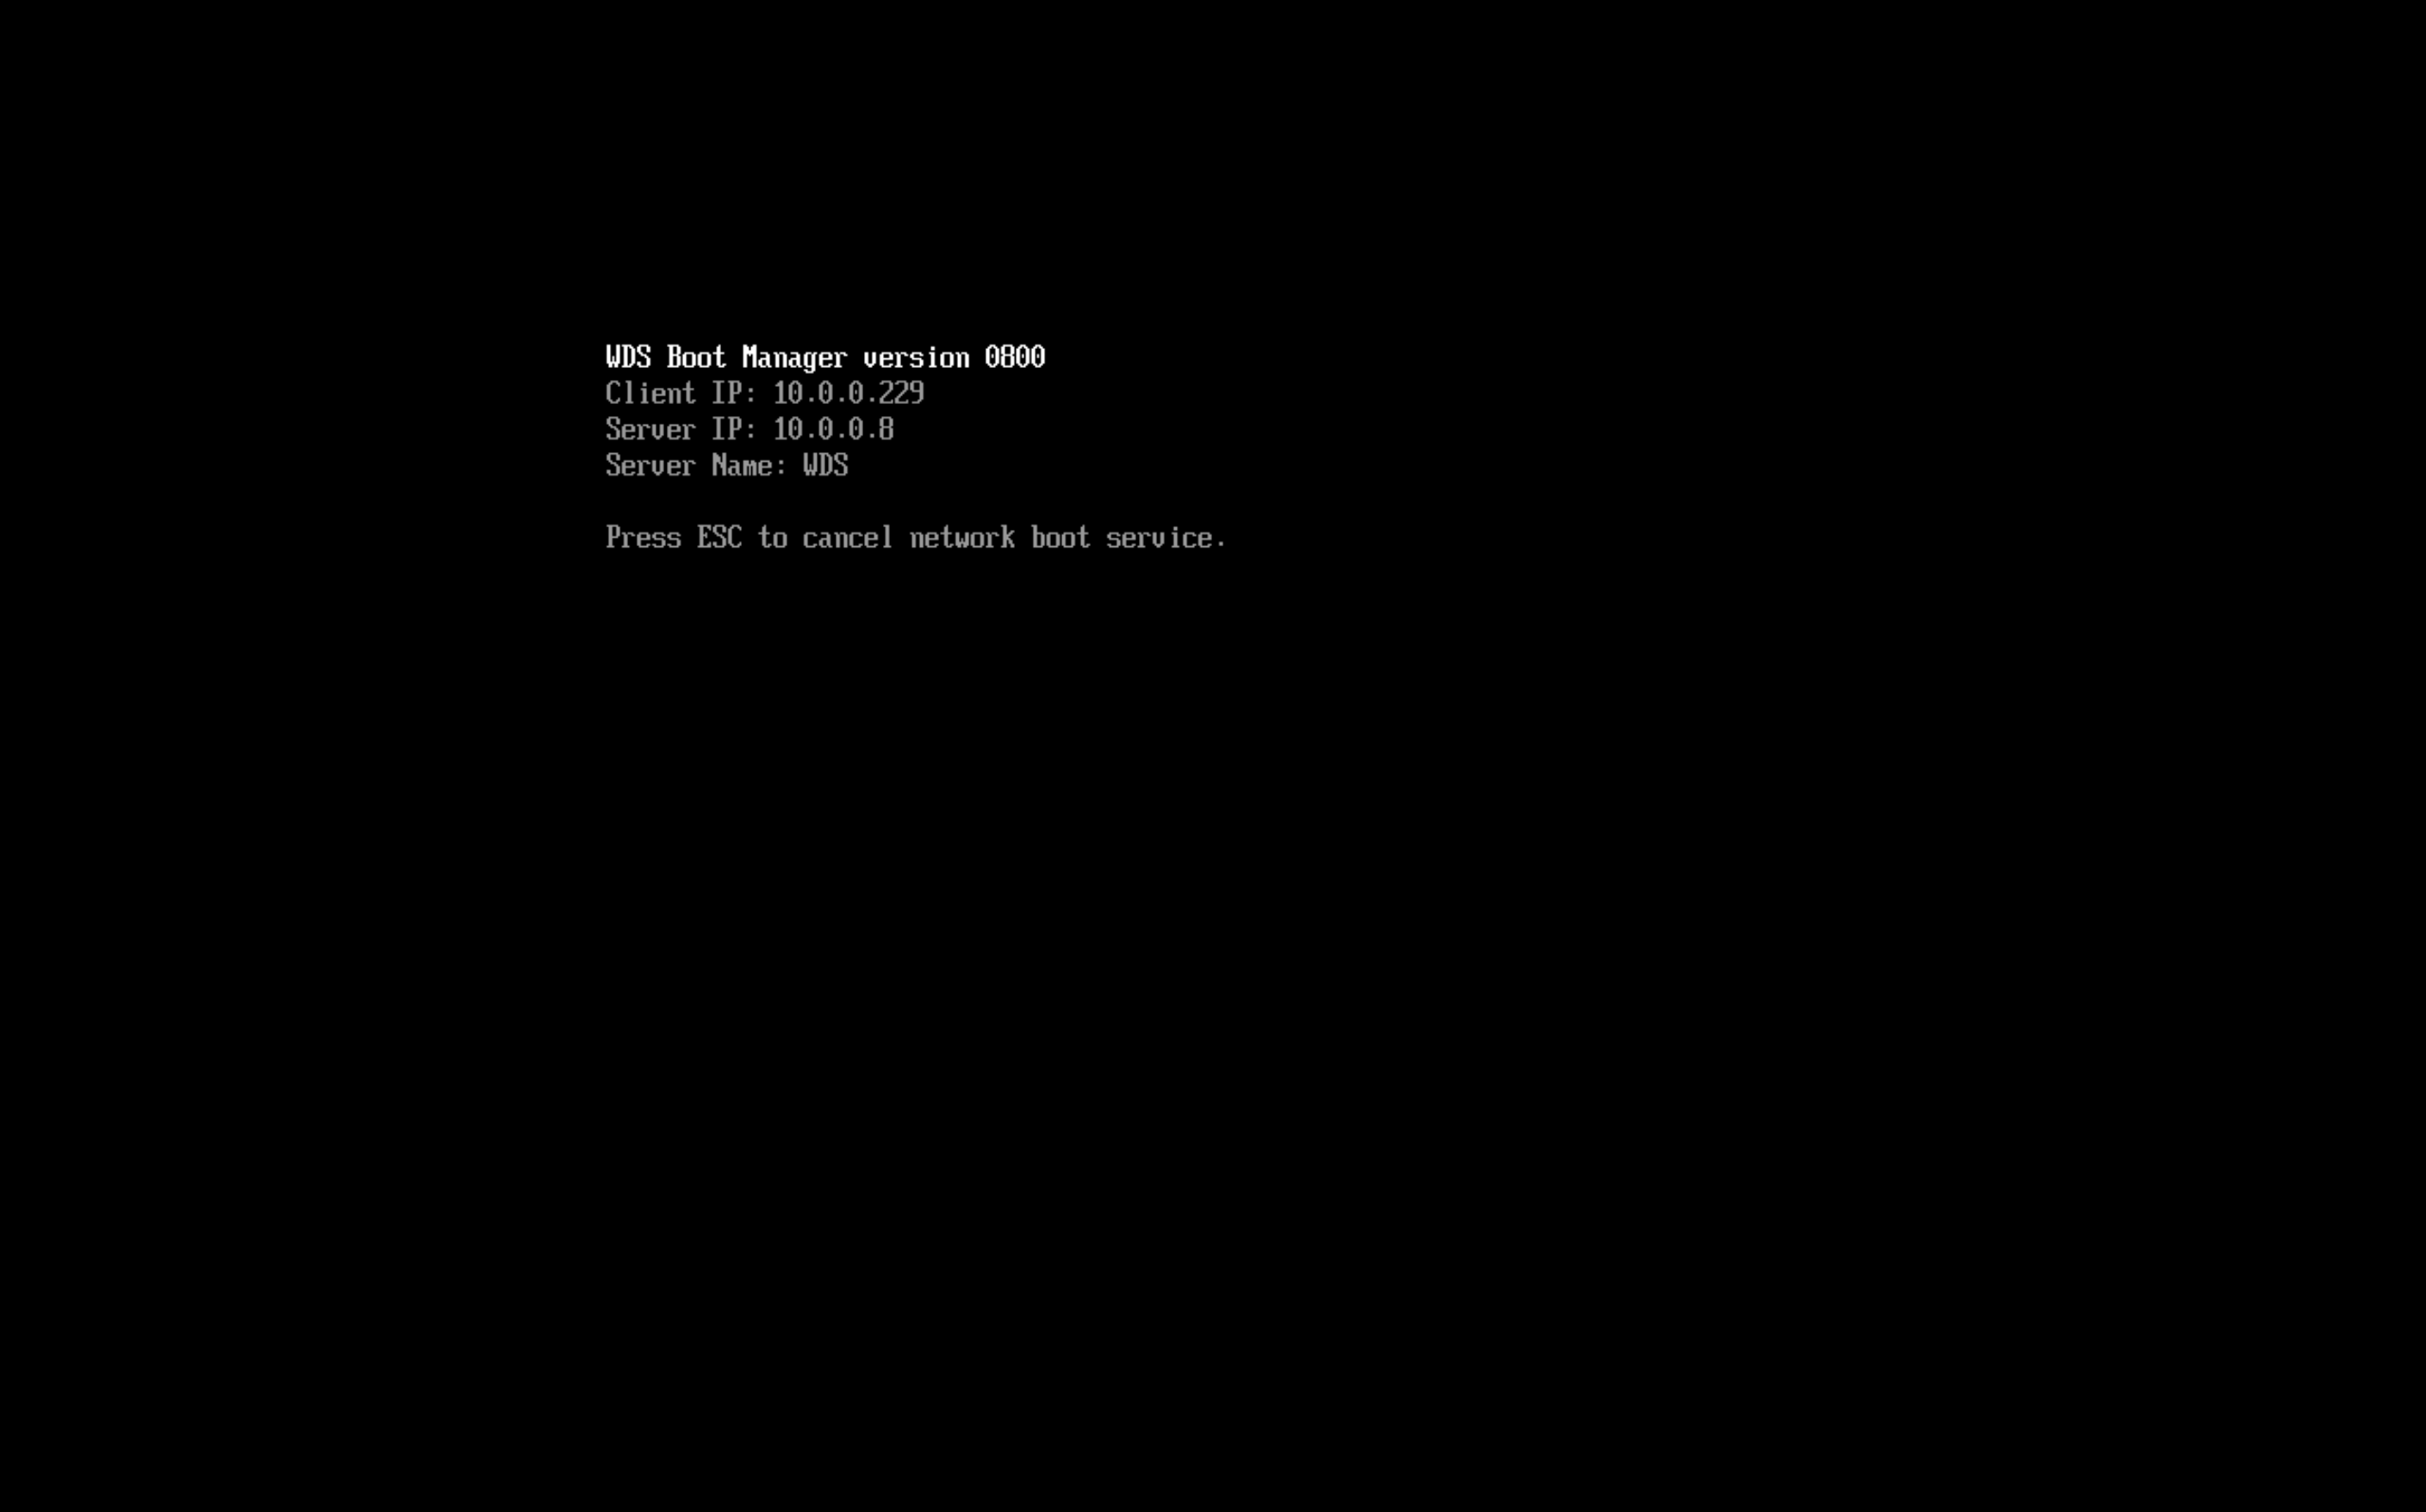
Oh man! Congrats on getting this far! You made it! Lets test it out! Grab a computer and make sure you enable PXE boot in the bios. For UEFI you will want to enable the "Network Stack" before it gives you the option. Once done, figure out your boot menu button and lets give it a try! For this exercise you should use a PC or VM you don't mind wiping. In the event you press "Next" a few too many times.Before we begin I do want to warn you. Below in the further reading section I have examples and a link to customizing MDT to let you CHOOSE WHICH DRIVE. By default MDT is dumb, it will attempt to format any drive that shows up as DRIVE 0 as is defined by the BIOS. DRIVE 0 DOES NOT CORRESPOND TO THE OS DRIVE IN ALL SCENARIOS.
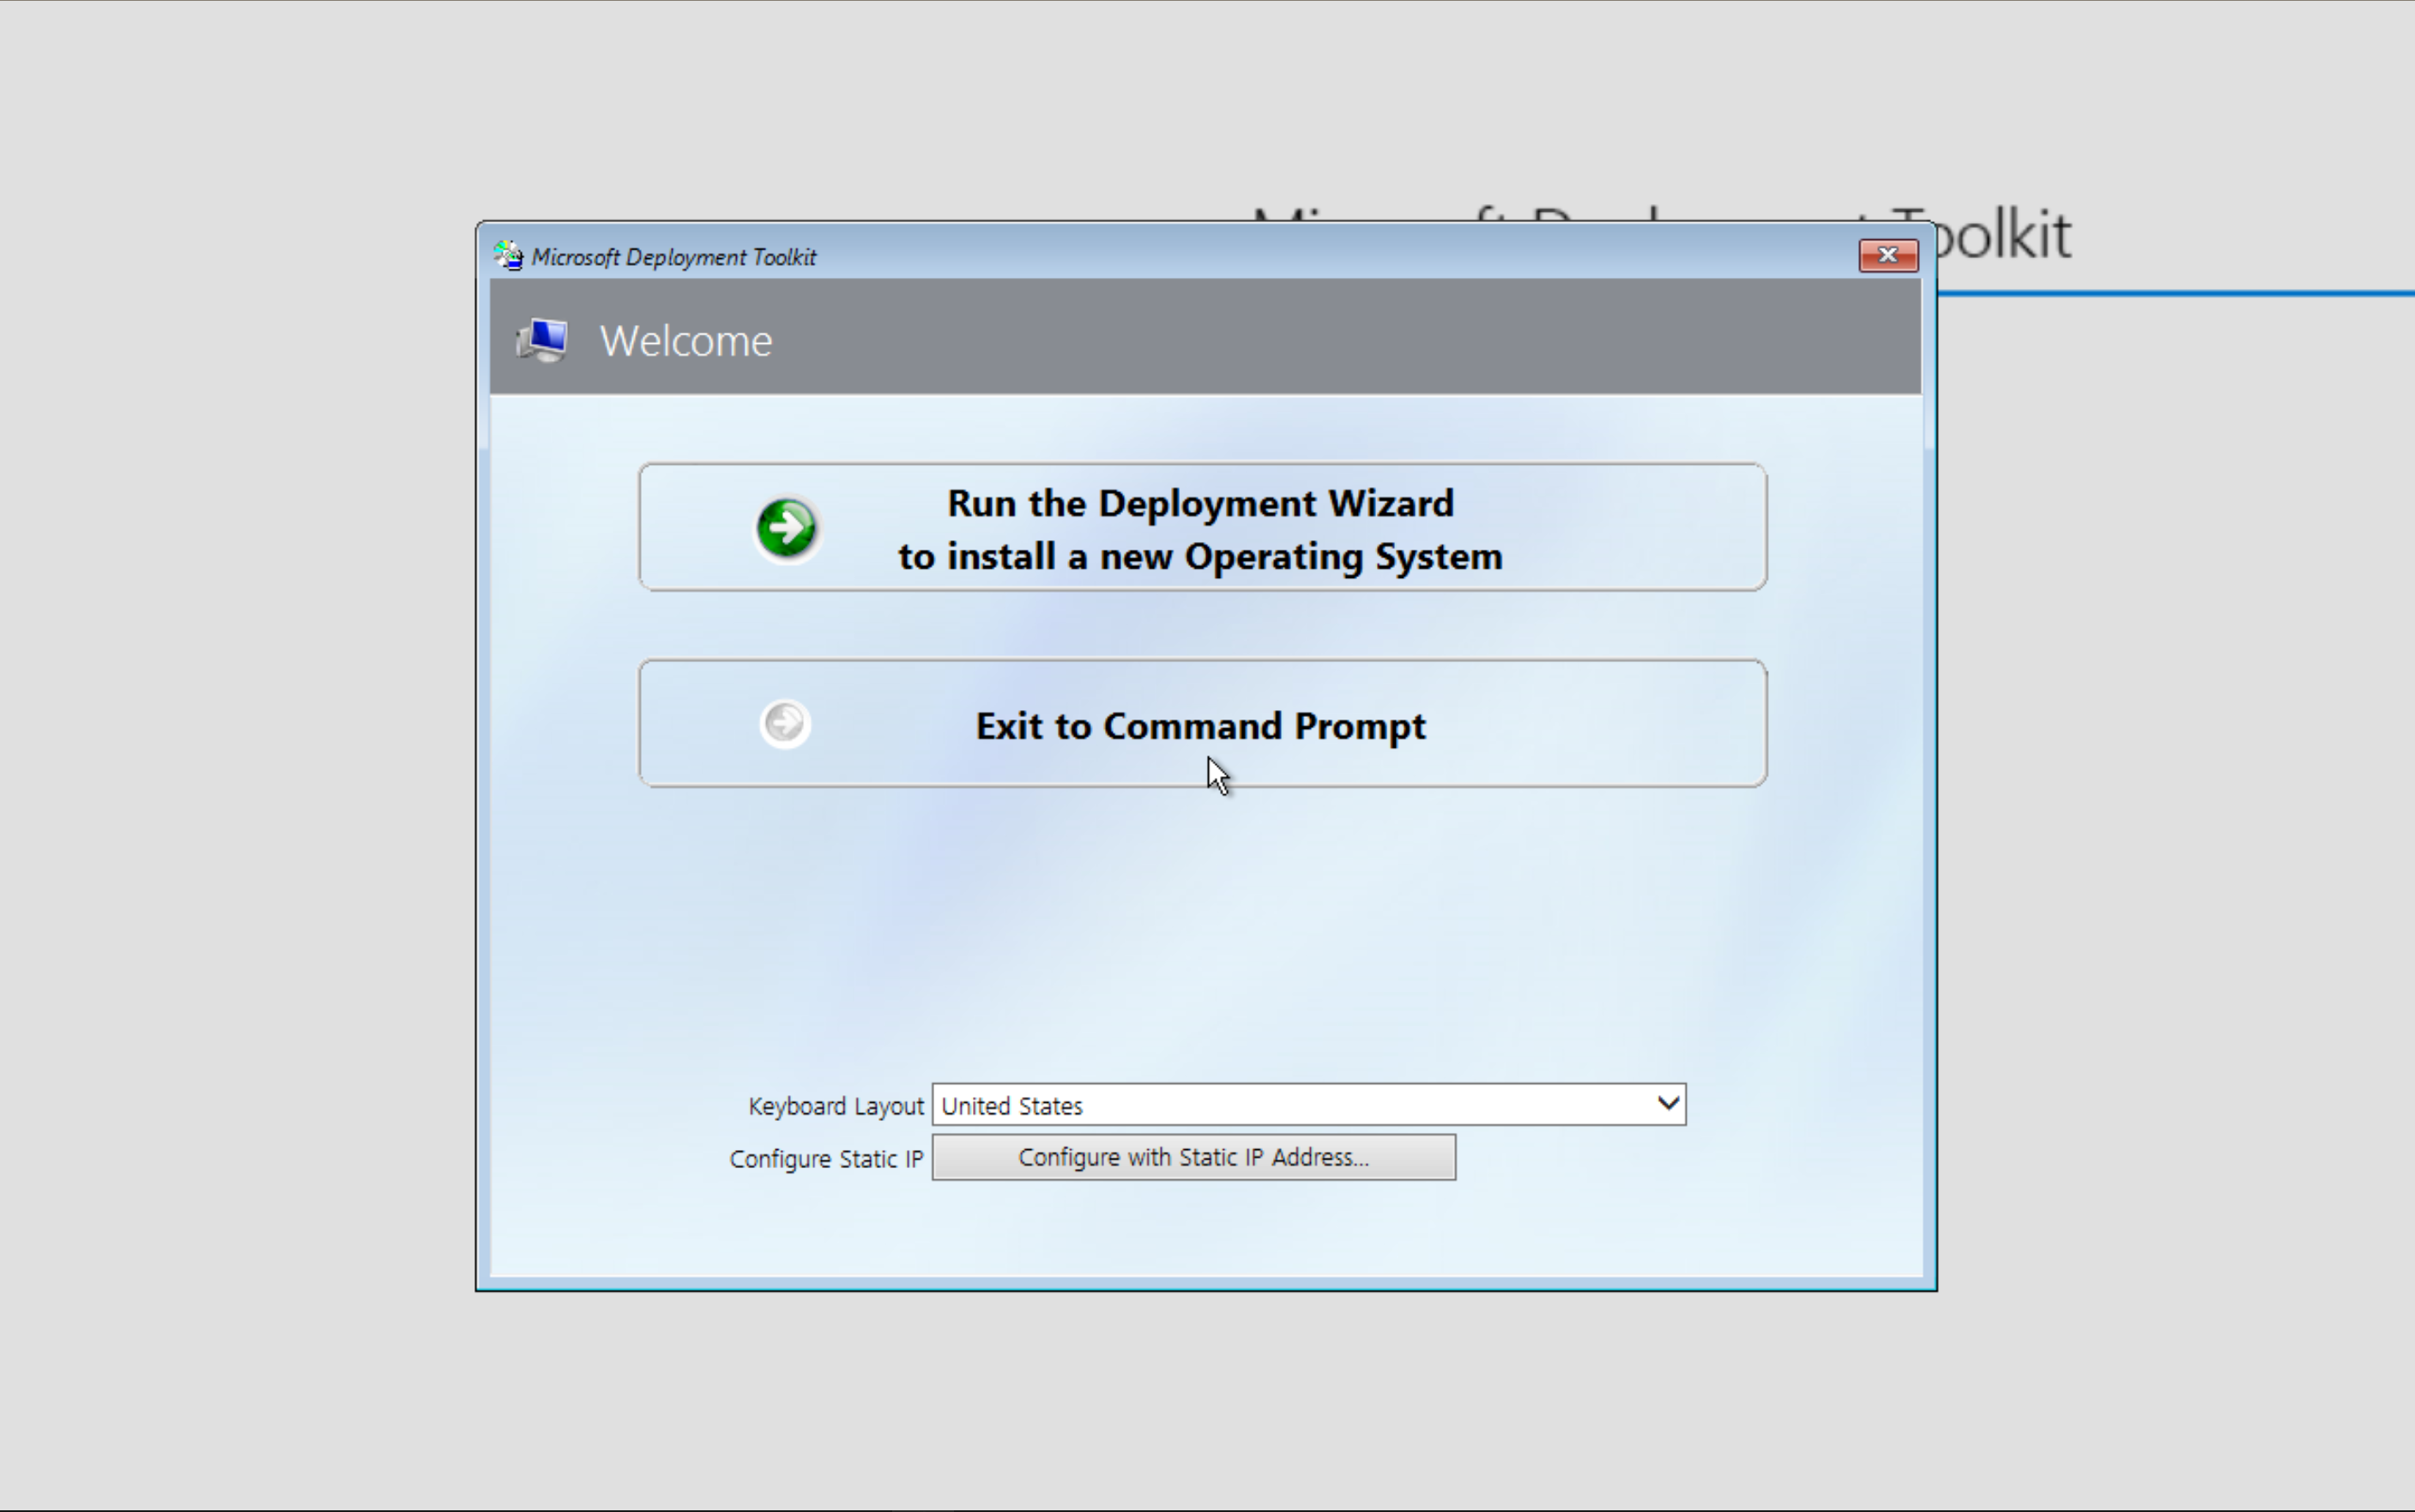
Lets go!
Good start!
Nice! Lets continue to the deployment wizard!
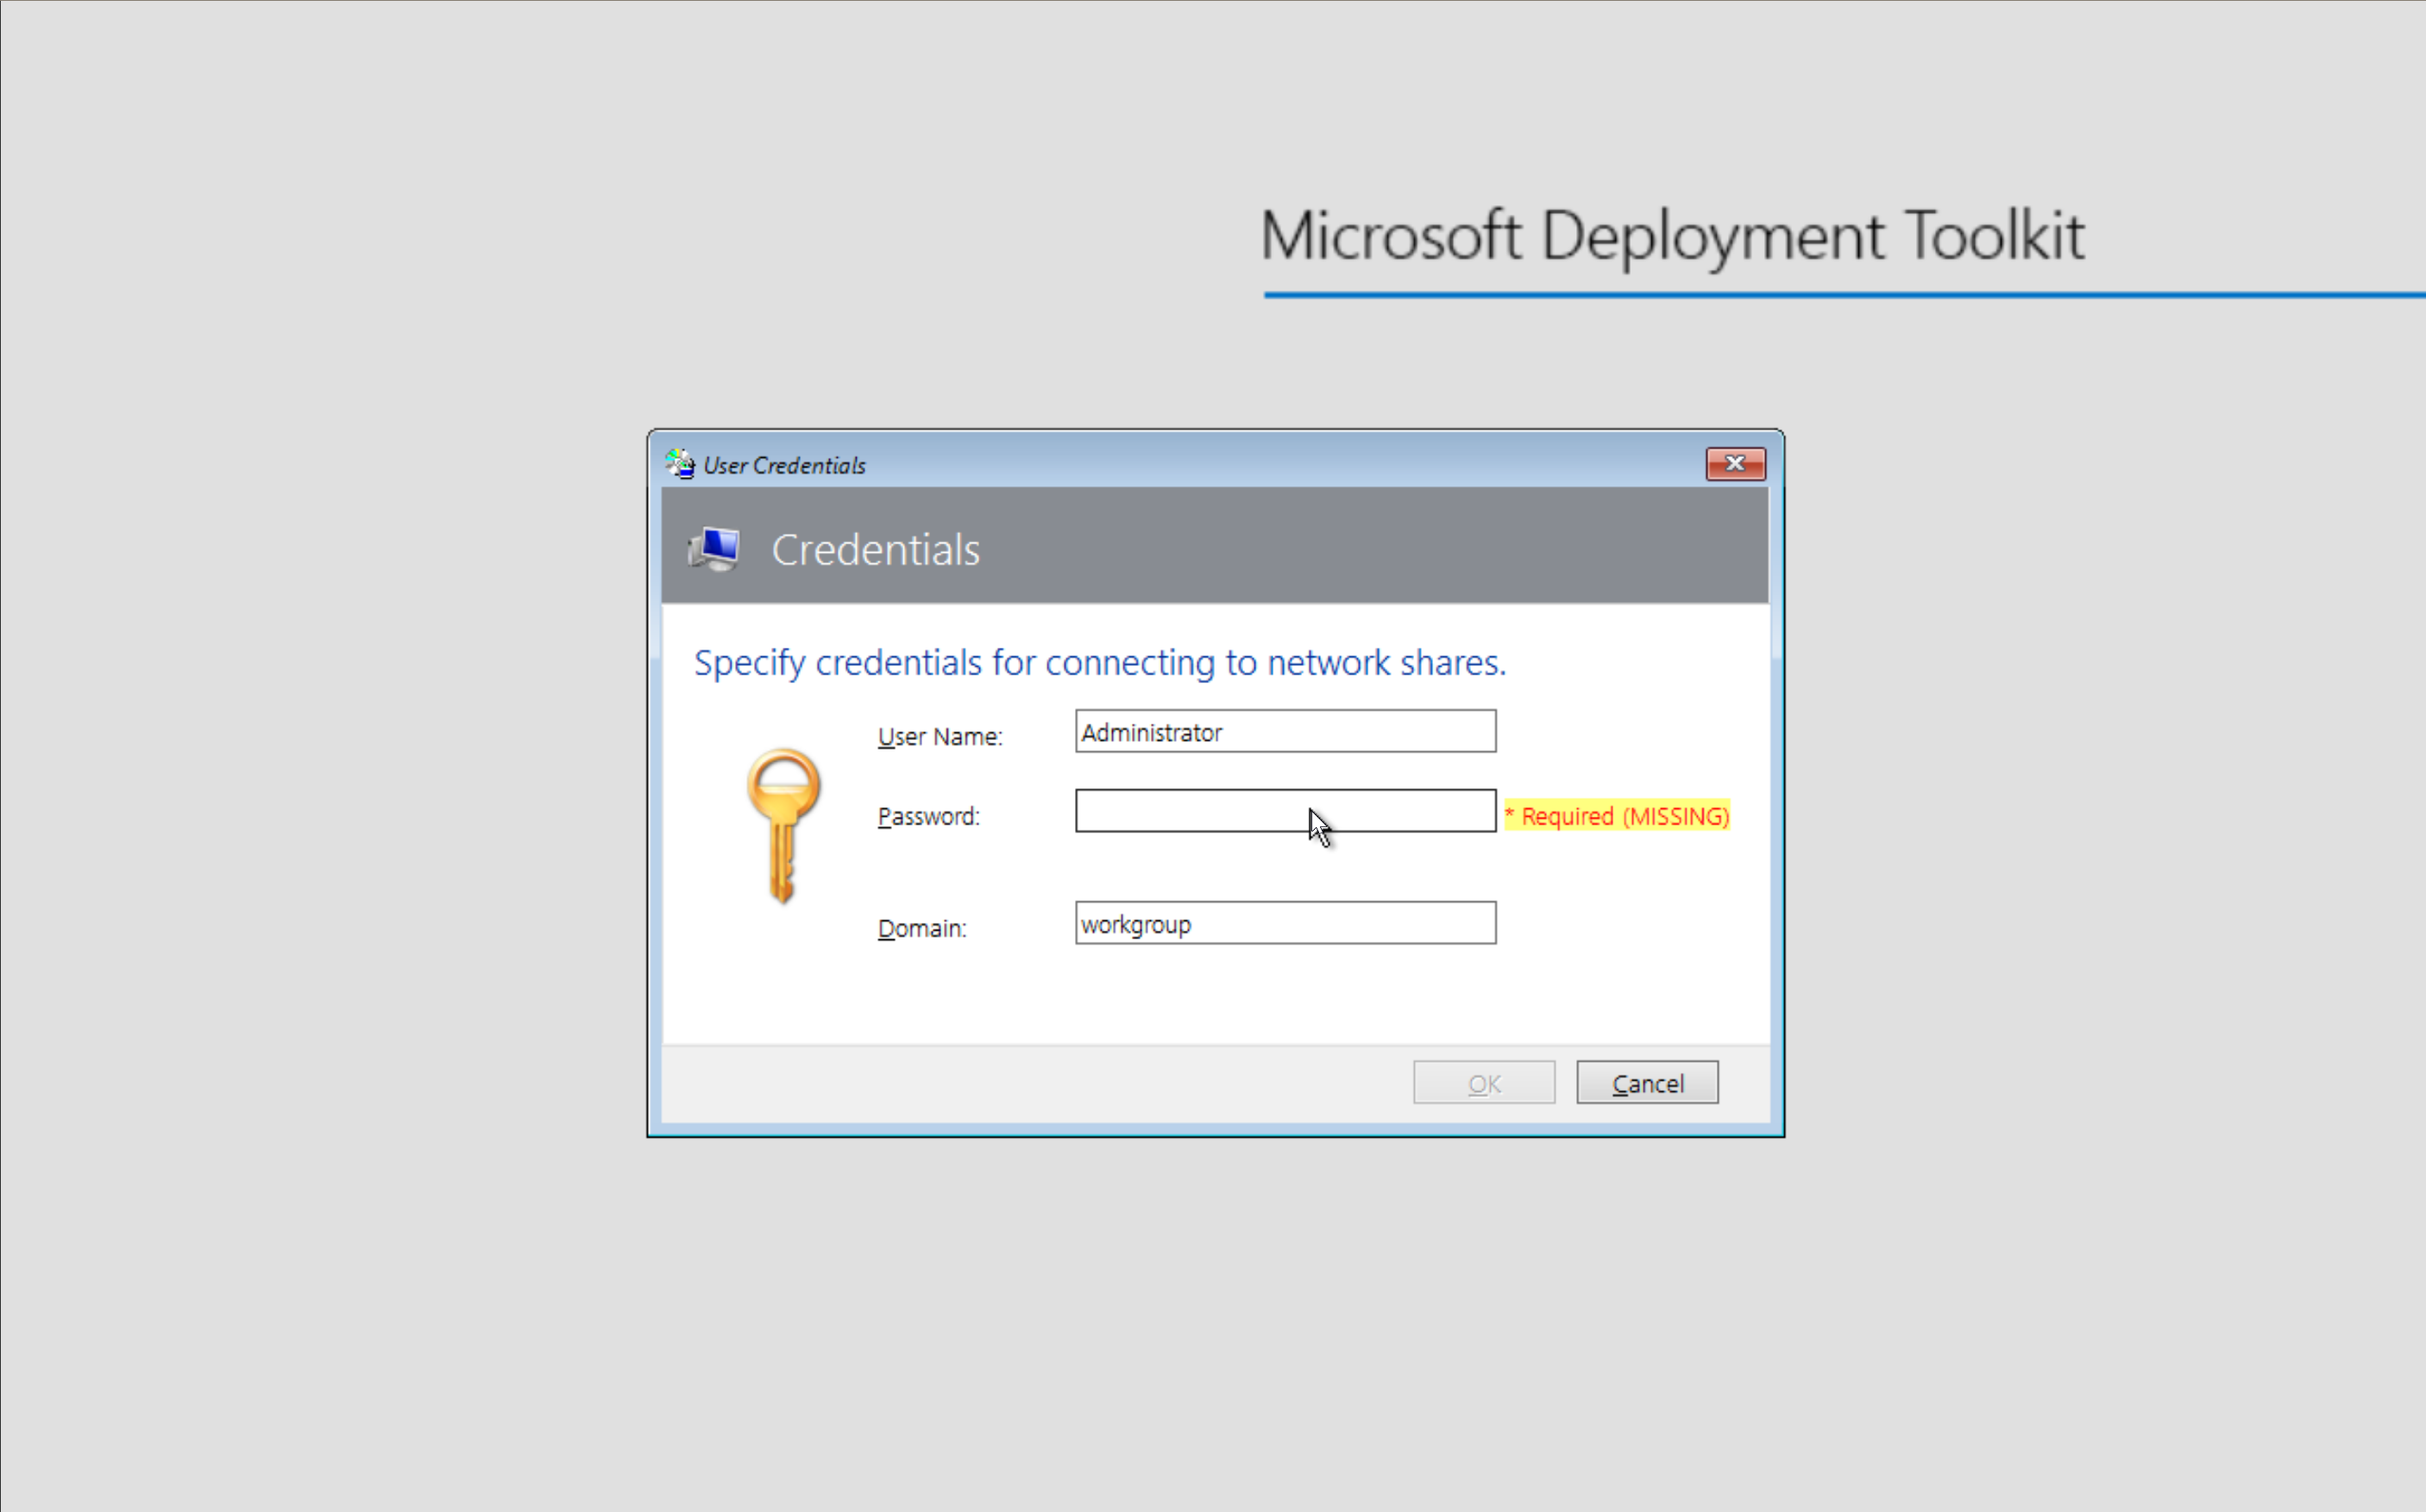
We need to enter the username and password for the Administrator user of the server. So that the PE environment can access the share.
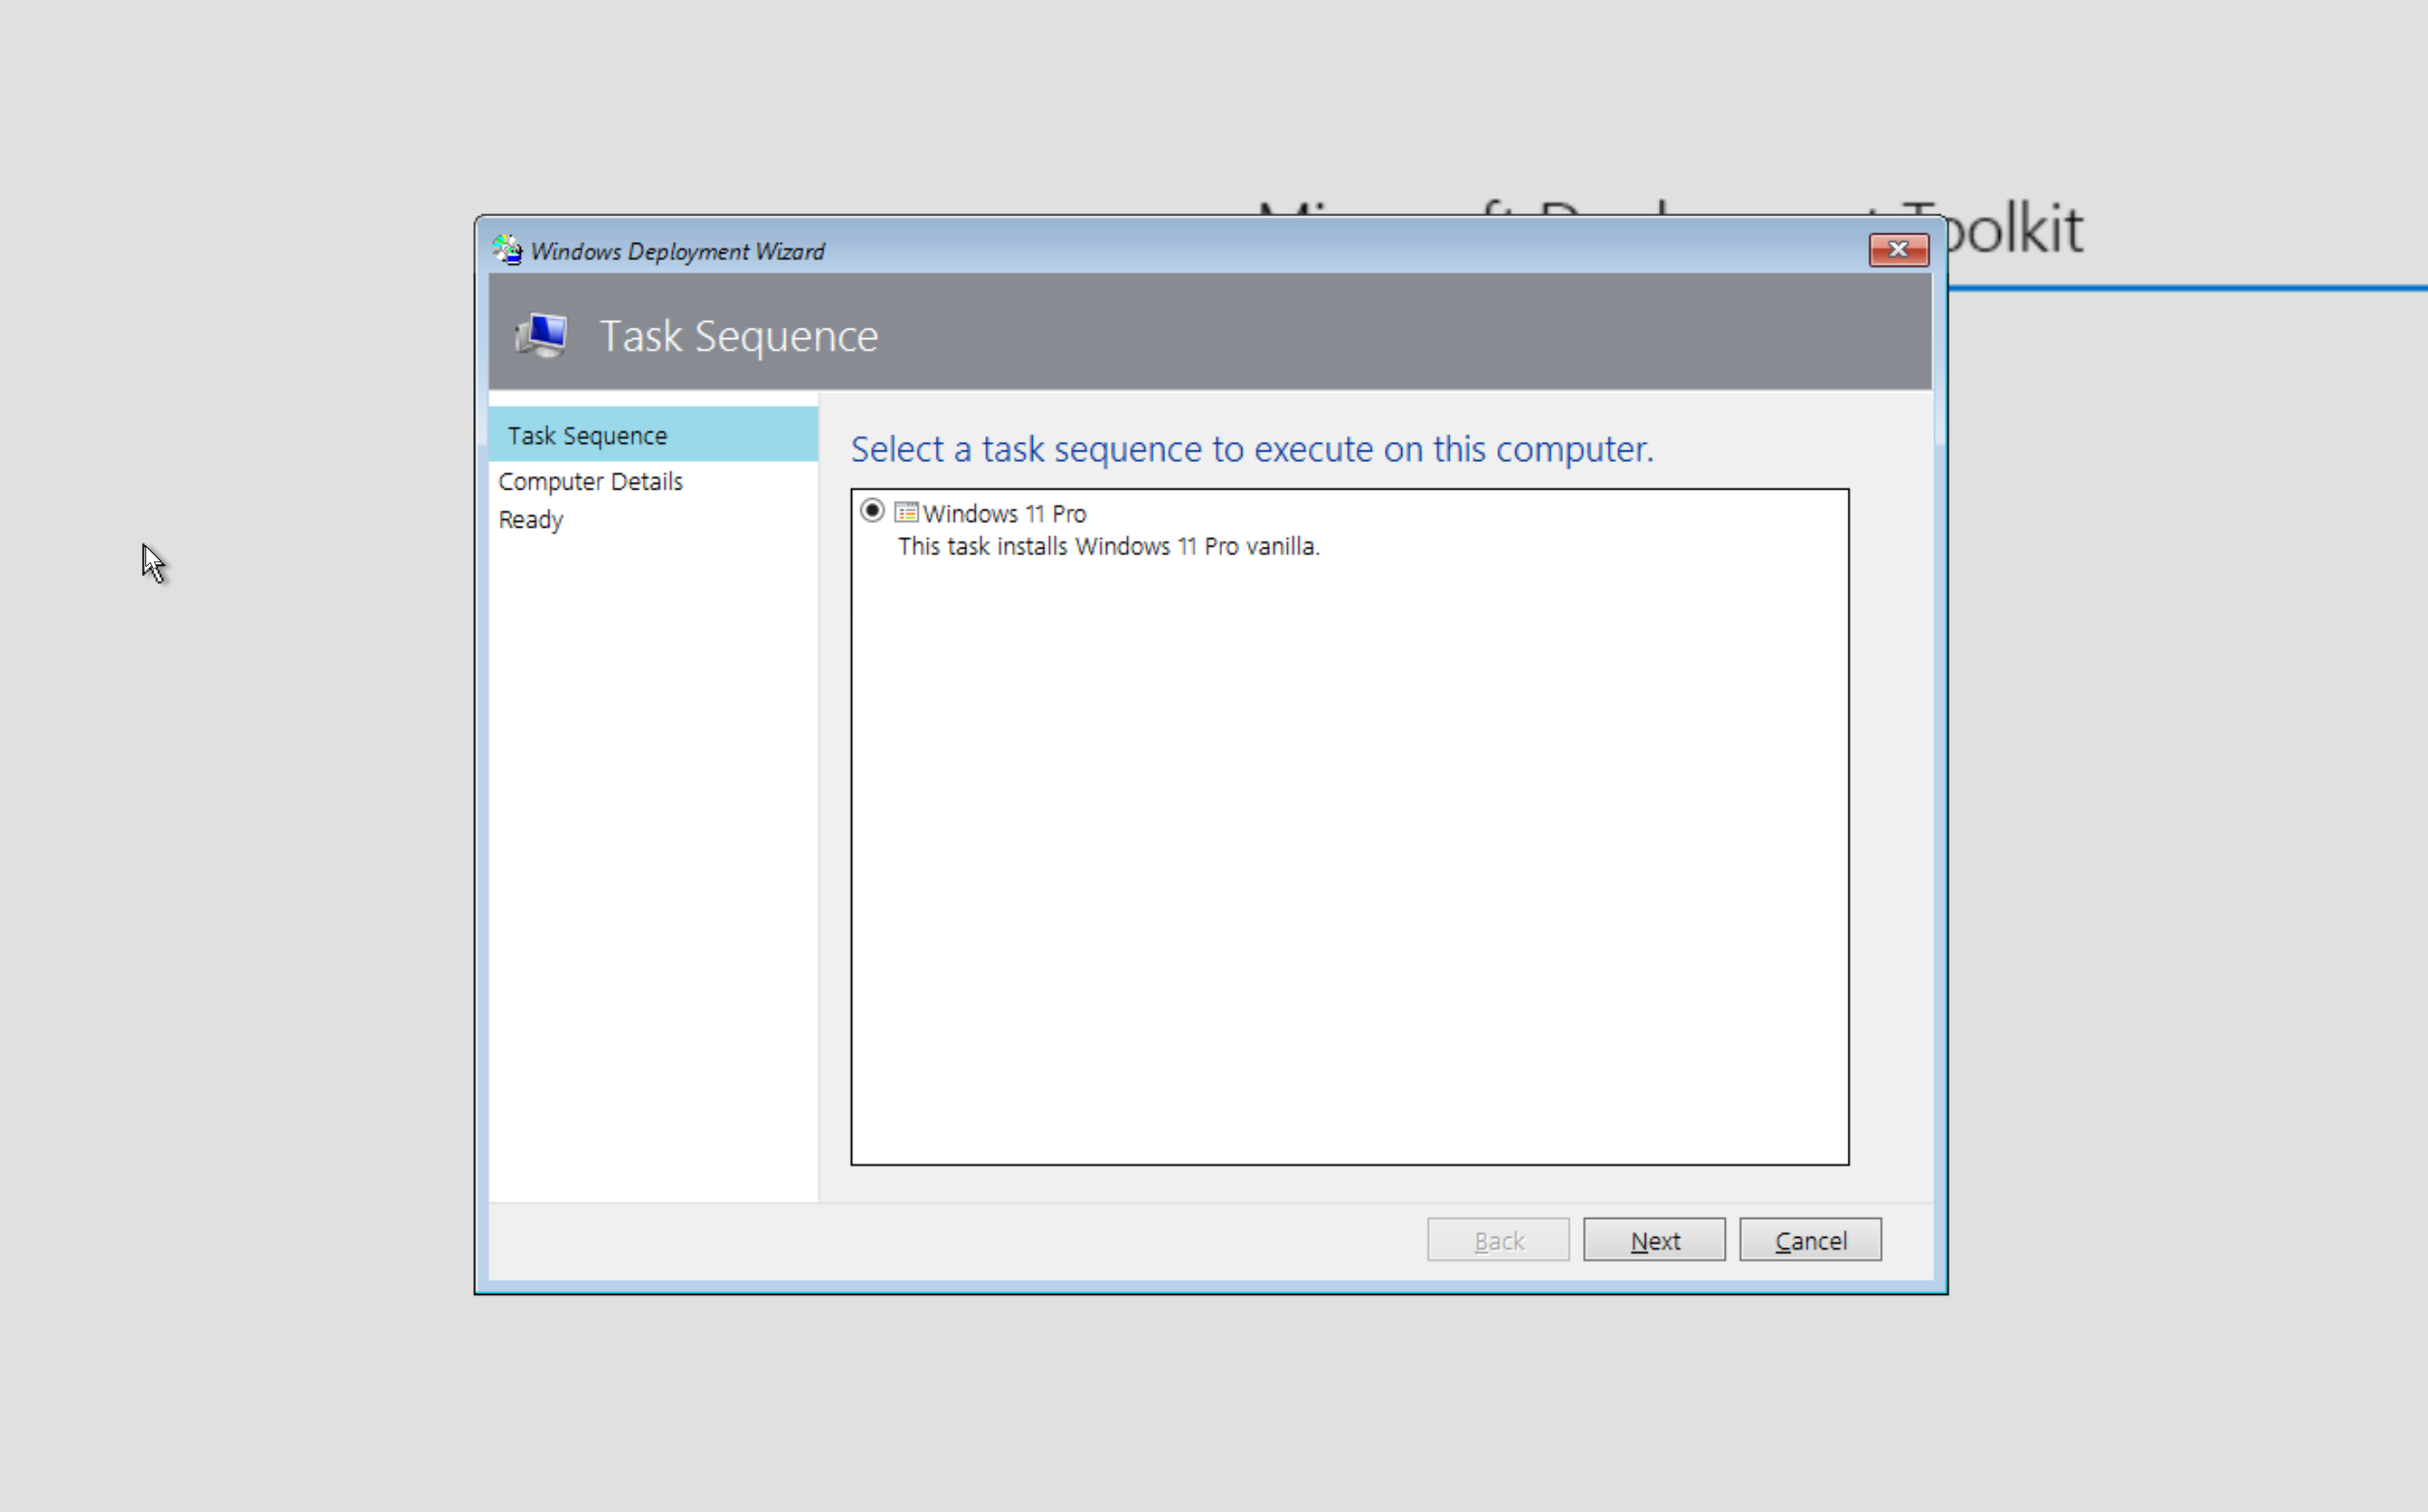
Nice!! We can select which task sequence we want to run!
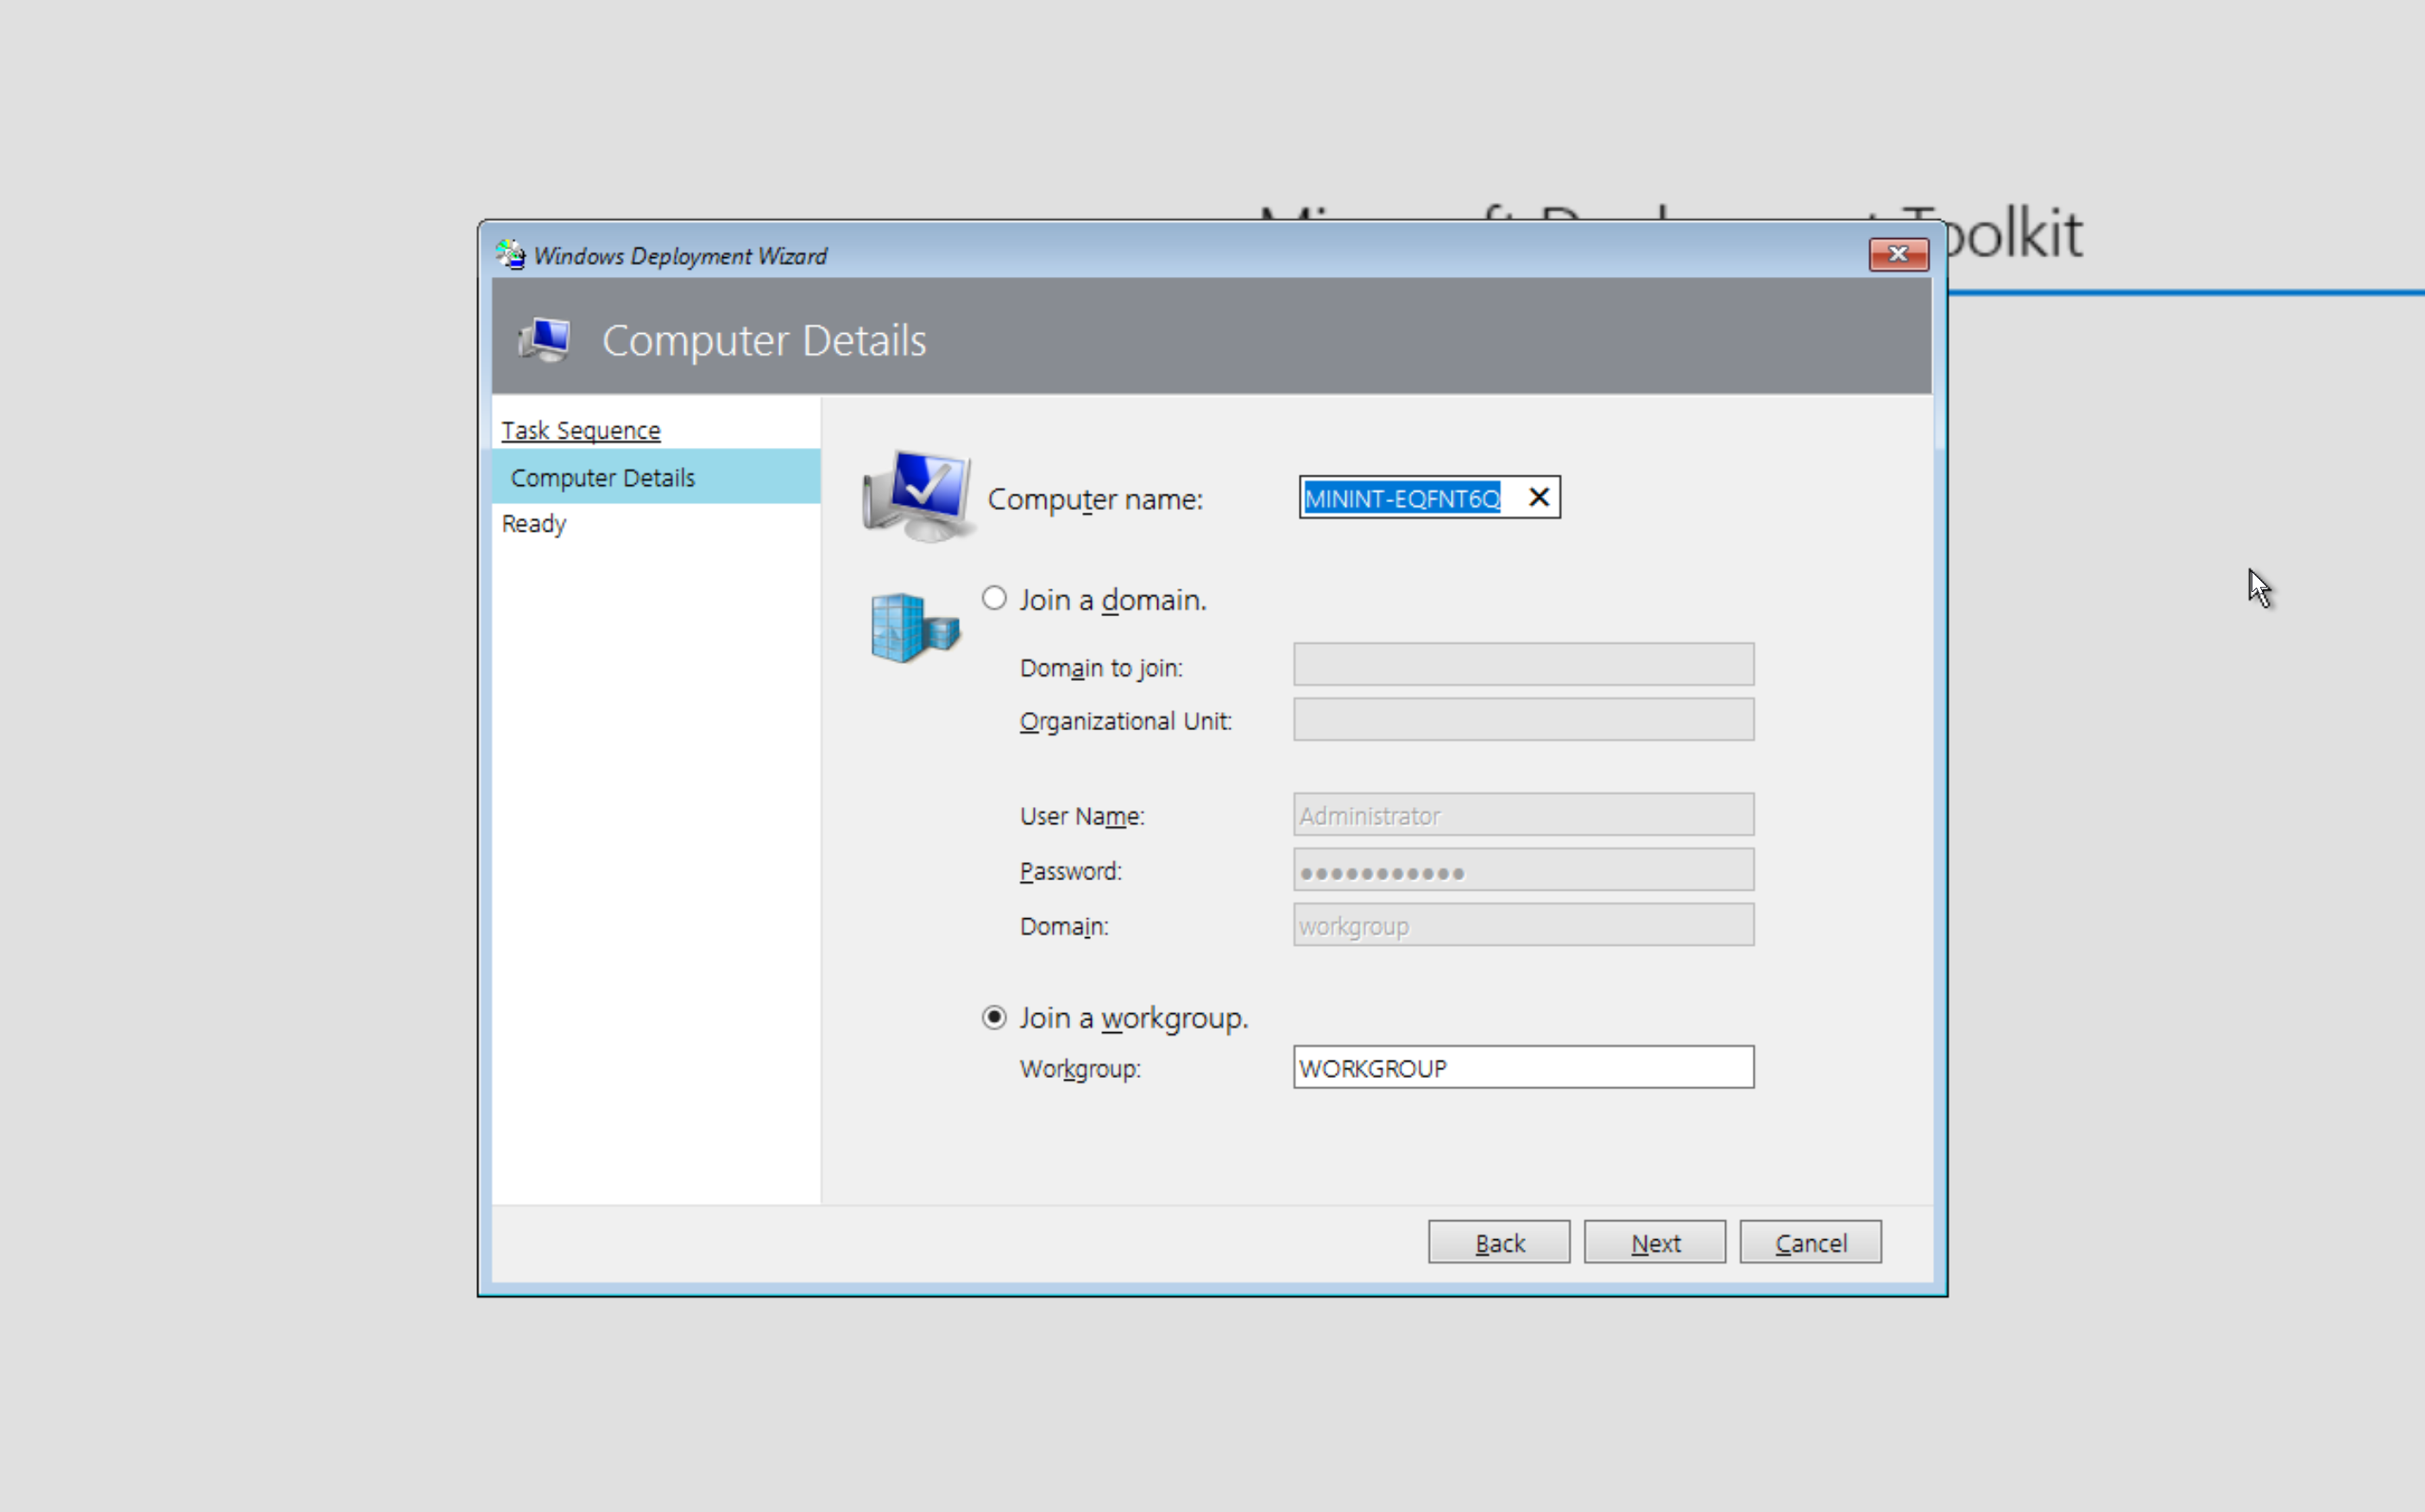
Some defaults, random PC name and the normal default "WORKGROUP" that everyone gets assigned. We can accept this and continue.
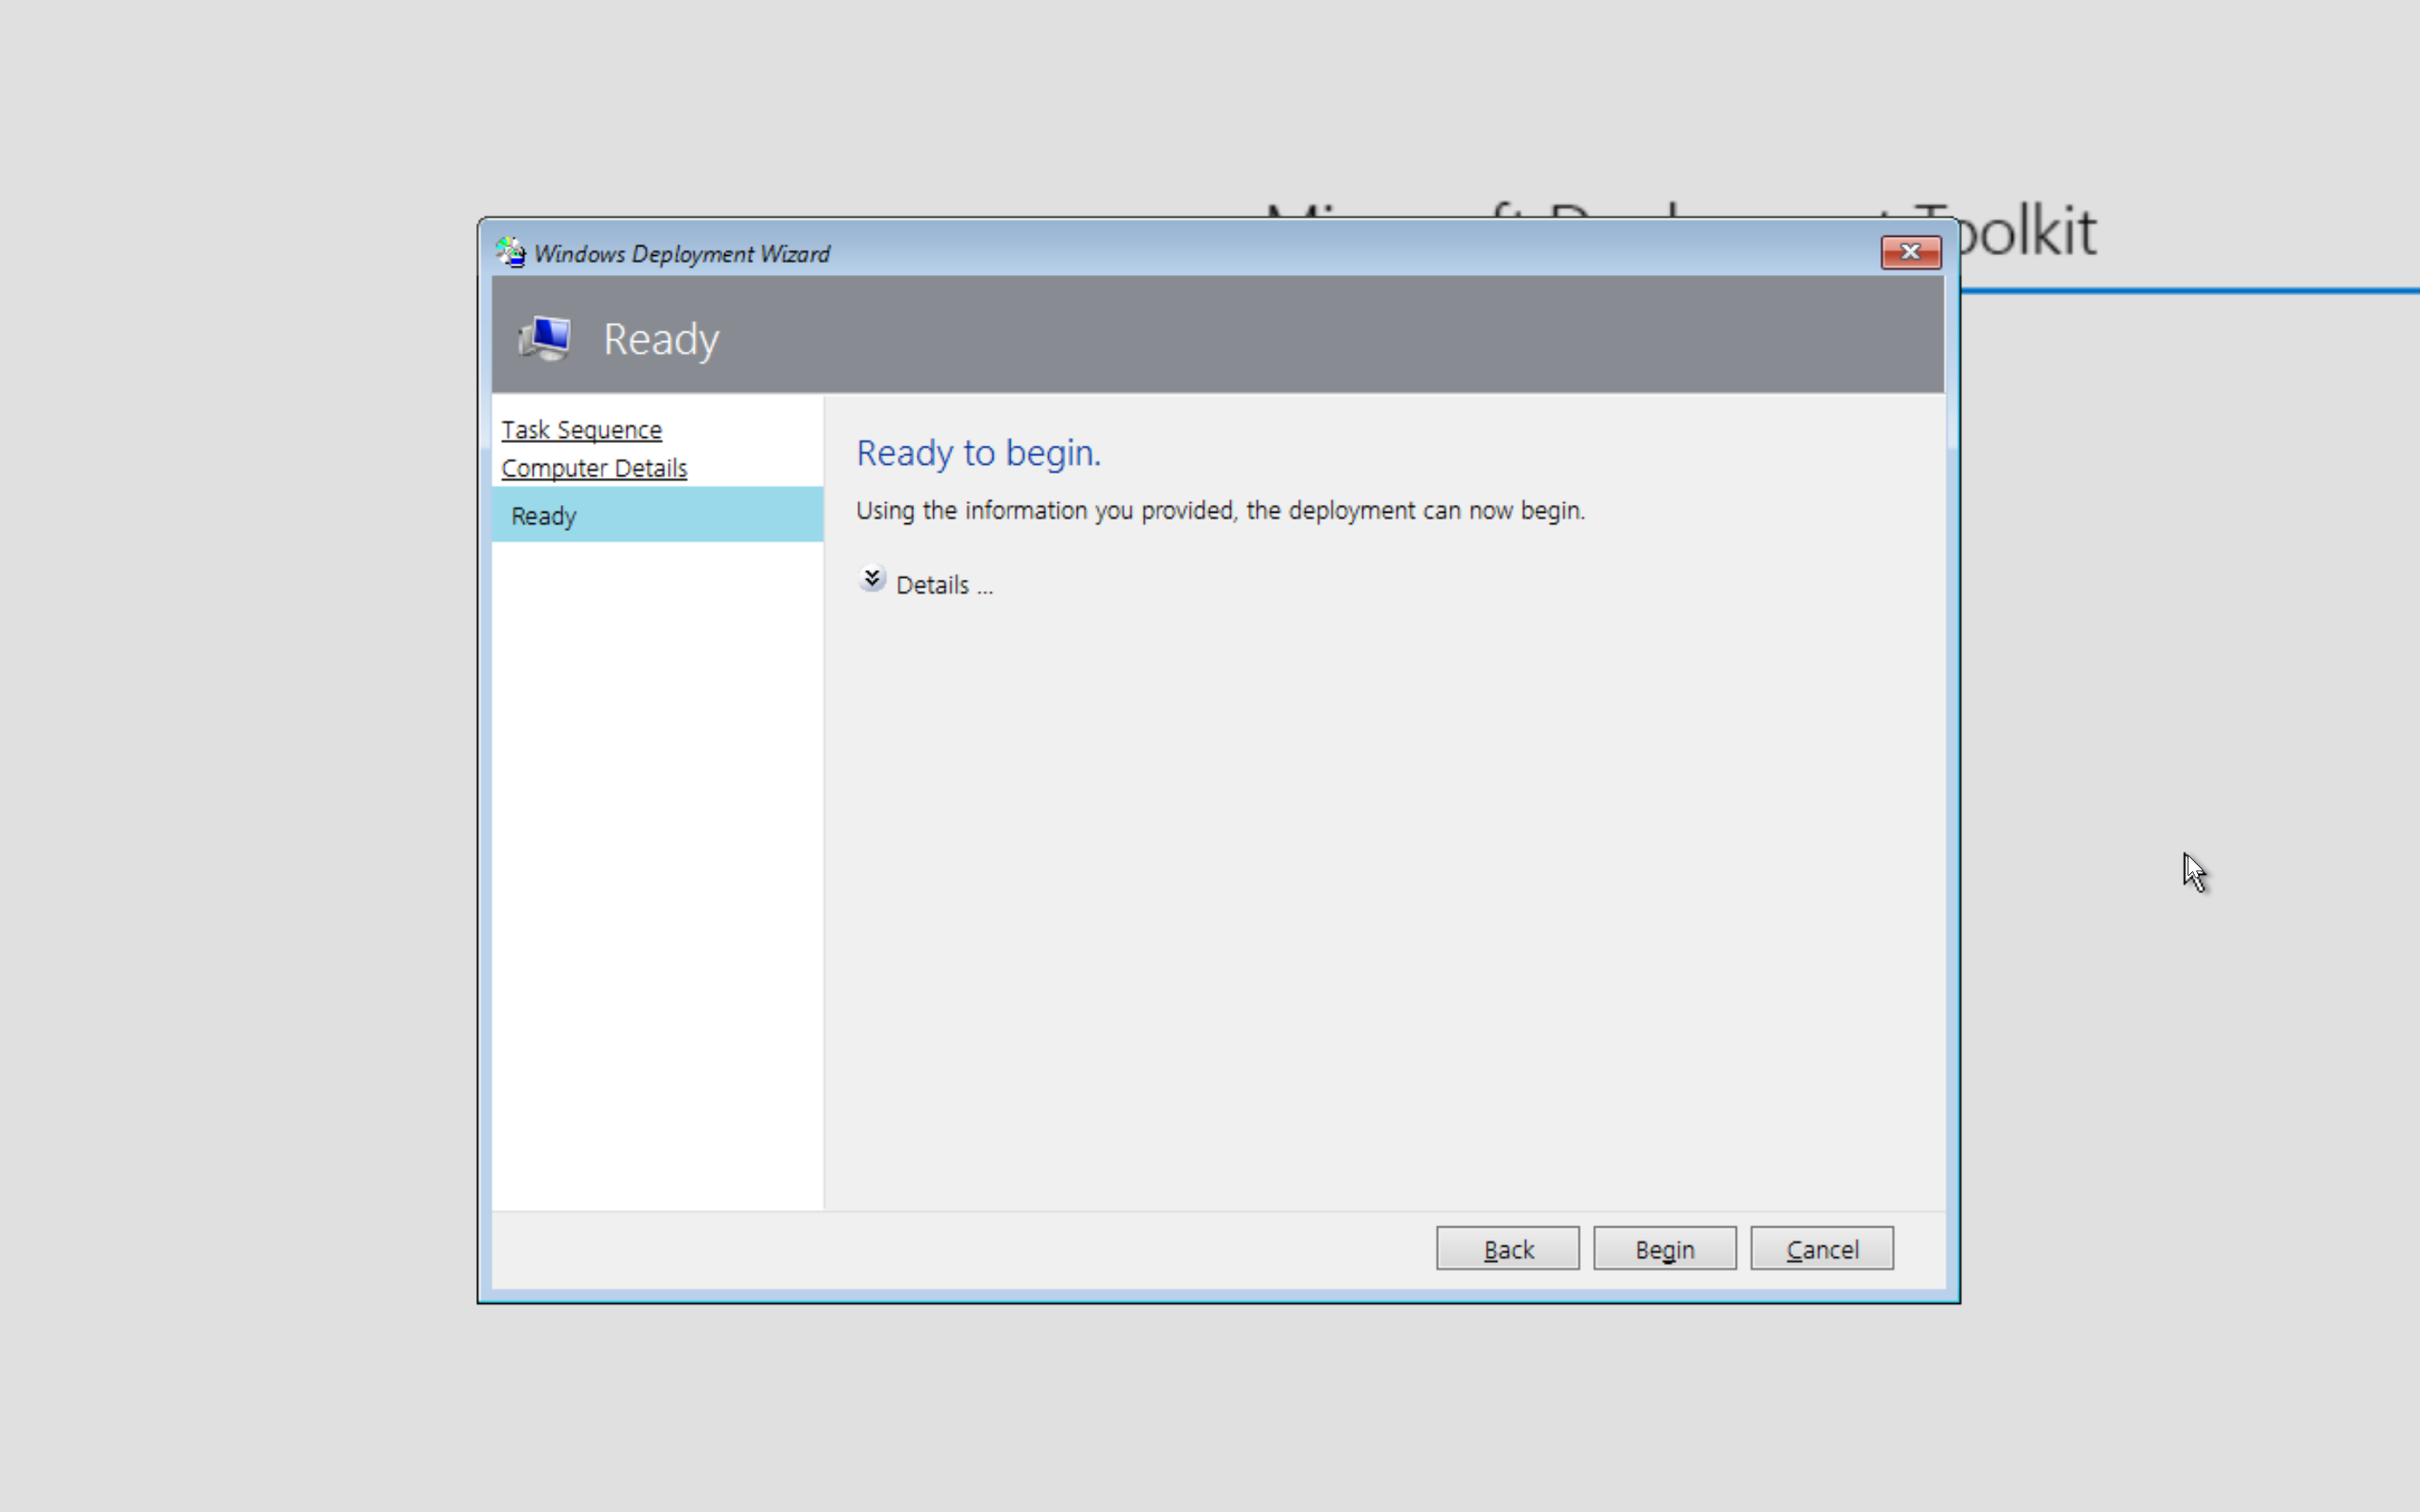
Here we go! All the hard work paid off lets do it! For the last time........click "Begin".
oops the renderer doesn't like "Solaris17's" it appears to dislike apostrophe's (see what I did? lololol)
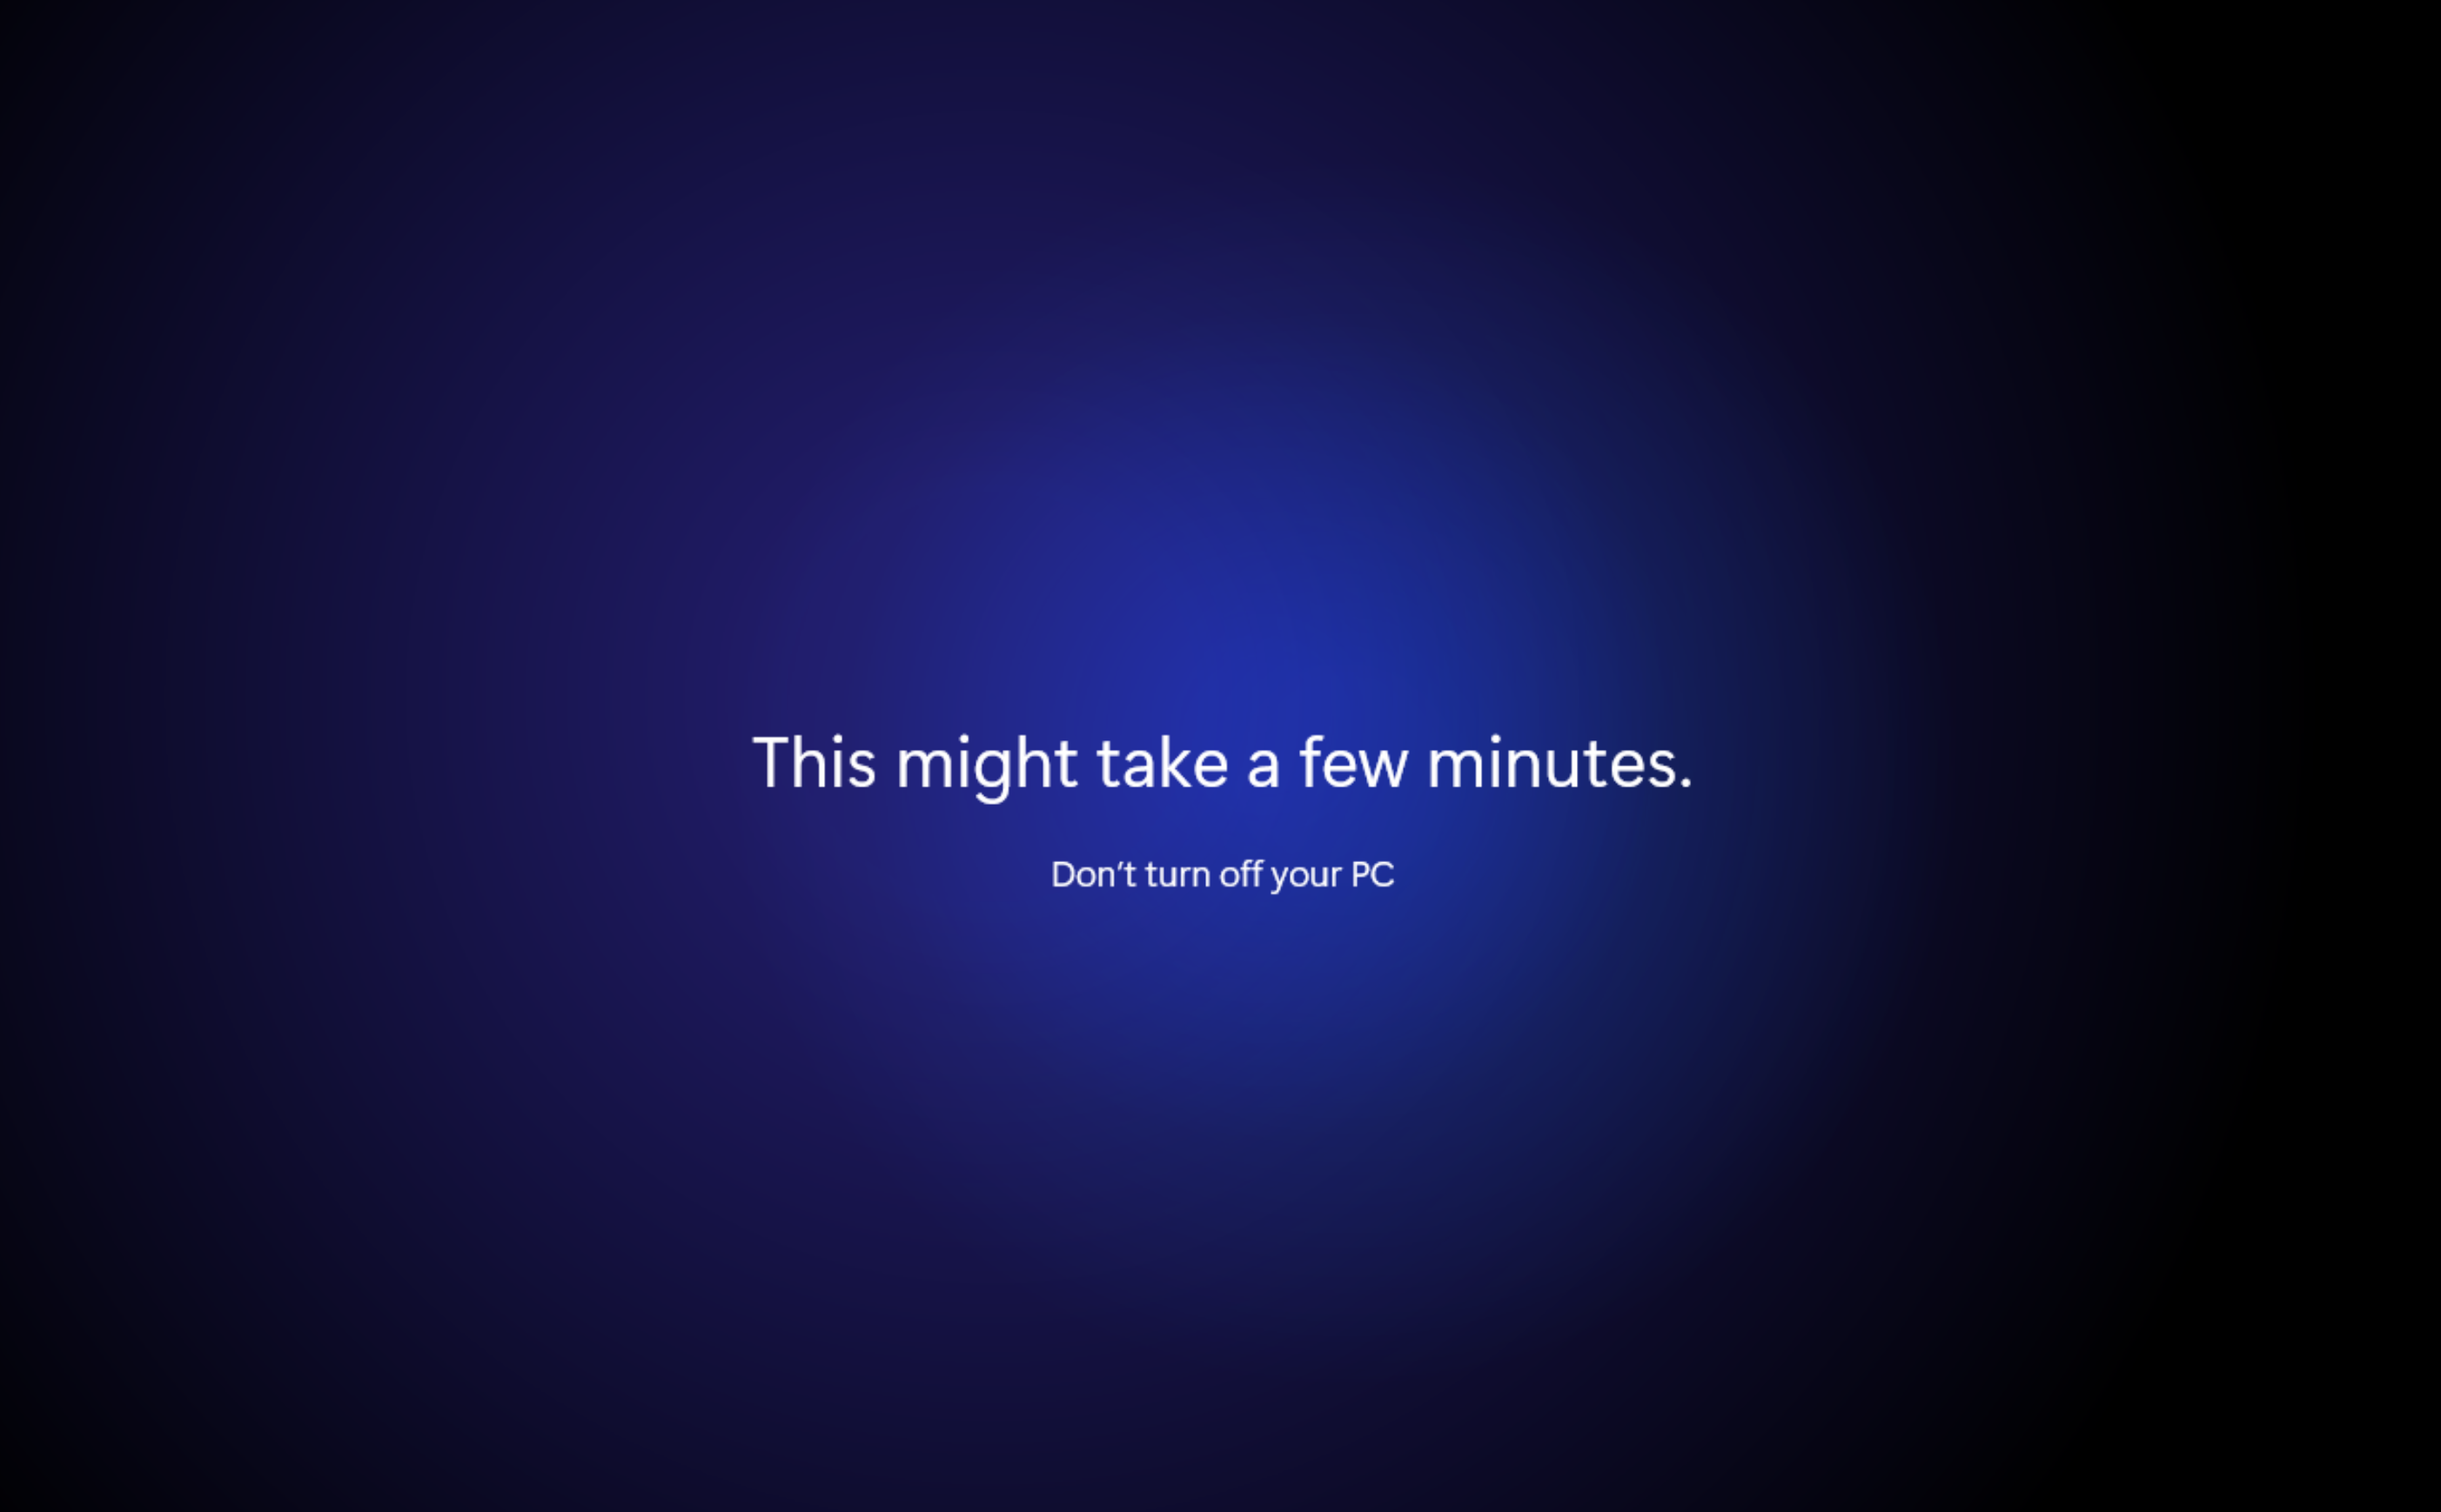
First boot!

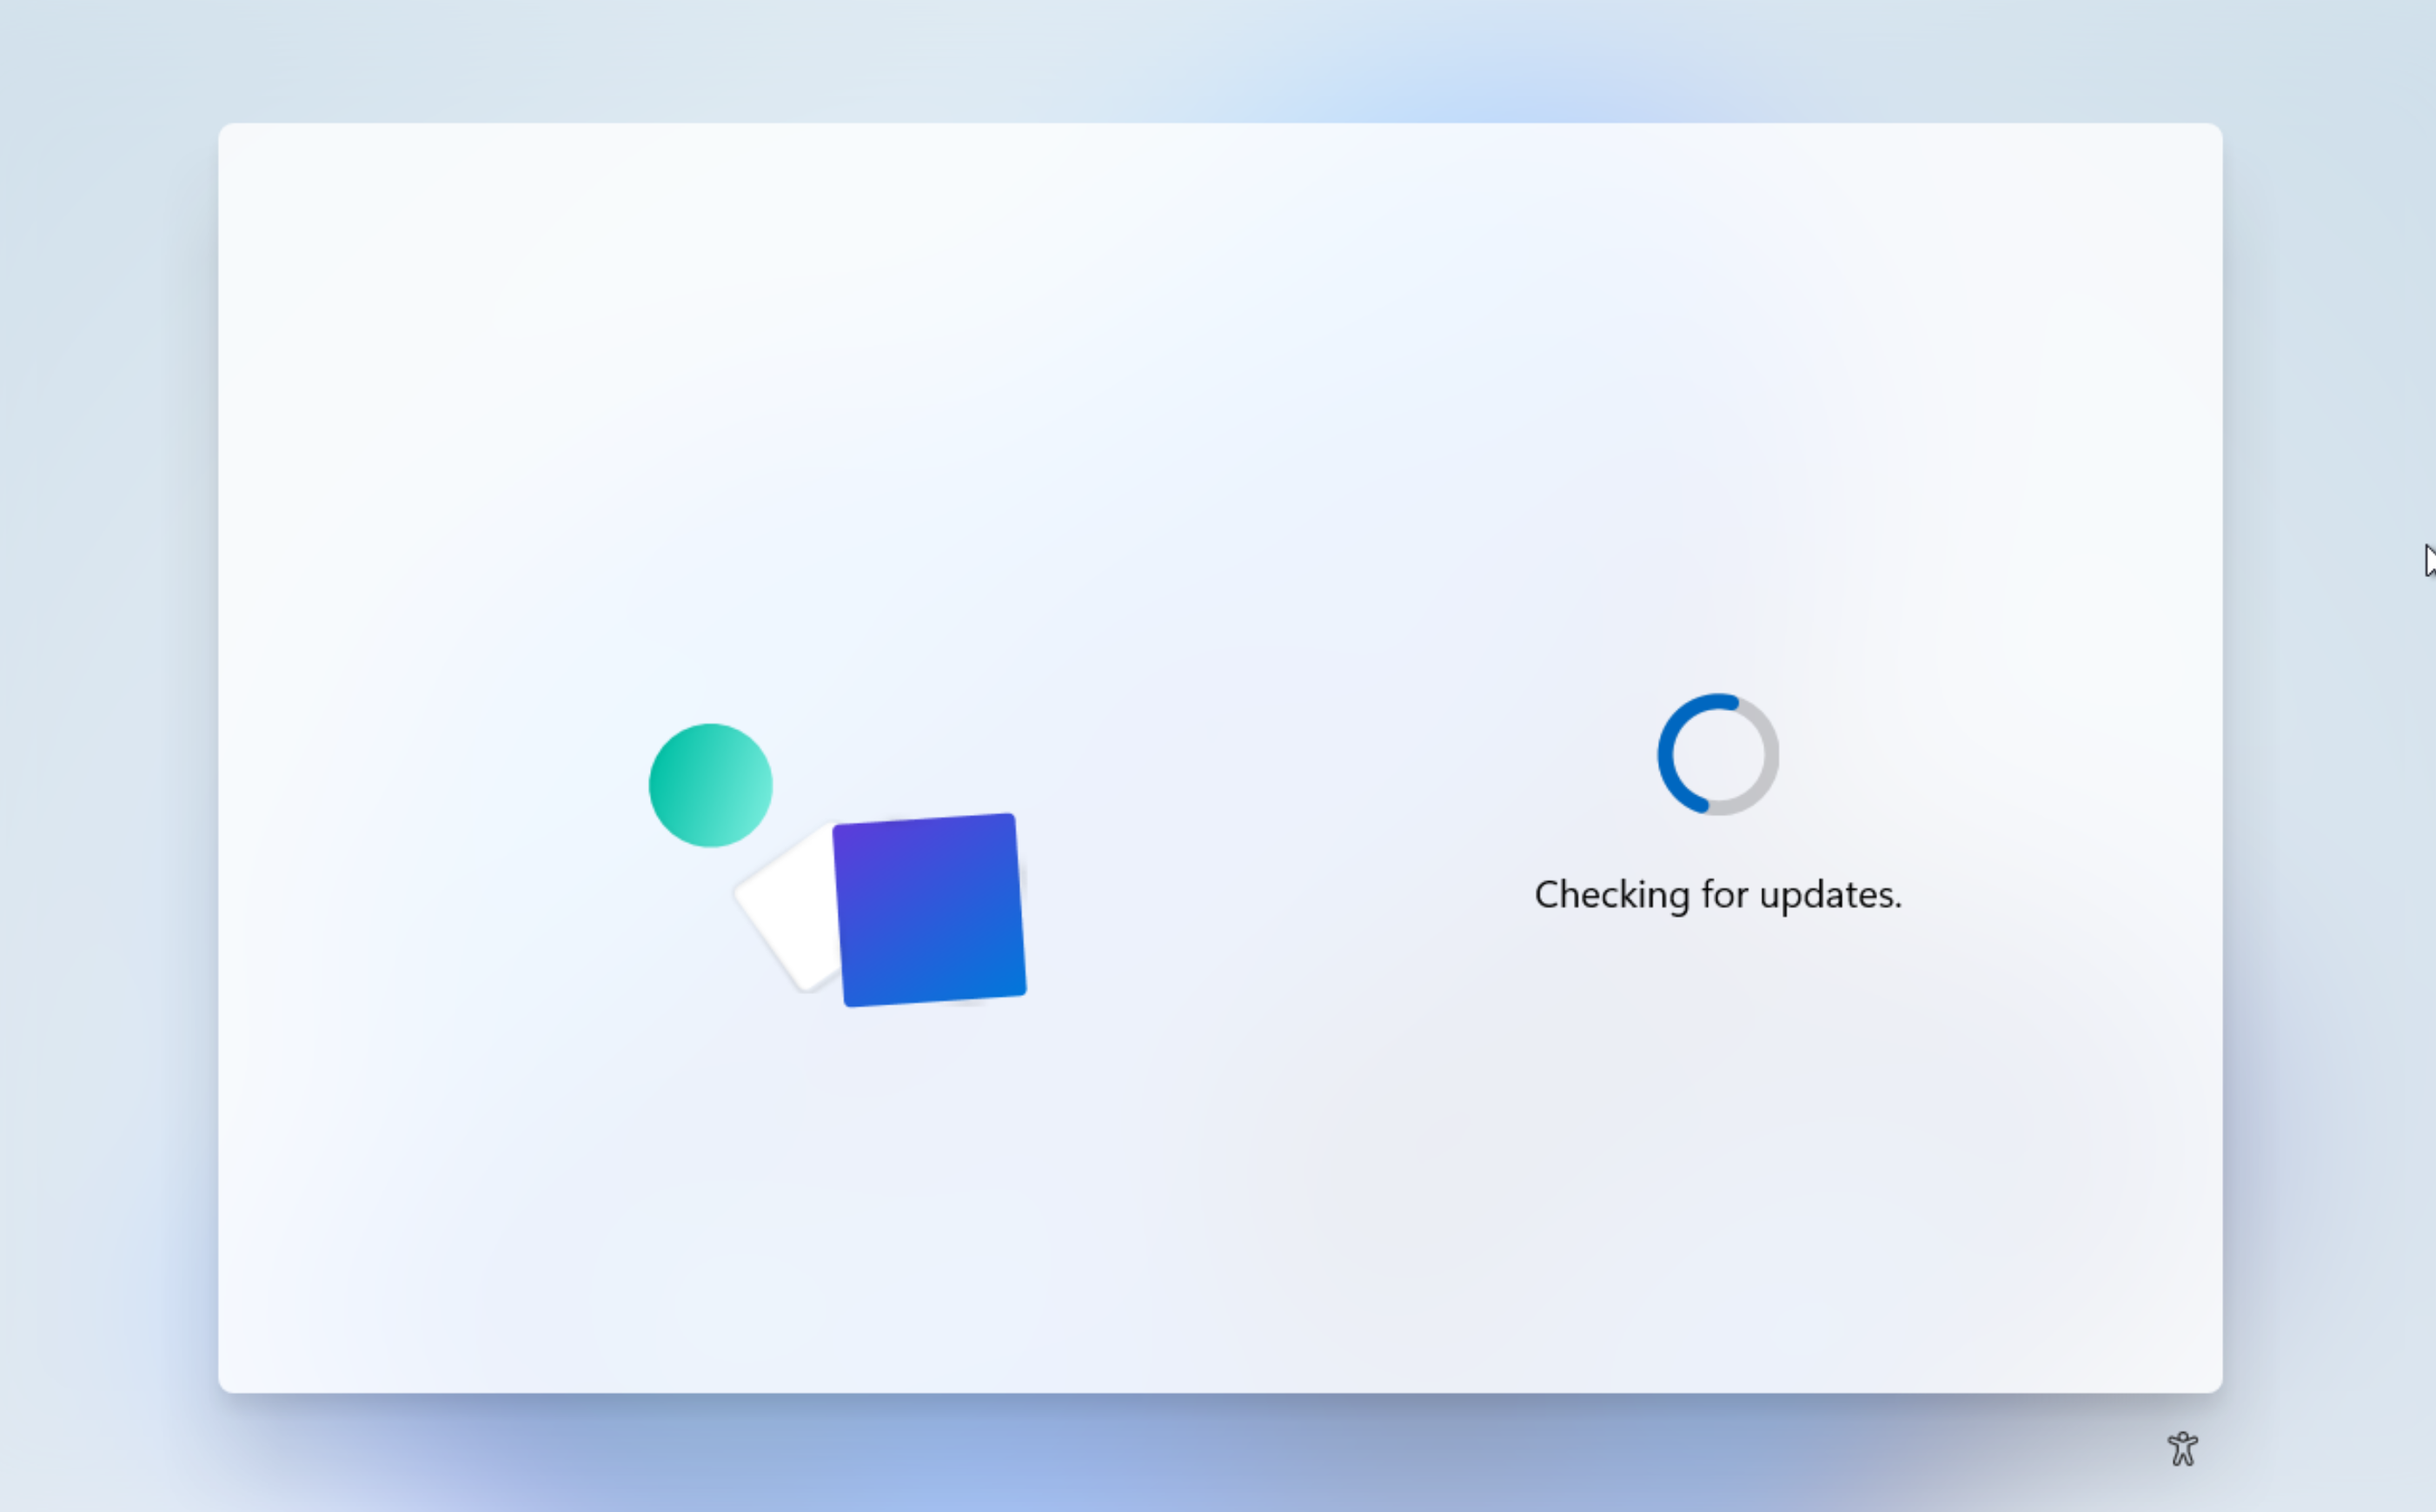
Checking for updates!
Close!
No questions.
No info.
No Eula.
No MS account.
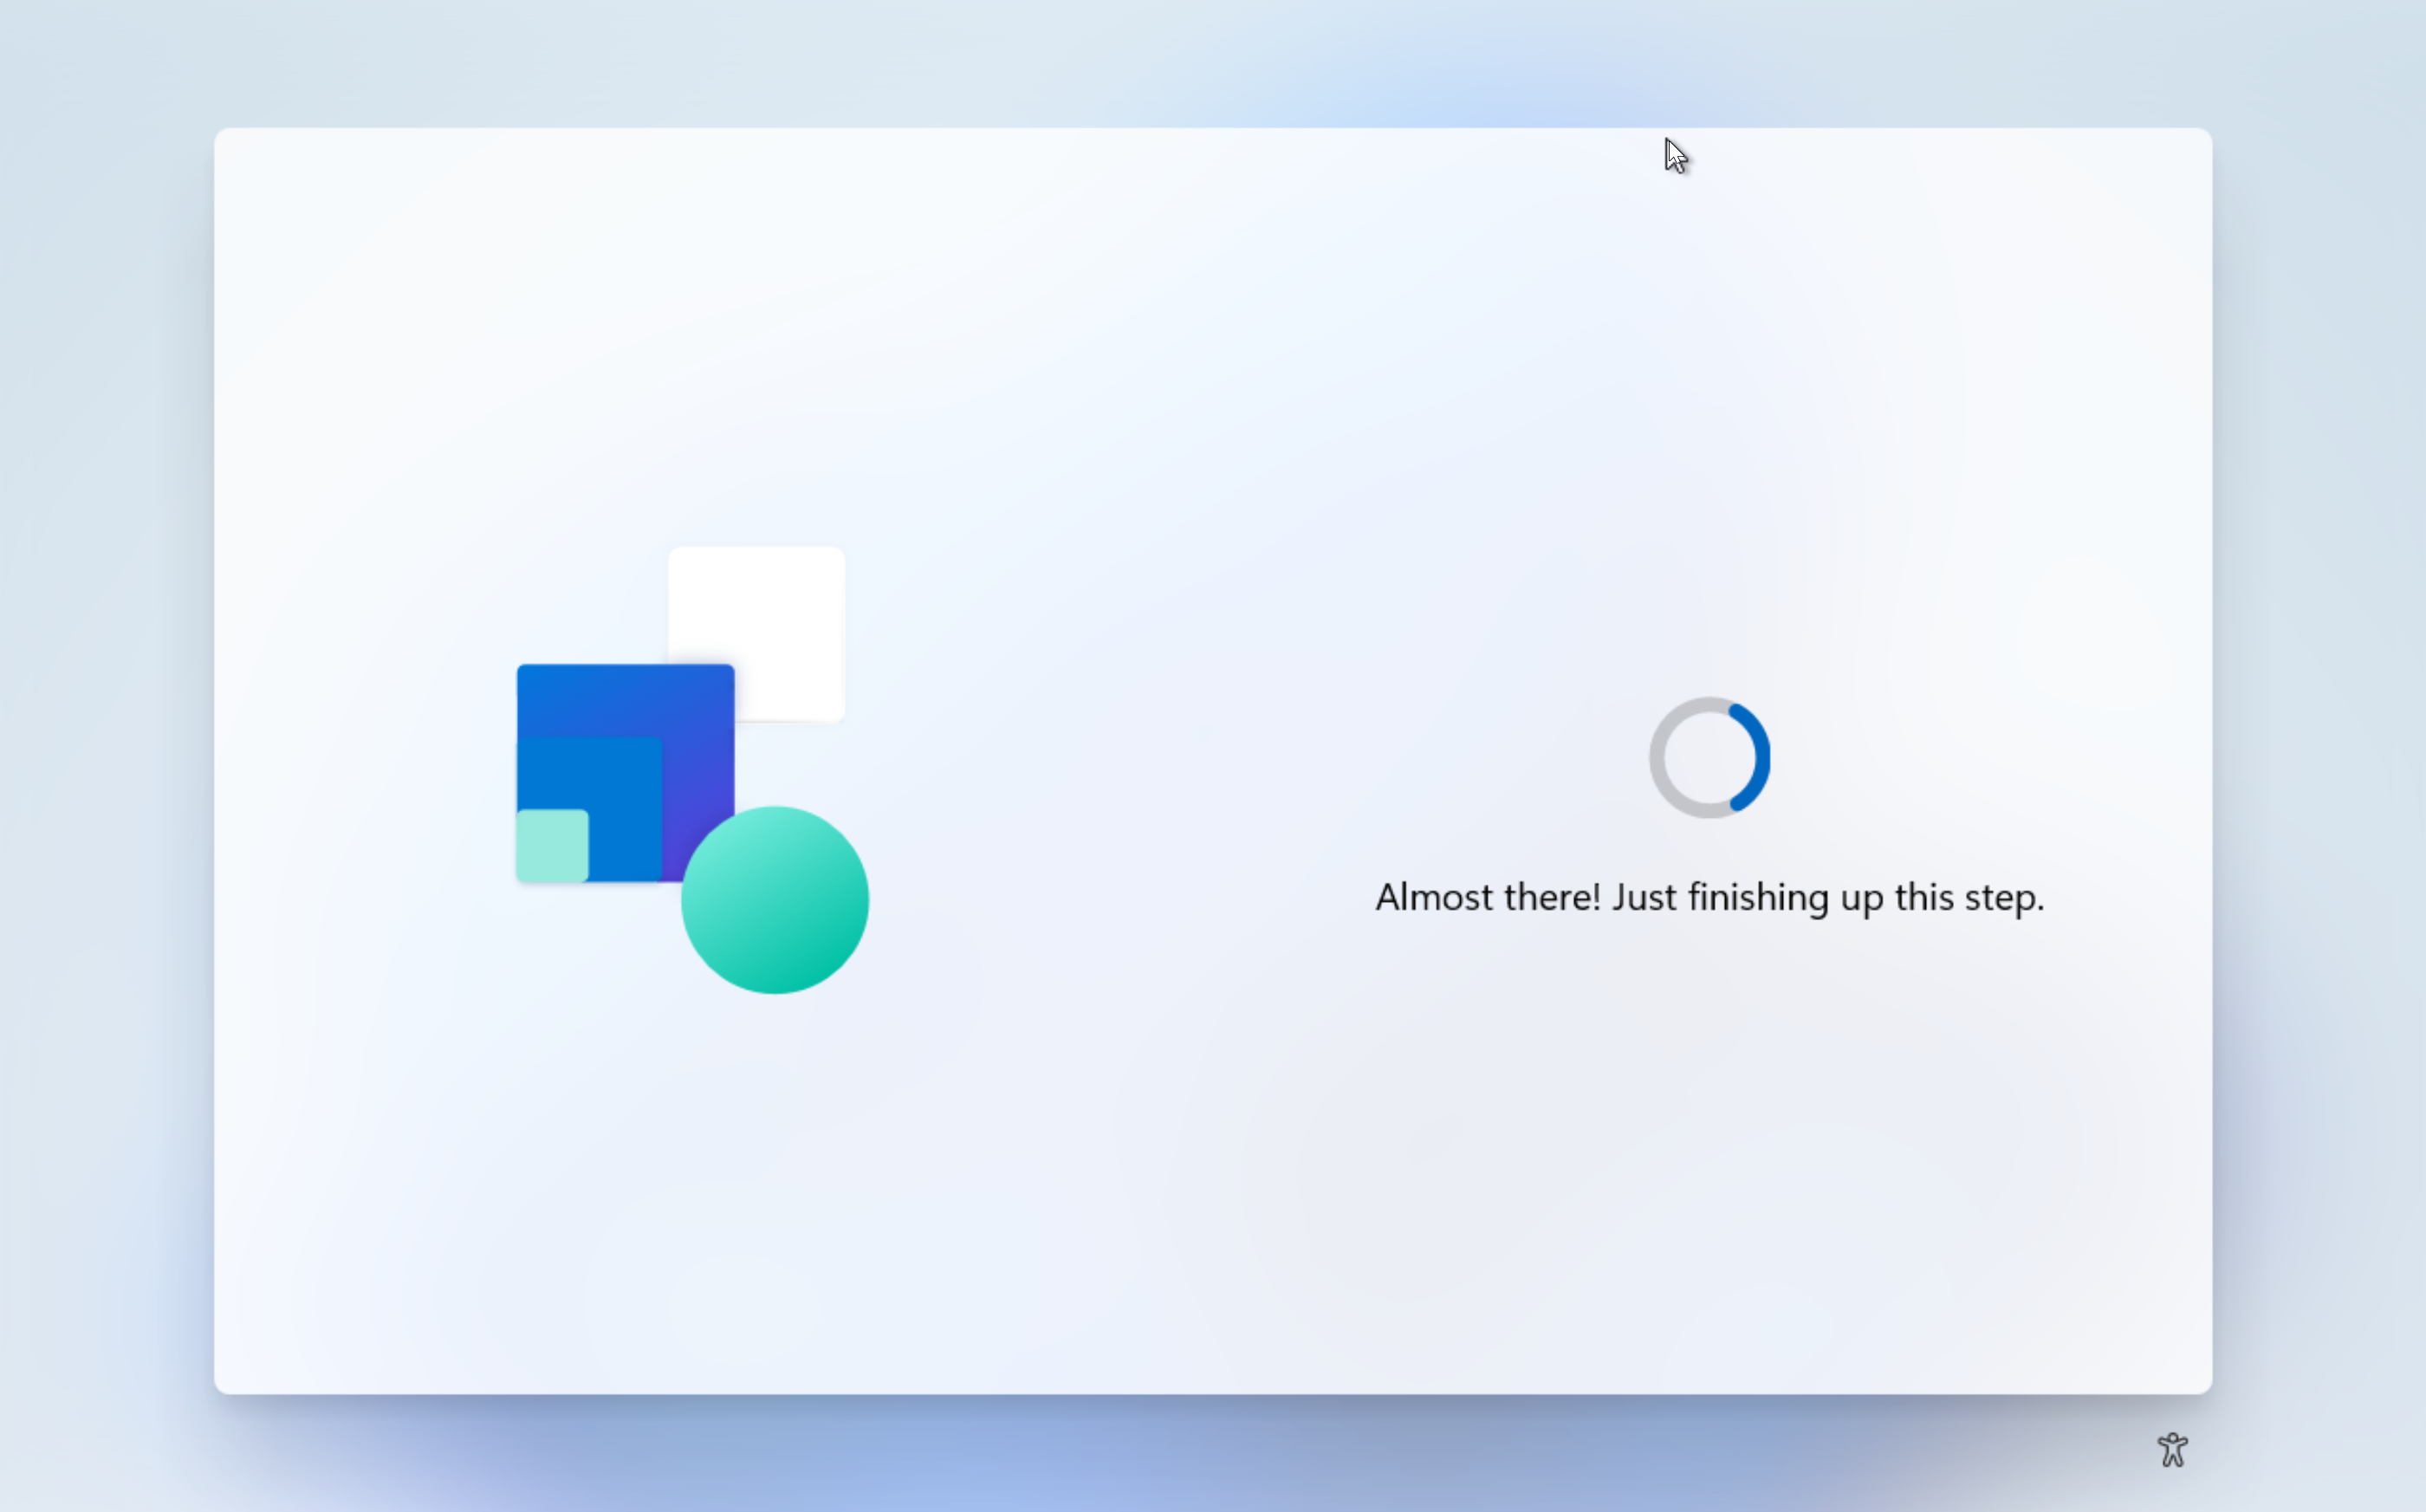
From install to desktop. Hands free after we clicked "Begin".

I hope you found this guide informative! Feel free to play to your hearts content. I hope this sparks some of you to pursue the hobby a little more deeply!
Thanks for reading!
Links/Further reading
- Windows Server Evaluation Download: https://www.microsoft.com/en-us/evalcenter/download-windows-server-2022
- Download MDT: https://www.microsoft.com/en-us/download/details.aspx?id=54259
- Download ADK: https://go.microsoft.com/fwlink/?linkid=2196127
- Download ADK PE Add-on: https://go.microsoft.com/fwlink/?linkid=2120253
- Add your own MDT steps to select a specific drive: https://social.technet.microsoft.co...m-pane-to-select-disk-in-mdt-wizard?forum=mdt
Q/A
Q: This is an eval ISO can I activate it?A: Yes if you buy a key and convert it: https://learn.microsoft.com/en-us/w...ade-conversion-options?source=recommendations
Q: Can I use WDS without MDT?
A: Yes it just won't work with newer operating systems like Windows 11+ Just use the "boot.wim" my script creates and put that in WDS. Instead of auto booting MDT it will then present you with a menu choice.
Fun Extras
Remember that monitoring we wanted enabled? You can see the machines being formatted in MDT. It also gives you the % completion and step. If a step is taking a long time, you can always take a look at what that step does in the task sequence.
Code for the crazies: